

by Ryan Jacobs

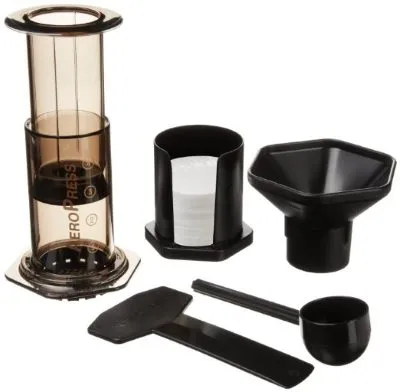
The Aerobie AeroPress is a single-cup espresso brewing system that’s glorious for touring or as an answer for high quality workplace espresso. The system is priced between $25 and $30, which I discover affordable. Along with the core brewing system, you’re going to get 350 AeroPress filters and a holder for them.
The system shares similarities with a number of different espresso brewing strategies. It makes use of a plunger to pressure water by the espresso, which will likely be acquainted to French press customers. The pressurization within the plunging motion is much like that of an espresso machine. Let me be clear: that is neither an espresso machine nor a press pot. In comparison with different brewing strategies, I discover the richness of taste akin to French press espresso, whereas the smoothness is extra like a Cafe Americano.
This AeroPress brewing system makes espresso by forcing water by the espresso underneath stress. The result’s a concentrated brew of espresso which you could then use for various functions. These directions give attention to brewing the espresso after which diluting it with sizzling water to regular power.
*Aeropress Espresso and Espresso Maker
*
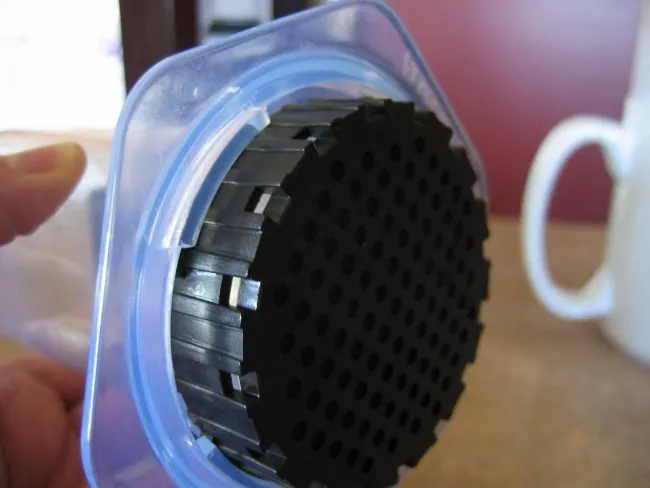
#1 Insert Filter
Choose one of many spherical AeroPress filters and place it into the underside of the black filter cap.
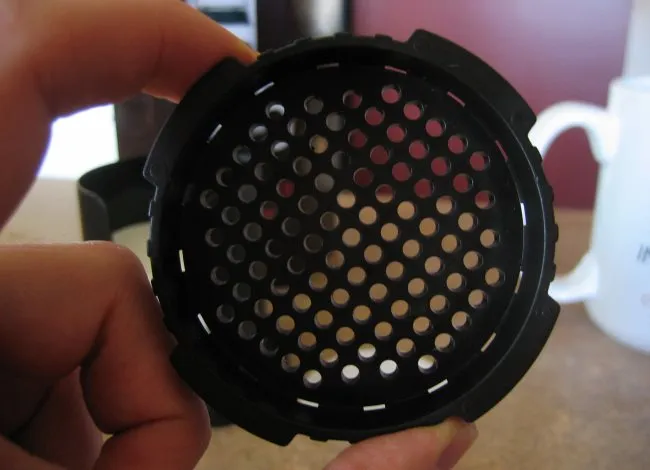
AeroPress filter cap
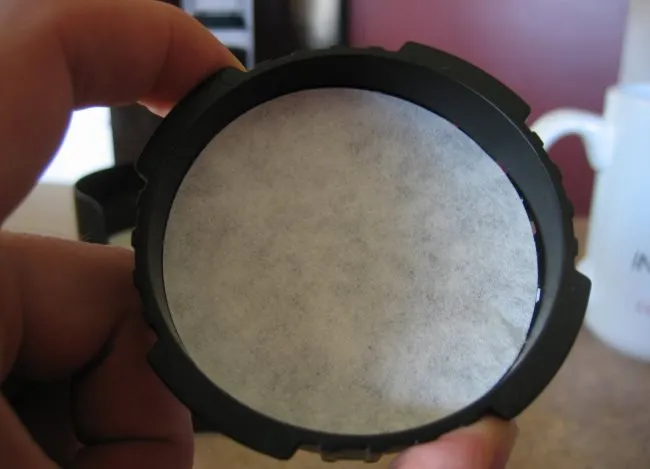
AeroPress filter
At this level, you must rinse the filter. This may assist the filter keep in place and decrease the prospect of any paper-residual taste coming into the espresso.
#2 Twist Filter Into Place
Place the filter into the underside of the brewing chamber and twist it into place. Now, place the brewing chamber, filter aspect down, and on prime of the mug that you may be ingesting from.
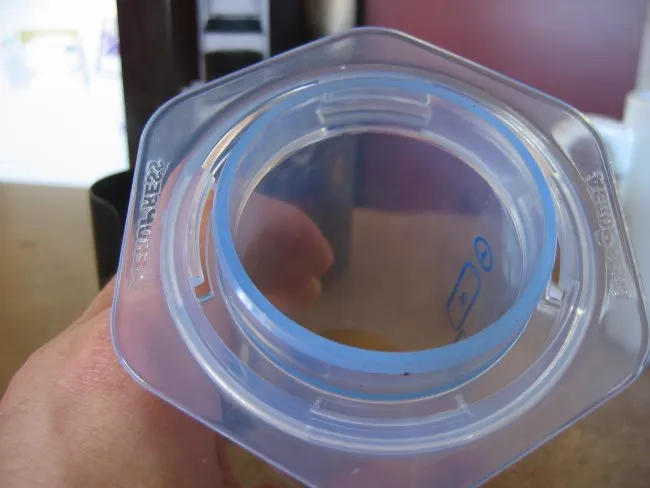
AeroPress brewing chamber
AeroPress twist filter
#3 Add Espresso
Utilizing the inside track that got here with the AeroPress, measure two scoops of espresso for a 16-oz.mug. You’ll wish to experiment a bit together with your grinder and style preferences when choosing the grind, however briefly, a grind between espresso and drip is an effective goal to shoot for. See our Espresso Grind Chart for a visible clarification.
When you misplace your Aeropress scoop, two scoops equal 20-22 grams of espresso.
A funnel comes with the AeroPress that can assist you get the espresso into the brewing chamber with out inflicting an excessive amount of mess. Whereas that is positively a comfort, it isn’t completely mandatory. In both case, get that espresso into the chamber.
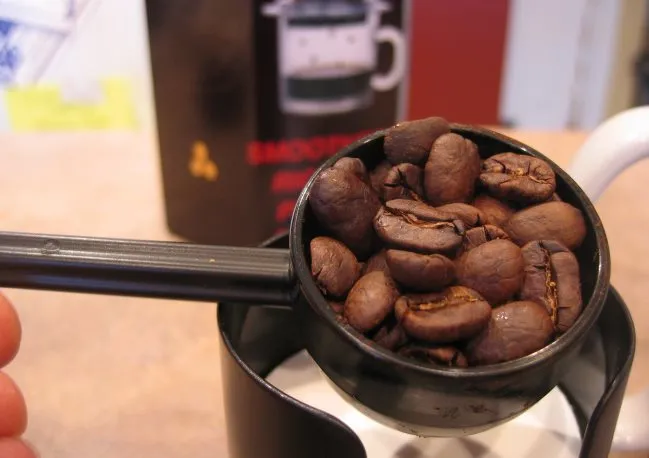
AeroPress espresso scoop
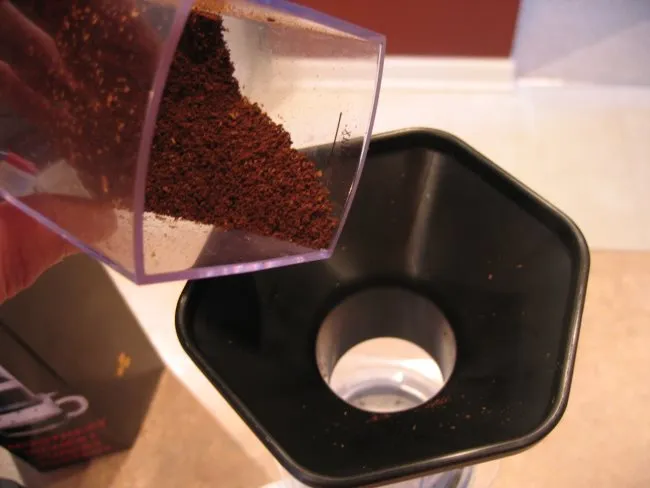
Pour espresso grounds.
#4 Warmth Water
The AeroPress directions point out utilizing water at a temperature between 165 and 175 levels F. Be at liberty to experiment a bit to see what works for you. I truly discovered that water simply off the boil labored nice for diluted espresso. Be sure that to warmth sufficient water to reconstitute your mug to 16 oz.
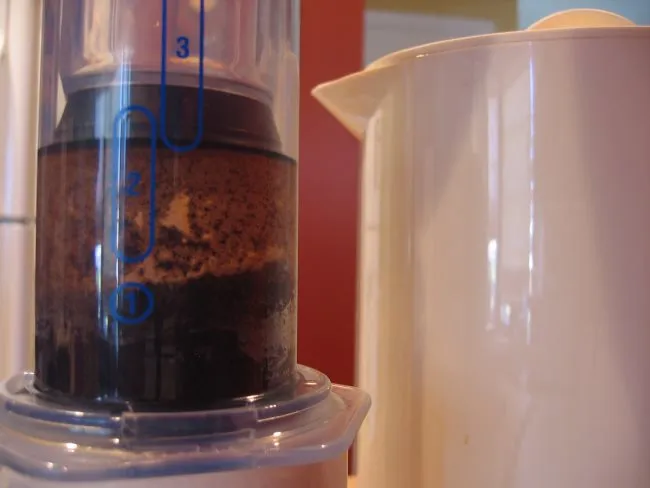
#5 Add Water and Stir
Use the markings on the cylinder to find out how a lot water to pour into the brewing chamber. Since we’re making diluted espresso, we are going to use the highest of the markings as a information.
Add only a portion of the water at first in order that the grounds can swell a bit, then give it an excellent stir with the included stirrer in order that the grounds settle again down a bit—much like getting ready French press espresso.

AeroPress espresso stir
Add the remaining water so the brew is on the prime of the quantity 2 oval. Let the water steep for about 10 extra seconds, and provides the brew one other fast stir.
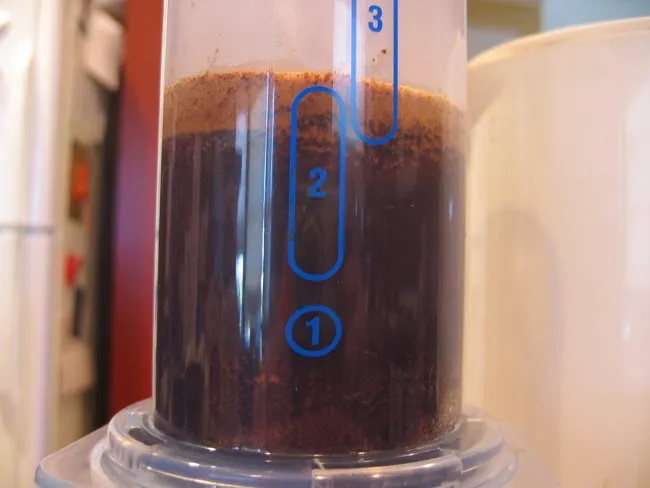
Add water to AeroPress and stir with the paddle.
#6 Plunge
After a complete brew time between 45 and 90 seconds, place the plunger into the chamber and apply a gradual quantity of pressure to maneuver the plunger downward. Ensure you plunge all the best way down till the plunger simply begins compacting the espresso on the backside.
AeroPress plunge
#7 Take away AeroPress and Add Extra Water
Take away the brewing unit out of your mug and reconstitute the brew together with your remaining sizzling water.
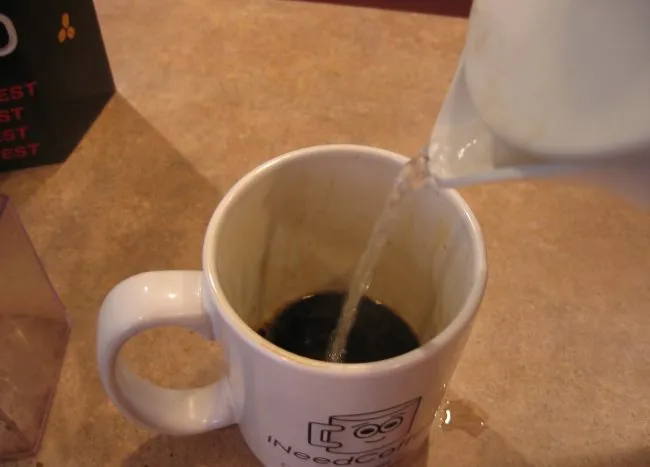
Add sizzling water to AeroPress brewed espresso.
#8 Serve and Take pleasure in!
Take pleasure in your AeroPress espresso!
Cleanup
Take away the filter cap from the AeroPress brewer and push the plunger the remaining approach over a compost bin. This may eject the espresso grounds, which now resemble an espresso puck. As soon as that is full, rinse the AeroPress so it is able to use once more.
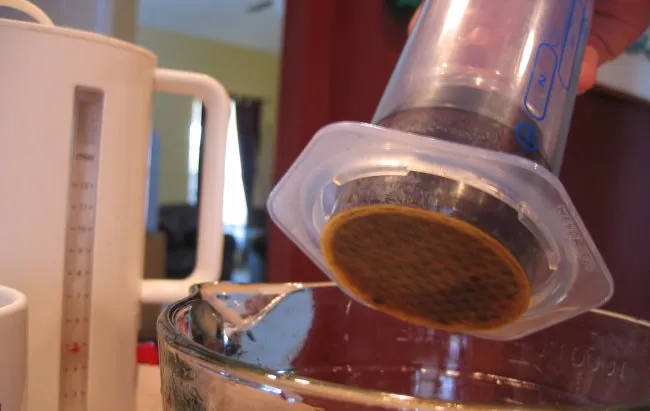
AeroPress filter after brewing
Sources
The Upside Down AeroPress Brewing Tutorial – Our detailed tutorial explores different variables you possibly can manipulate when making espresso with an AeroPress.
Massive Mug Hack – A brief video displaying the way to make AeroPress espresso into a large mug.
Printed on