


Recipe Highlights
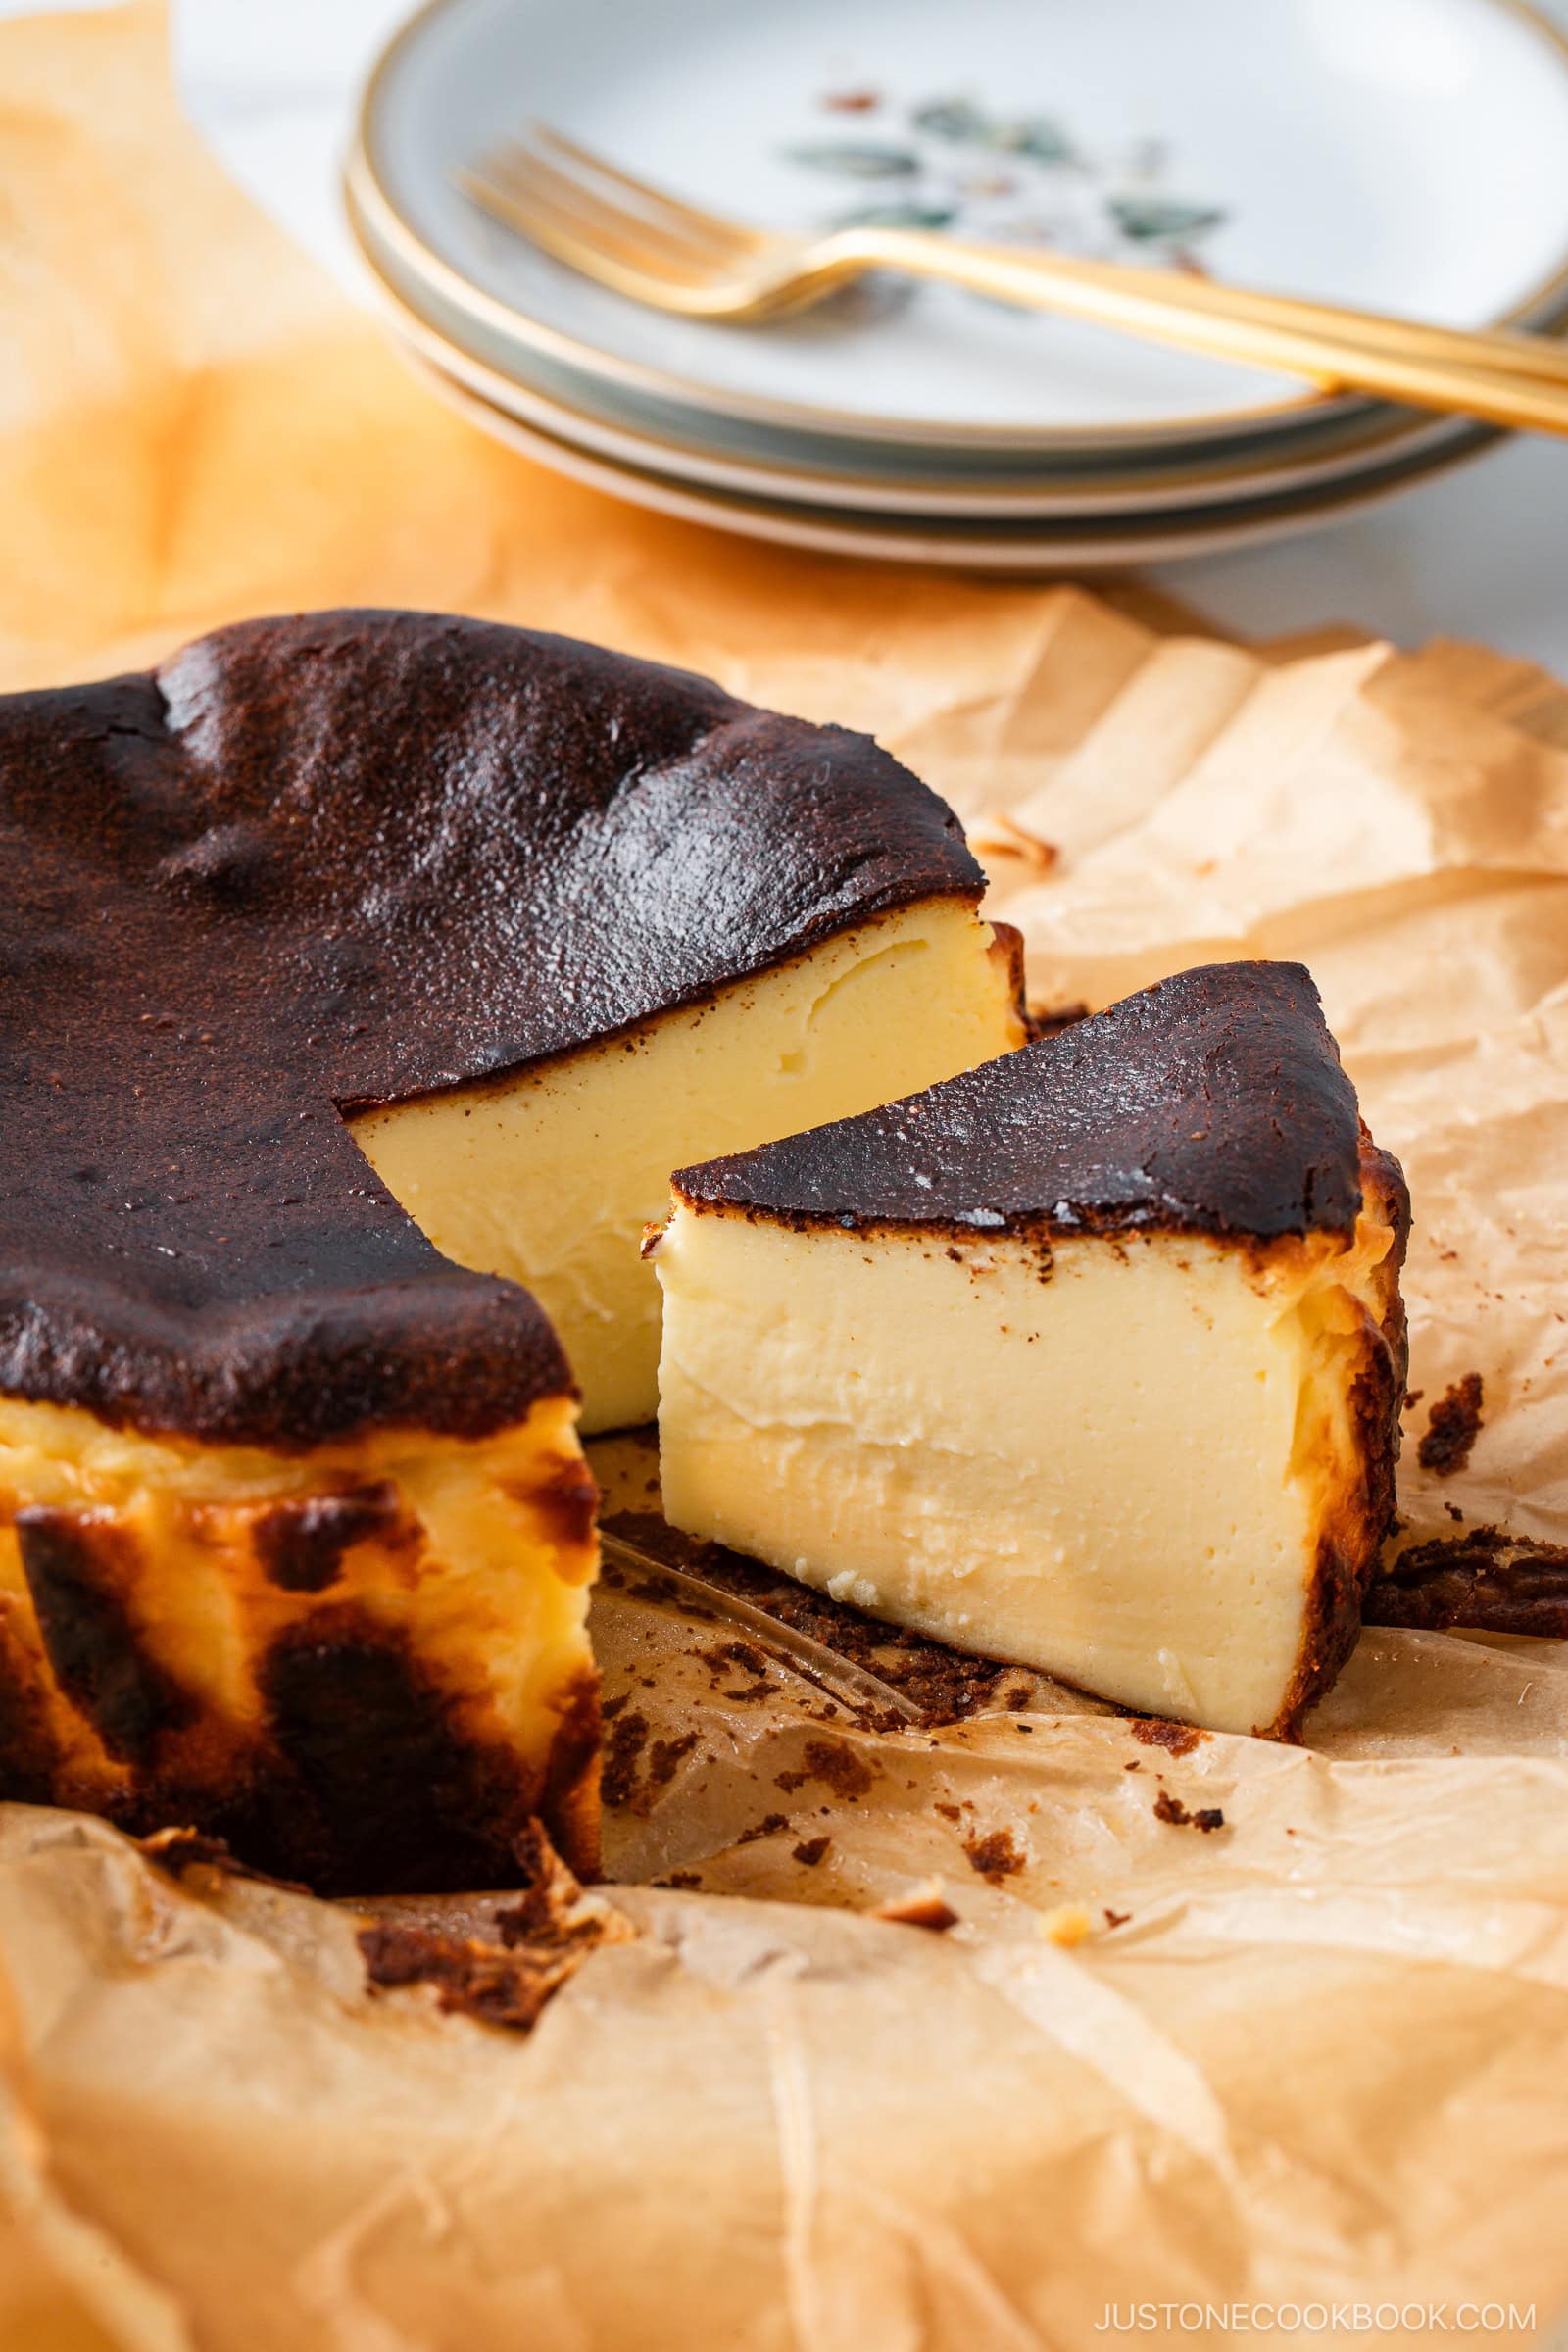
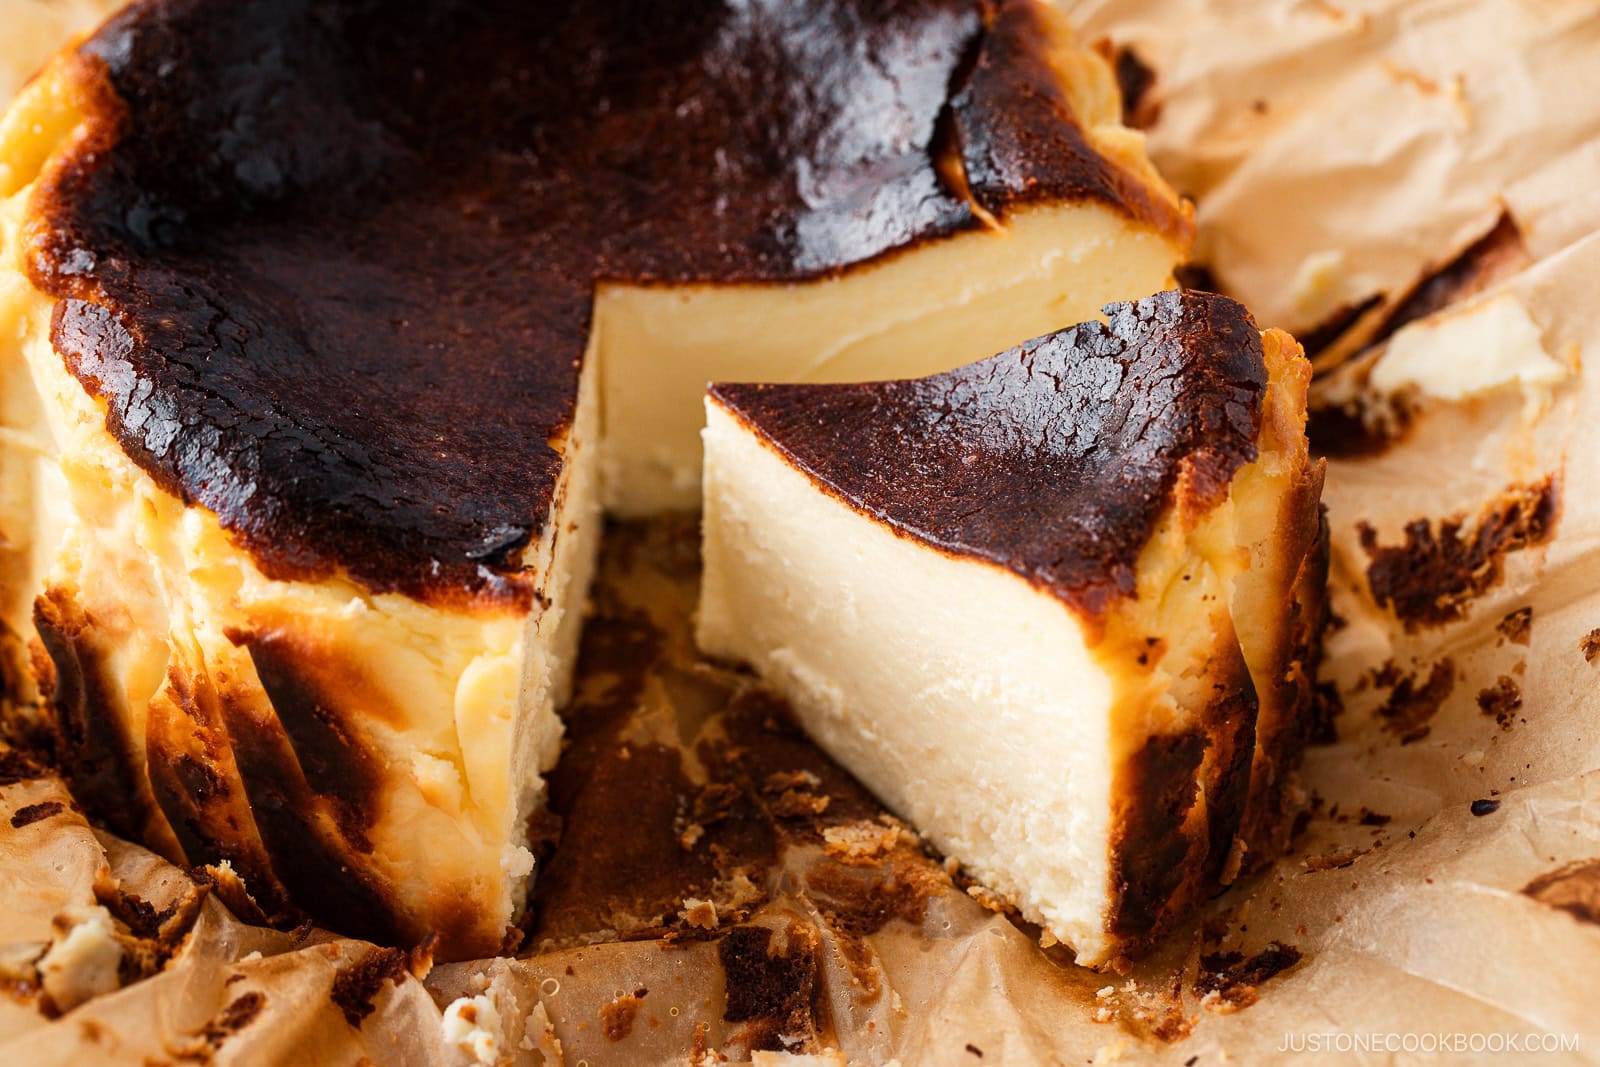
This Basque Cheesecake might look daring and dramatic, however it’s one of many best cheesecakes you may bake at dwelling. With no crust and easy components, it depends on excessive warmth to create its signature darkish high whereas retaining the middle creamy and custardy. After testing many variations, I discovered the steadiness that delivers a deeply caramelized exterior with a dreamy, clean middle.
- fuss-free – no crust, no water bathtub
- creamy middle with a wealthy, caramelized exterior
- beginner-friendly recipe with easy components
Should you love cheesecakes, strive my Japanese Cheesecake, Matcha Basque Cheesecake, and Baked Cheese Tarts recipes subsequent!
What’s Basque Cheesecake?
Basque cheesecake, additionally known as tarta de queso, originated within the Basque area of Spain. Created in 1990 at La Viña in San Sebastián, it’s recognized for its darkish, caramelized high, crustless form, and creamy inside.

Components for Basque Cheesecake
You’ll want a 3-inch deep 6-inch spherical cake pan with detachable backside, which is ideal for six individuals.
- cream cheese – use Philadelphia blocks, NOT the whipped or reduced-fat sort
- giant eggs
- heavy whipping cream – 36–38% fats
- granulated sugar
- cake flour
- lemon juice
- kosher salt
- vanilla extract
Discover the printable recipe with measurements under.
How one can Make Basque Cheesecake
- Preheat the oven for at the very least half-hour so it’s absolutely sizzling. Deliver the cream cheese, eggs, and heavy cream to room temperature for simple mixing. Line a deep 6-inch spherical cake pan or springform pan utterly with sheets of parchment paper, folding the surplus down over rim.
- Mix the cream cheese and sugar. Heat up the cream cheese within the microwave a bit bit and blend nicely with sugar till clean.


- Make the batter. Whisk the eggs in a separate bowl, then steadily drizzle them in and mix till mixed. Add the remaining components so as, mixing nicely earlier than including the following. Press out any lumps early whereas the combination continues to be thick.


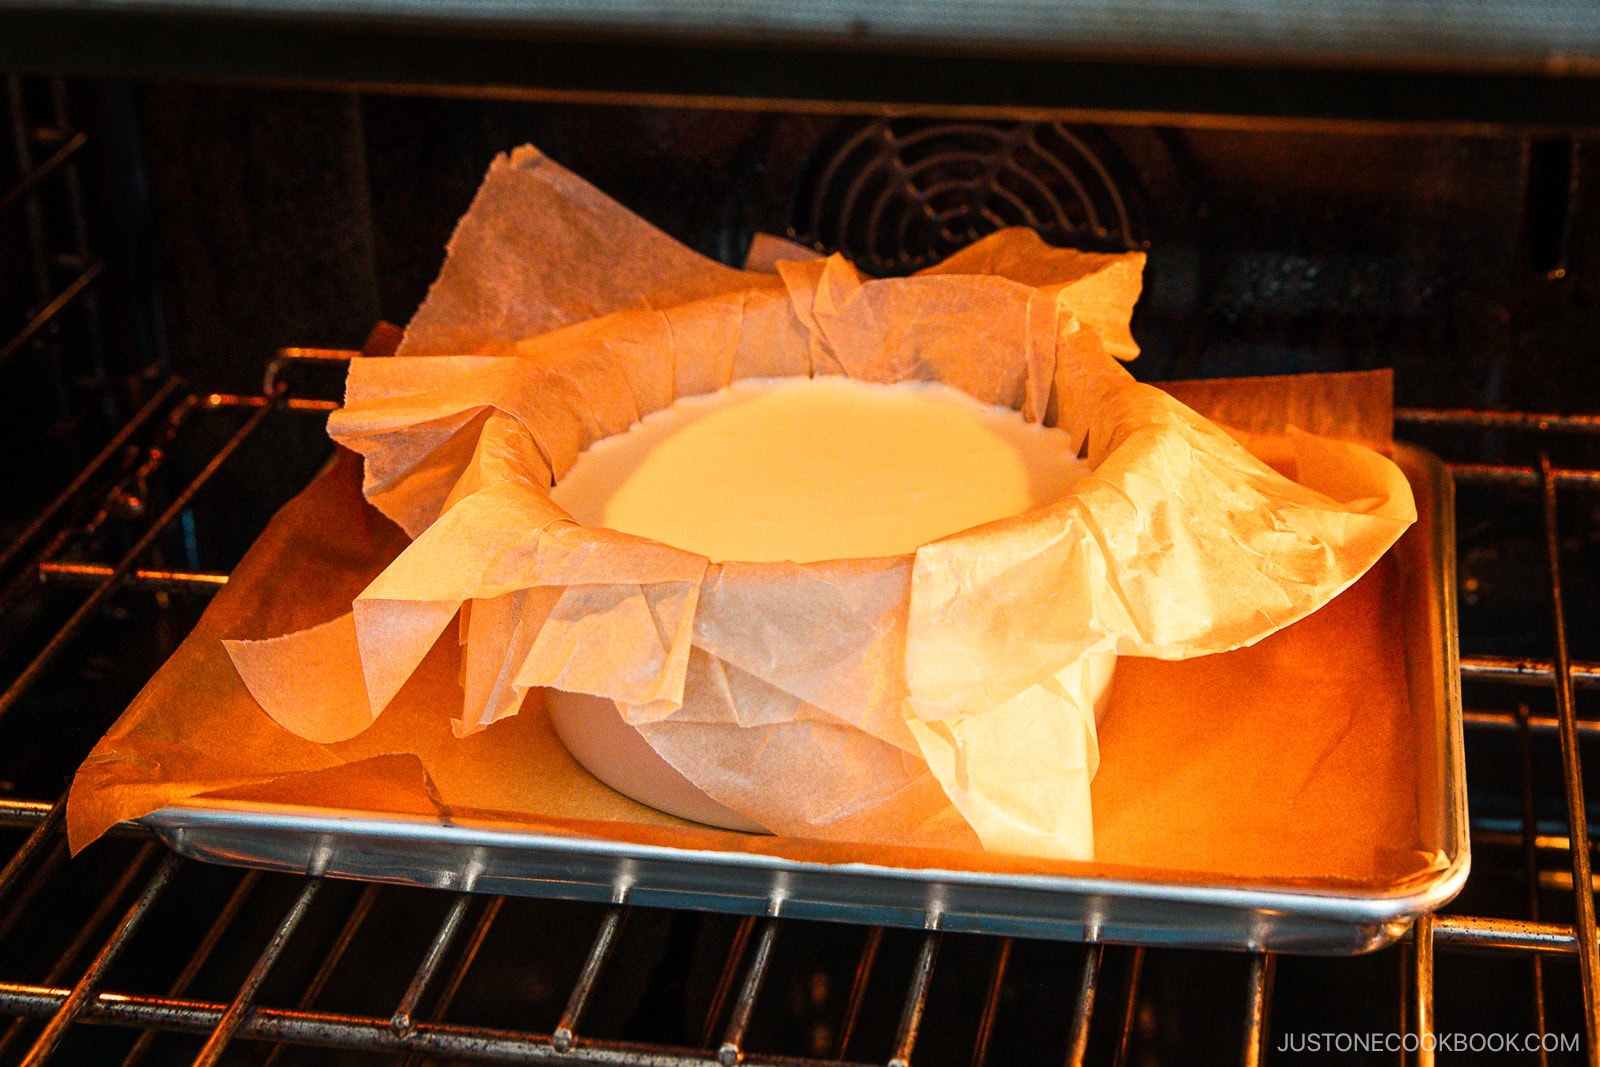
- Bake. Pour the batter into the ready pan set on a rimmed baking sheet and bake at excessive warmth for 30–35 minutes, till the highest is deeply browned and the middle nonetheless jiggles when gently shaken.
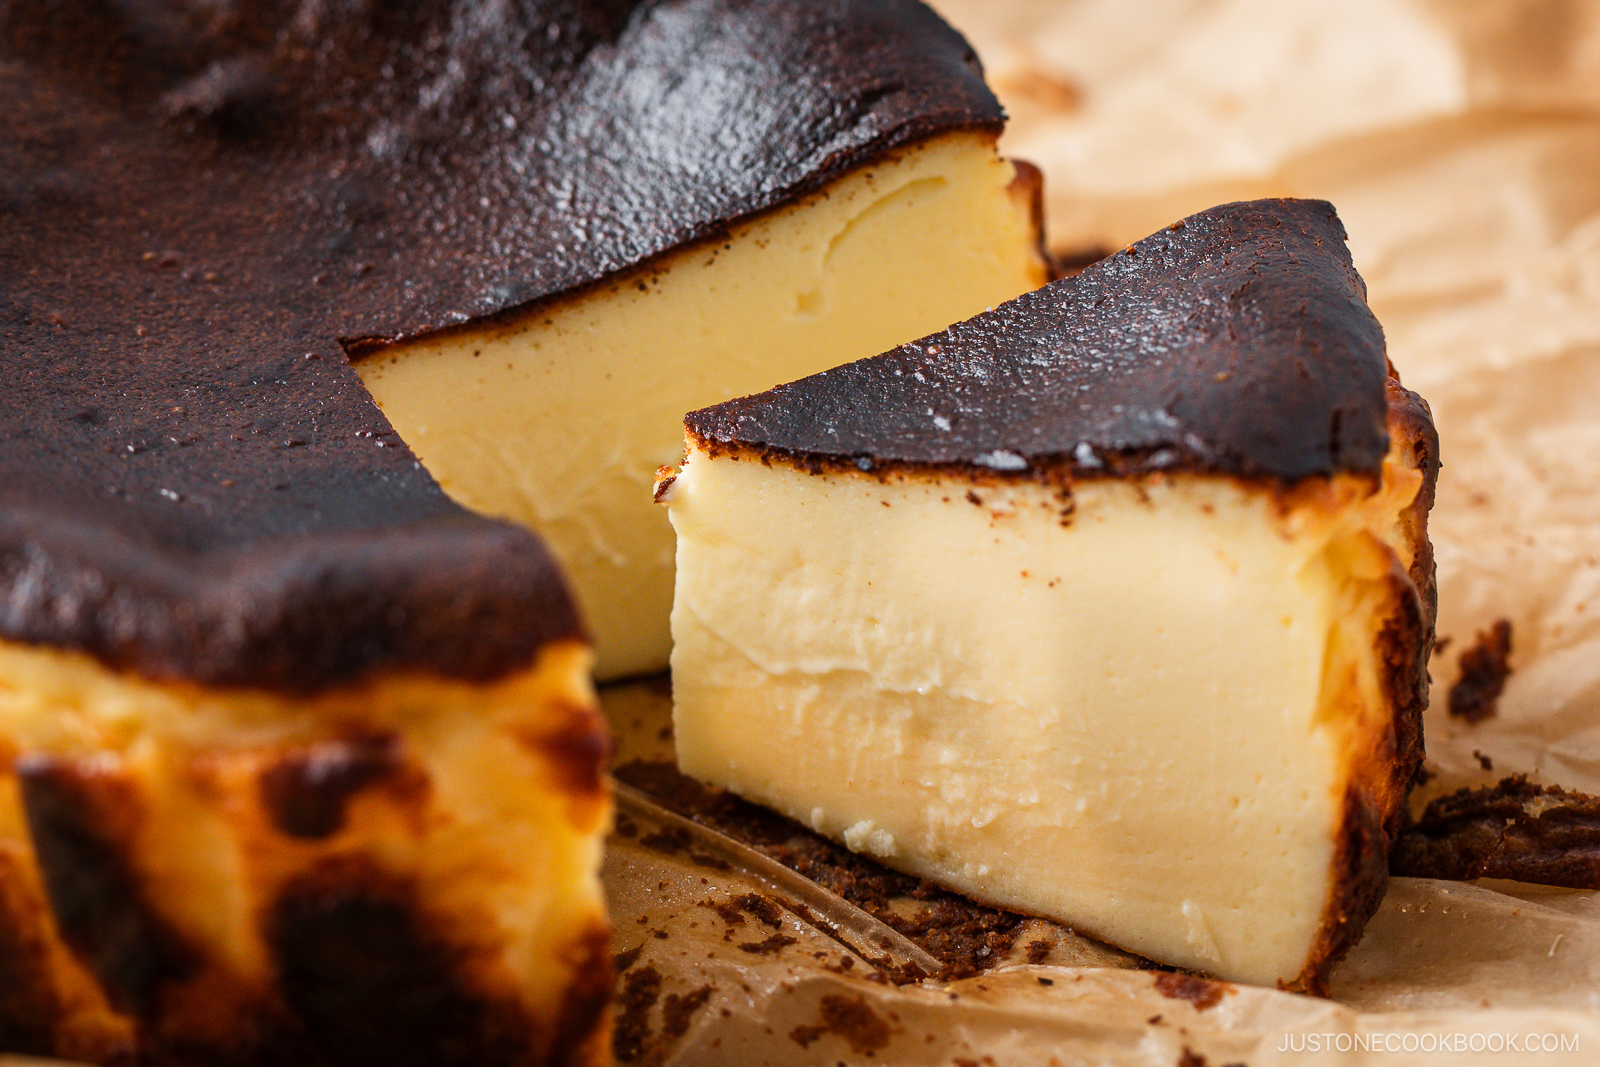
- Cool and serve. Let the cheesecake cool utterly at room temperature so it could actually set naturally because it sinks. Serve at room temperature for a custardy texture, or chill within the fridge and slice for a firmer cheesecake.

Nami’s Recipe Ideas
These detailed suggestions will show you how to make Basque cheesecake completely each time.
For Prepping:
- Preheat completely. It’s necessary to warmth the oven for at the very least half-hour. A very popular oven is crucial to correctly caramelize the highest.
- Use convection bake (oven with fan) to attain a shiny brown high. For an everyday oven, strive setting the rack excessive the place it’s hotter; simply don’t let the parchment paper contact the highest heating component.
- Use room-temperature components. They’ll mix simply for a clean batter and uniform texture. In case your cream cheese is chilly and agency, microwave it at 50% energy in 15-second bursts till it’s delicate and smashes simply (~45 seconds).
- Line the cake pan with parchment paper. Don’t skip this! Double line it to make sure full protection (until your paper is huge/giant). Trim or fold down the surplus paper if it’s too near the highest of the oven.

For Batter & Mixing:
- Clean the batter early. Press and rub the cream cheese with a silicone spatula whereas the batter continues to be thick. Scrape down the bowl and spatula typically—lumps are a lot more durable to repair as soon as the batter turns into liquid.
- Add components steadily. Mix every ingredient utterly earlier than including the following.
- Use cake flour. It has much less gluten than all-purpose (plain) flour, which helps hold the cake tender moderately than barely agency. I additionally add cornstarch for a lighter texture.
- Steadiness the flavour. Historically, Basque cheesecake is made with out lemon and salt, however I add each—lemon juice brightens the cake, and salt enhances the general taste. I don’t add vanilla, as within the conventional recipe, however you may embody it for those who choose.
- Take away air bubbles. Earlier than baking, faucet the cake pan stuffed with the batter on the counter just a few occasions and run a skewer within the batter to pop any air pockets.
For Baking:
- Adapt to your oven. It’s a truth: Each oven is completely different. Even for those who comply with my recipe to a T, it’s possible you’ll not get the very same texture. Use your judgment and watch intently as you bake.
- Preserve the warmth in. Put the cake pan within the oven shortly and keep away from opening the door whereas baking—you don’t wish to lose warmth.
- Look ahead to doneness. The cake is completed when the highest is deeply browned and the middle nonetheless jiggles.
- Don’t overbake. By no means bake longer than 30–35 minutes, even when the highest hasn’t absolutely darkened. Overbaking curdles the filling, and it can’t be fastened.

For Cooling & Serving:
- Let the cake cool on a wire rack. Because it cools, it’s going to sink barely and continues to set from the residual warmth. As soon as it reaches room temperature, refrigerate it. Don’t chill the cake whereas it’s nonetheless heat, as this may have an effect on different meals within the fridge.
- Select your texture—custardy or agency. I prefer to take it out of the fridge about half-hour earlier than serving. Serve at room temperature for a delicate, custardy filling, or chilled for a firmer texture.
- Heat your knife every time you slice. I prefer to fill a tall mug cup with boiling water, dunk the blade, then shortly dry it with a towel. Slice in a single clean movement and pull the knife straight out for clear cuts.
- Heat a chilly slice if desired. Microwaving it for just a few seconds brings out the cream cheese taste, and it’s very scrumptious!

Variations and Customizations
Trying to change issues up? Attempt these straightforward and attractive concepts!
- Creamier middle. Bake on the shorter finish of the time vary and chill in a single day.
- Firmer texture. Bake barely longer and chill for a number of hours earlier than serving.
- Gluten-free choice. Substitute the cake flour with rice flour.
- Serve with berries, fruit compote, or chocolate. Historically, the cheesecake is served plain, and that’s my favourite means—however toppings are at all times non-compulsory.
What to Serve with Basque Cheesecake
This Basque burnt cheesecake works year-round and shines with easy drinks.
- With espresso – It’s scrumptious with an espresso or Japanese Iced Espresso.
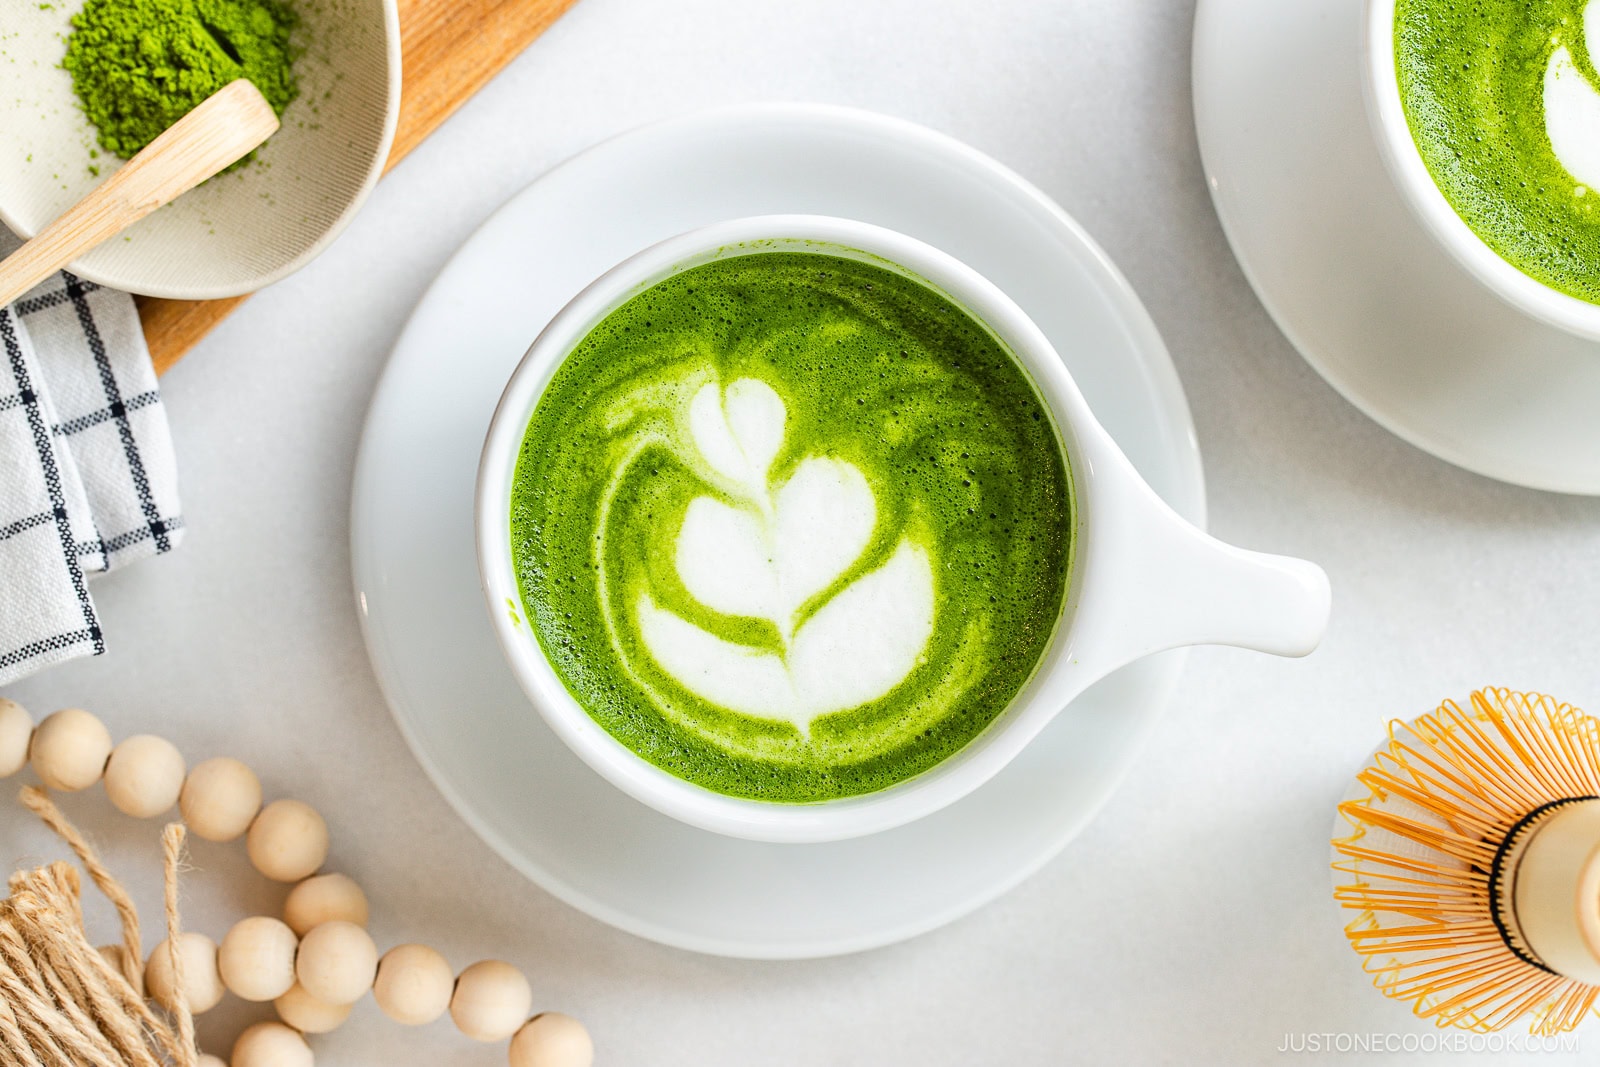
- With matcha – Serve creamy and comfortable Matcha Latte to steadiness the richness properly.
- With black tea – Japan’s favourite Royal Milk Tea is scrumptious served sizzling or chilly!
- With hojicha – For a low-caffeine beverage that’s nutty and toasty, strive Hojicha Latte.
Storage and Reheating Ideas
To retailer: As soon as the Basque cheesecake has cooled to room temperature, retailer it in an hermetic container and refrigerate for as much as 3 days.
To reheat: This cheesecake is greatest loved chilled or at room temperature. If chilled, let it stand at room temp for half-hour to 2 hours earlier than serving.
FAQs
Can I make this Basque cheesecake recipe forward of time?
Sure. Basque cheesecake is a superb make-ahead dessert. You may bake it sooner or later upfront, let it cool utterly, and refrigerate it. Chilling additionally helps the feel set and makes slicing cleaner, particularly for those who choose a firmer middle.
Why isn’t my Basque cheesecake browning on high?
This often means the oven was not sizzling sufficient. Preheat for half-hour (or longer) and use the convection setting when you have one. Baking on the next rack also can assist, however keep away from opening the oven door since warmth loss impacts browning.
The deep coloration comes from caramelization and browning reactions, which depend on sugar. Be sure you didn’t scale back the sugar considerably.
A wider pan spreads the batter thinner, which may have an effect on how the highest browns.
My Basque cheesecake is browning too quick.
Each oven is completely different, so it’s possible you’ll want to regulate the oven temperature. Even for those who comply with the recipe precisely, the colour and texture can range. Watch the cake intently because it bakes.
If the highest is browning too shortly, decrease the oven temperature. It’s typically higher to sacrifice a little bit of coloration than to danger overbaking. Use your judgement and modify as you go.
Why is the middle nonetheless gooey after chilling?
If the middle stays uncooked even after chilling, the cheesecake wanted barely extra baking time. Each oven behaves in another way, so small changes are regular. A jiggly middle when heat is predicted, however it ought to set extra as soon as chilled.
Can I take advantage of a bigger cake pan?
Sure, however please scale the recipe as a wider pan spreads the batter thinner, which may have an effect on how the highest browns.
Multiply the recipe by 1.5 for a 7-inch pan or by 2 for an 8-inch pan, each at the very least 3 inches deep. Baking time will improve relying in your oven.
I’d love to listen to how yours turned out! 💛 Please go away a star ranking and remark under to share your expertise. Your suggestions not solely helps Simply One Cookbook but in addition helps different dwelling cooks uncover recipes they will belief.
Forestall your display screen from going darkish
Earlier than You Begin…
-
Please be aware that this cake requires 2–3 hours of cooling time. You may serve it both at room temperature or chilled within the fridge for an extra 4 hours.
-
Collect all of the components.
To Preheat the Oven
-
Preheat a convection oven (with fan) to 450ºF (230ºC) for at the very least half-hour. Should you don’t have convection, preheat a standard oven to 475ºF (245ºC). In case your oven doesn’t warmth up very nicely, preheat it on the hottest temperature (mine is 550ºF/290ºC) for 30–60 minutes, then flip it right down to 475ºF (245ºC) when it is time to bake.Oven rack: I used my convection oven’s center rack, because it’s best place for the fan to flow into the air. Should you use a standard oven, transfer the rack barely larger because the temperature towards the highest is hotter. Remember that a 3-inch deep cake pan wants further house for rising.
To Line the Cake Pan
-
Collect one 6-inch (15-cm) spherical cake pan with detachable backside. Put together two rectangular sheets of parchment paper lengthy sufficient to hold over the edges of the pan by 2 inches (5 cm). Place them crisscross to ensure they cowl all inside surfaces of the pan. (Or use one sheet in case your paper is further huge.) Fold every sheet in half, then once more into quarters, like a paper serviette.
-
Unfold the sheets and place them crisscross as earlier than. Discover the middle level the place the creases intersect. Middle the parchment sheets over the cake pan ring, then middle the detachable backside on high.
-
Press them down into the cake pan, utilizing the detachable backside to crease the paper into the pan and in opposition to the insides for a comfortable match. Press and crease the paper edges down across the outdoors of the cake pan, too.
-
Gently take out the detachable backside and parchment sheets, now molded to the form of the pan. Place the detachable backside again into the cake pan (correctly). Then, match the molded paper into the pan and press it down to suit snugly. (Should you‘re doubling the recipe, repeat with a second cake pan.)
To Make the Batter
-
Place 1 lb cream cheese in a big bowl. Ensure that the cream cheese is at room temperature.Nami’s Tip: If the cream cheese is chilly and agency, microwave it at half energy (50%) in 15-second increments till it‘s room temperature (about for 45 seconds).
★ Hand Mixing Methodology
-
Press down on the cream cheese with a silicone spatula to melt it. Then, add ½ cup sugar. (For the blender technique, scroll right down to the following part.)Nami’s Tip: A silicone spatula makes the batter is tremendous clean with fewer air bubbles.
-
Rub the combination with the silicone spatula in opposition to the edges of the bowl to mix. The cream cheese will grow to be fluffy and clean because the sugar granules dissolve.
-
Regularly scrape the bowl and spatula to include the components nicely and forestall lumps.Nami’s Tip: Eliminate lumps early, because it’s more durable to do when the batter is extra liquid.
-
Crack 3 giant eggs (50 g every w/o shell) in one other bowl and whisk nicely.Nami’s Tip: Whisking in a separate bowl is extraordinarily useful for mixing, as an alternative of cracking eggs one after the other into the cream cheese.
-
Slowly and steadily add the crushed eggs to the cream cheese combination, one-third at a time. Ensure that the batter is clean and with no lumps earlier than including extra egg.
-
After every addition, mix the eggs with the cream cheese THOROUGHLY and COMPLETELY.
-
Add the remainder of the egg and mix nicely.
-
Often scrape off the batter from the bowl and the spatula. This may assist forestall lumps within the batter. Then, add 1 Tbsp lemon juice and blend completely.
-
Subsequent, add 2 Tbsp cake flour and 2 tsp cornstarch to a sieve. Sift a bit little bit of the flour and cornstarch into the cream cheese combination when you stir with a spatula. Incorporate the components nicely earlier than including extra. Preserve sifting and mixing till you‘ve added all of the flour combination. Take your time doing this. You don’t need any lumps.
-
Add ⅛ tsp Diamond Crystal kosher salt and mix collectively. Ensure that there aren’t any lumps at this stage (earlier than including the heavy cream–extra liquid).
-
Step by step add 1 cup heavy (whipping) cream when you stir. Combine till it’s all mixed.
★ Blender Methodology
-
Put all of the components for the cake batter in a blender (I take advantage of my Vitamix): 1 lb cream cheese, ½ cup sugar, 3 giant eggs (50 g every w/o shell), 1 Tbsp lemon juice, 2 Tbsp cake flour, 2 tsp cornstarch, ⅛ tsp Diamond Crystal kosher salt, and 1 cup heavy (whipping) cream. Mix till very clean, about 2 minutes. Then, let this combination relaxation for quarter-hour to let the air bubbles within the batter settle, or else the cake might crack.
To Pour the Batter into the Pan
-
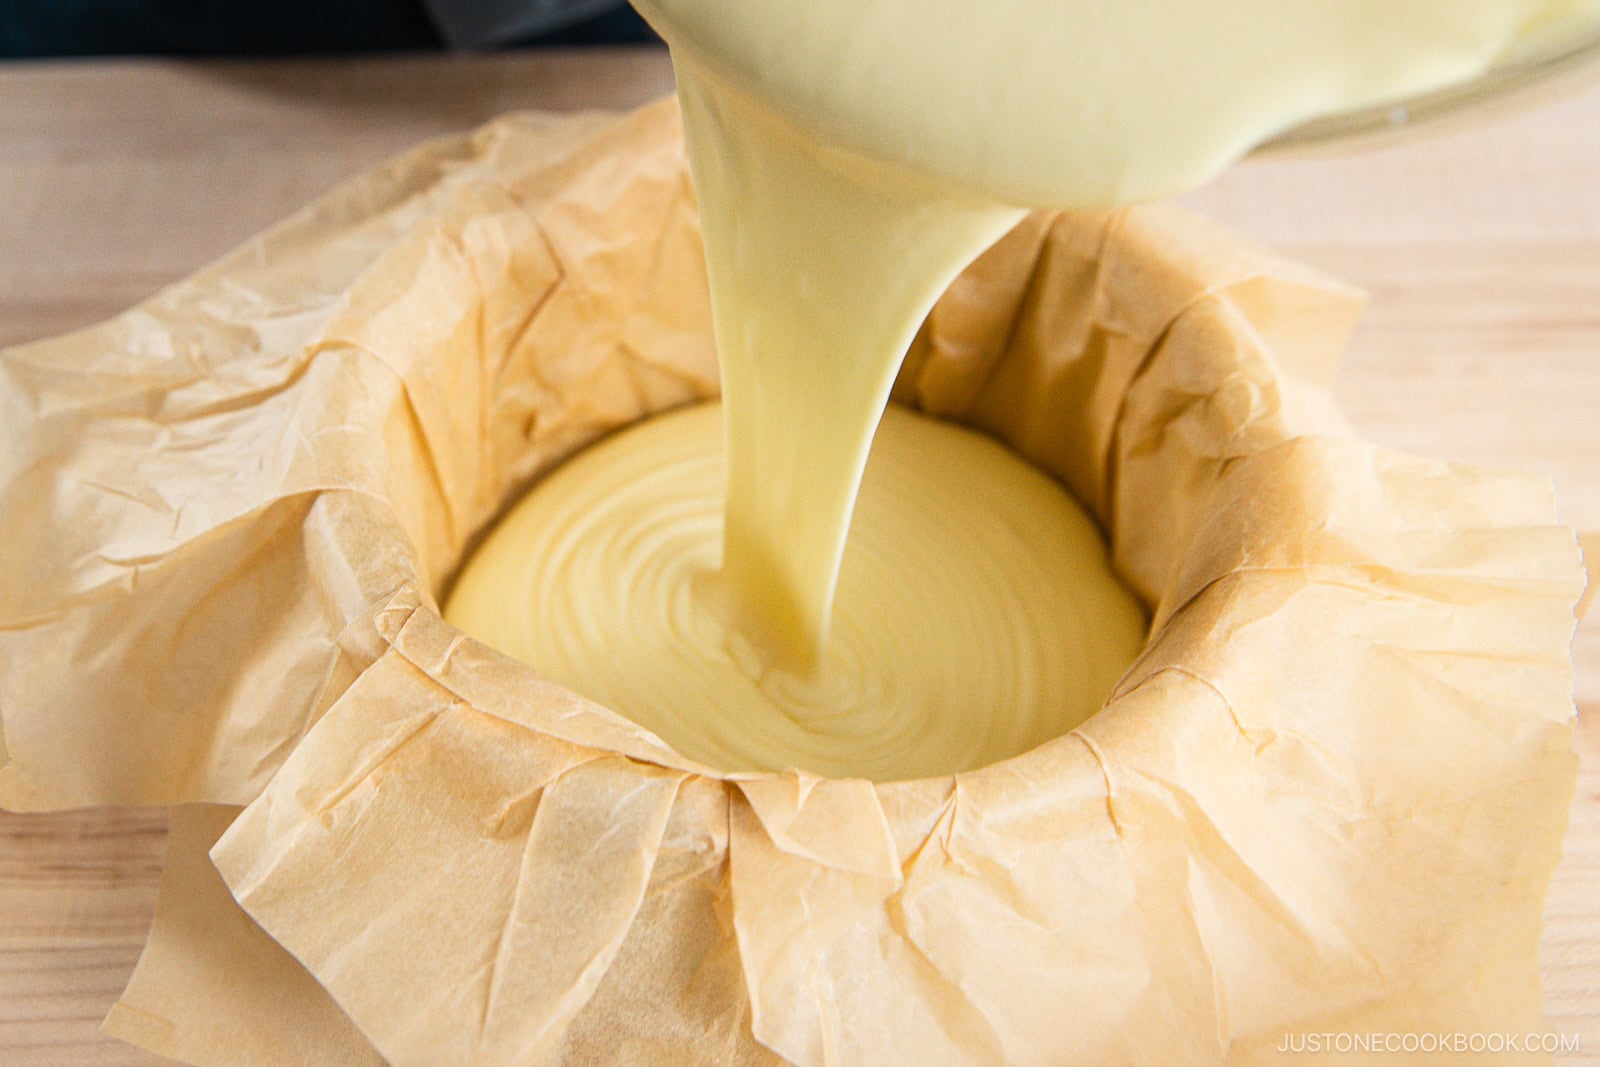
Pour the cake batter into the ready pan in a single go (keep away from stop-and-go) so that you don‘t create any air pockets. Faucet the cake pan on the countertop just a few occasions to eradicate air pockets.
-
Pop any seen air bubbles with a bamboo skewer (or toothpick), then run the skewer by means of the batter to take away extra bubbles. Place the cake pan on a baking sheet, simply in case the cheesecake overflows throughout baking. Mine by no means did, however I nonetheless use a baking sheet to switch the cake pan to and from the oven.
To Bake
-
Switch the baking sheet with cake pan into the preheated oven; do it shortly so you do not let a lot warmth escape. Bake at 450ºF (230ºC) for a convection oven or 475ºF (245ºC) for a standard oven till the highest is darkish amber/brown and the middle continues to be very jiggly, about 30–35 minutes. Don’t open the oven door whereas baking and lose warmth. The highest of my cake begins browning on the 30-minute mark, then will get darkish brown inside 5 minutes. Please regulate your cheesecake, as a result of each oven is completely different. Nami’s Ideas: Should you love a “gooey“ or “oozy“ texture, then bake for much less time, however you should chill your cake nicely earlier than serving to agency it up. NEVER prolong the bake time, even when the highest hasn‘t turned darkish, as a result of you’ll overbake the cake. The filling will curdle and you may‘t repair it. If the highest doesn‘t darken in 30–35 minutes, you’ll most likely want to regulate the oven temperature (or oven rack or preheating time) subsequent time.
To Cool
-
Take out the cake when the floor is a darkish, burnt coloration. The center of the cake ought to wobble once you gently shake the pan. Let the cheesecake cool within the pan on a wire rack till it reaches room temperature, about 2–3 hours. Ensure that the air can flow into underneath the cake pan; don’t put it on the countertop immediately. You may place it on high of your fuel vary burner grate, if it‘s not in use.
To Chill
-
You may serve the cake both chilled or at room temperature (which we like, too). To sit back it for a firmer texture, cowl the room-temperature cake within the pan with a tea towel (don‘t use plastic, as condensation might drip onto the cake), and place within the fridge for 4 hours.
To Serve
-
Take away the cheesecake from the cake pan and thoroughly peel again the parchment paper. If in case you have chilled the cake, let it stand at room temperature for at the very least half-hour or as much as 2 hours earlier than serving.
Serving: 6inch cake, Energy: 3043kcal, Carbohydrates: 141g, Protein: 52g, Fats: 258g, Saturated Fats: 147g, Trans Fats: 1g, Ldl cholesterol: 1383mg, Sodium: 1901mg, Potassium: 1043mg, Fiber: 1g, Sugar: 116g, Vitamin A: 10402IU, Vitamin C: 7mg, Calcium: 687mg, Iron: 5mg
Did you make this recipe?
Tag @justonecookbook on Instagram so we are able to see your scrumptious creation!
Editor’s Be aware: This put up was initially revealed on December 17, 2020, and republished on December 18, 2025 with extra useful info.