


Why I Love This Recipe
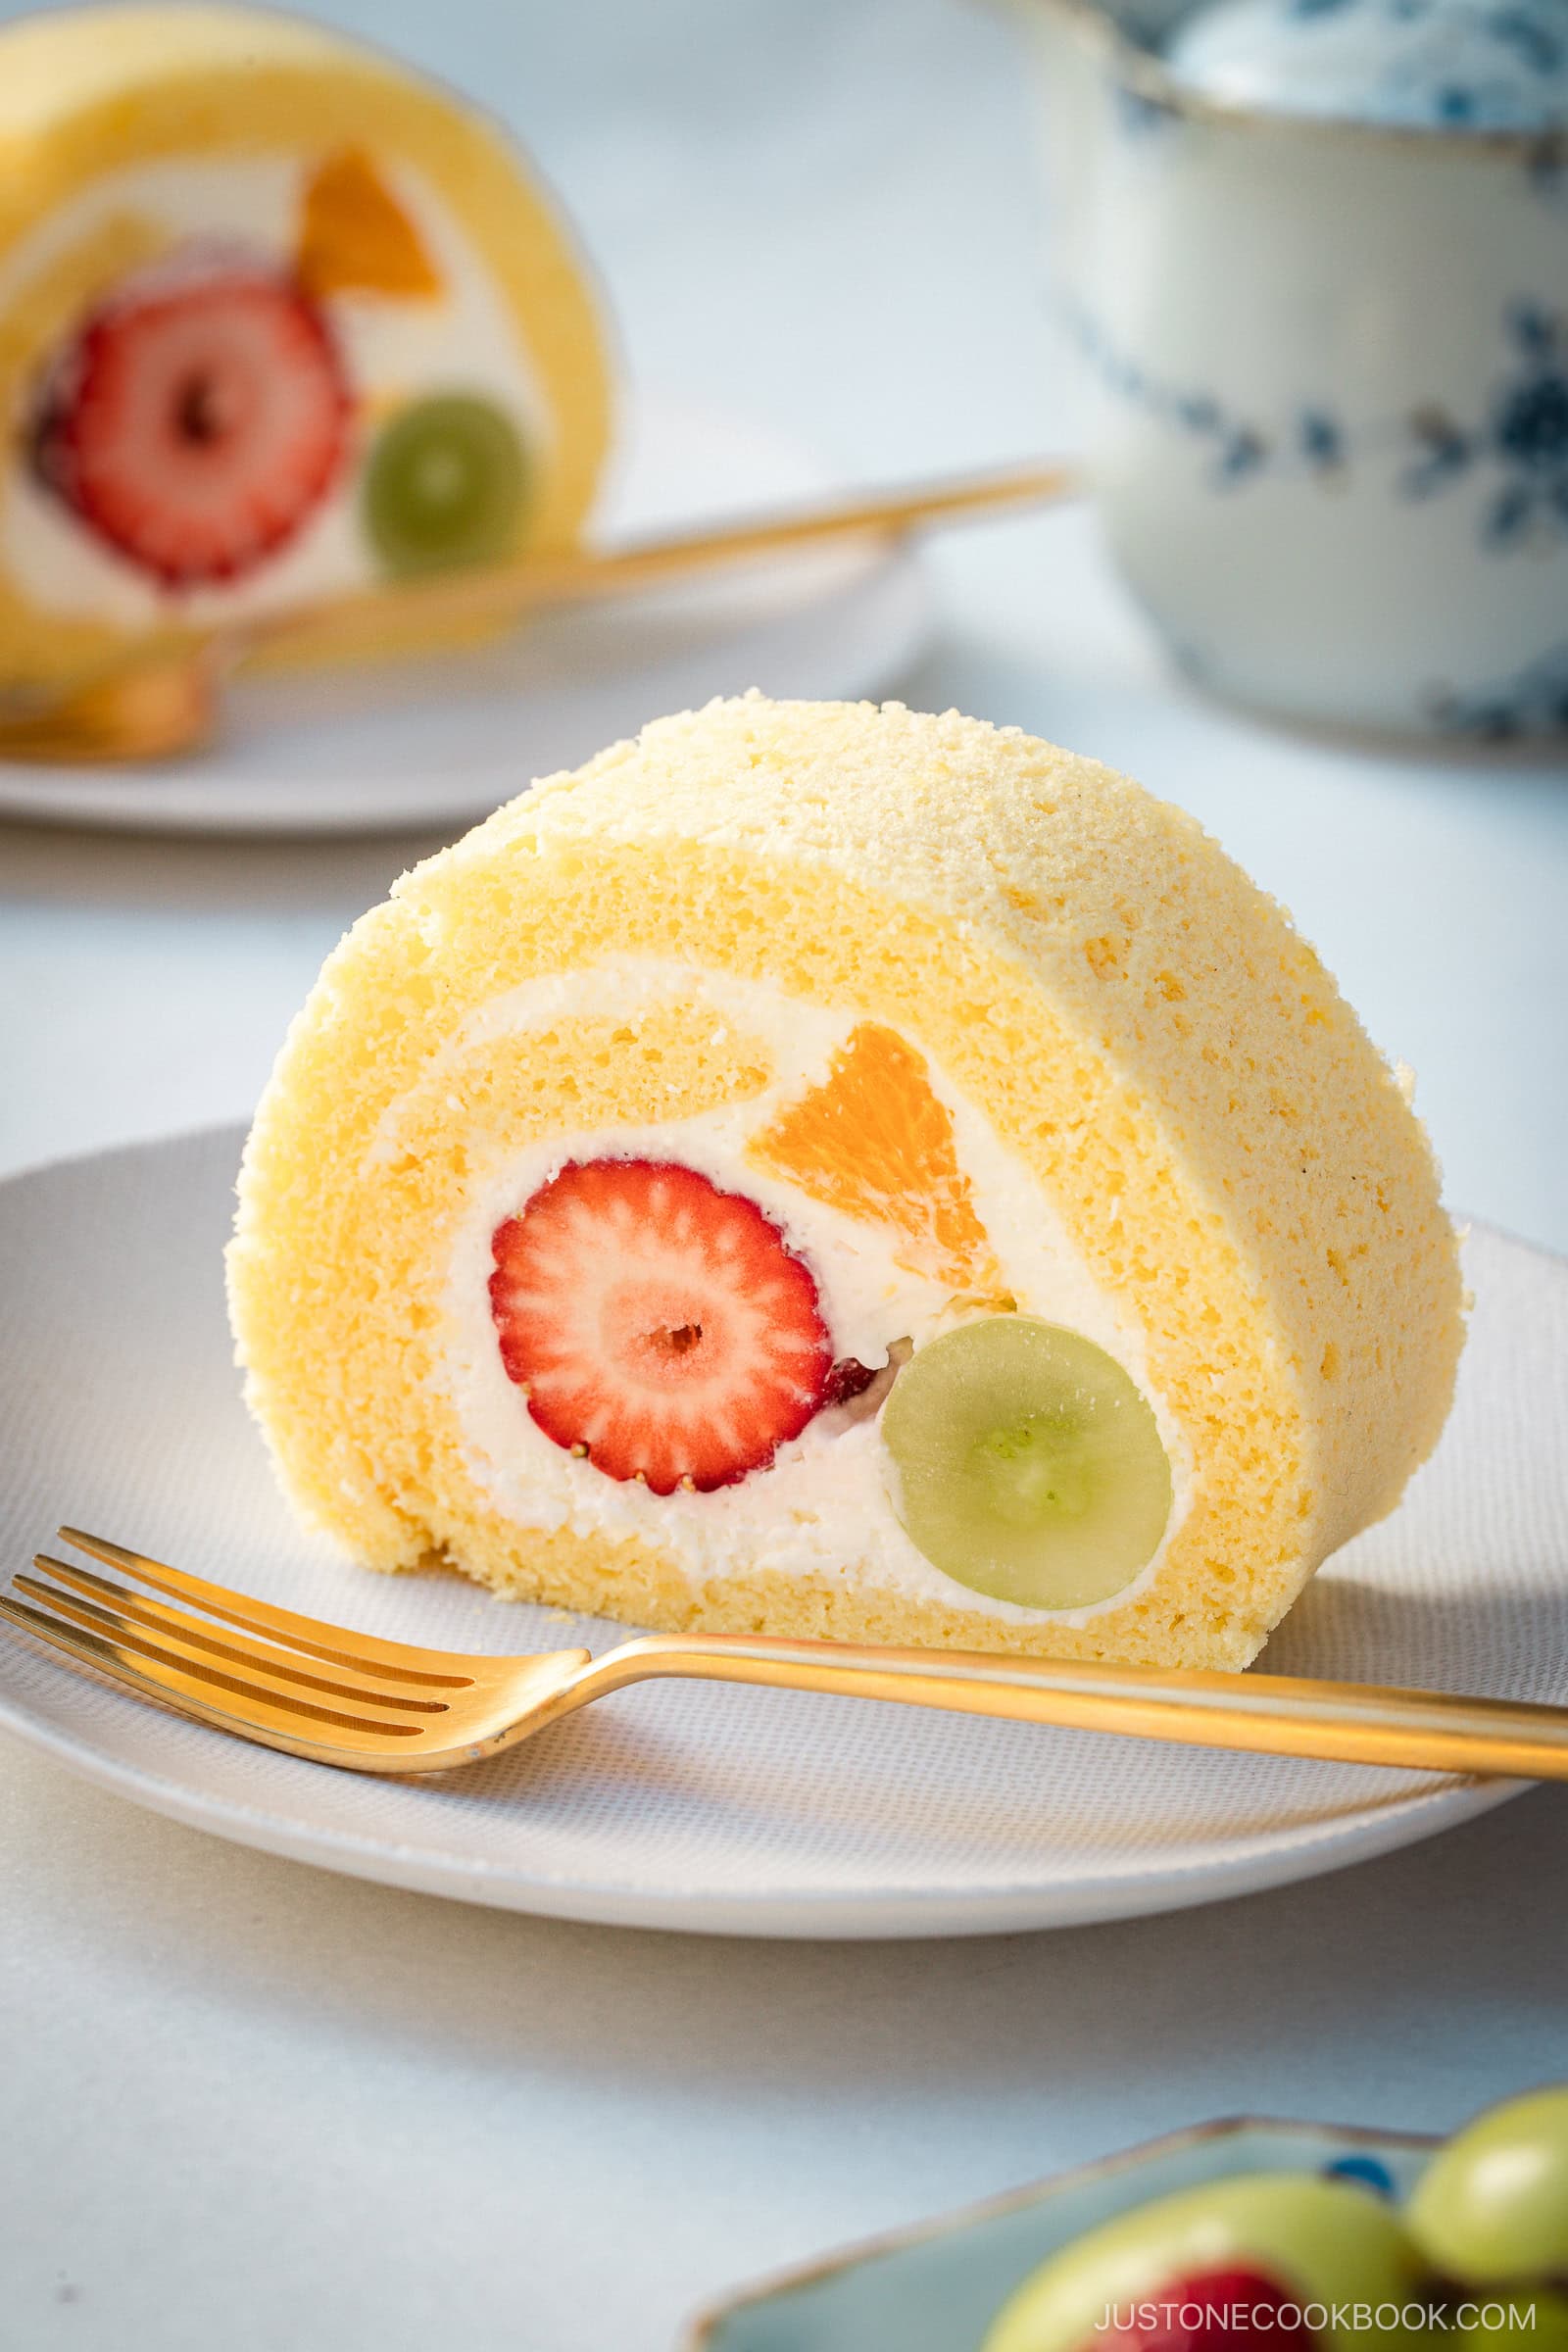
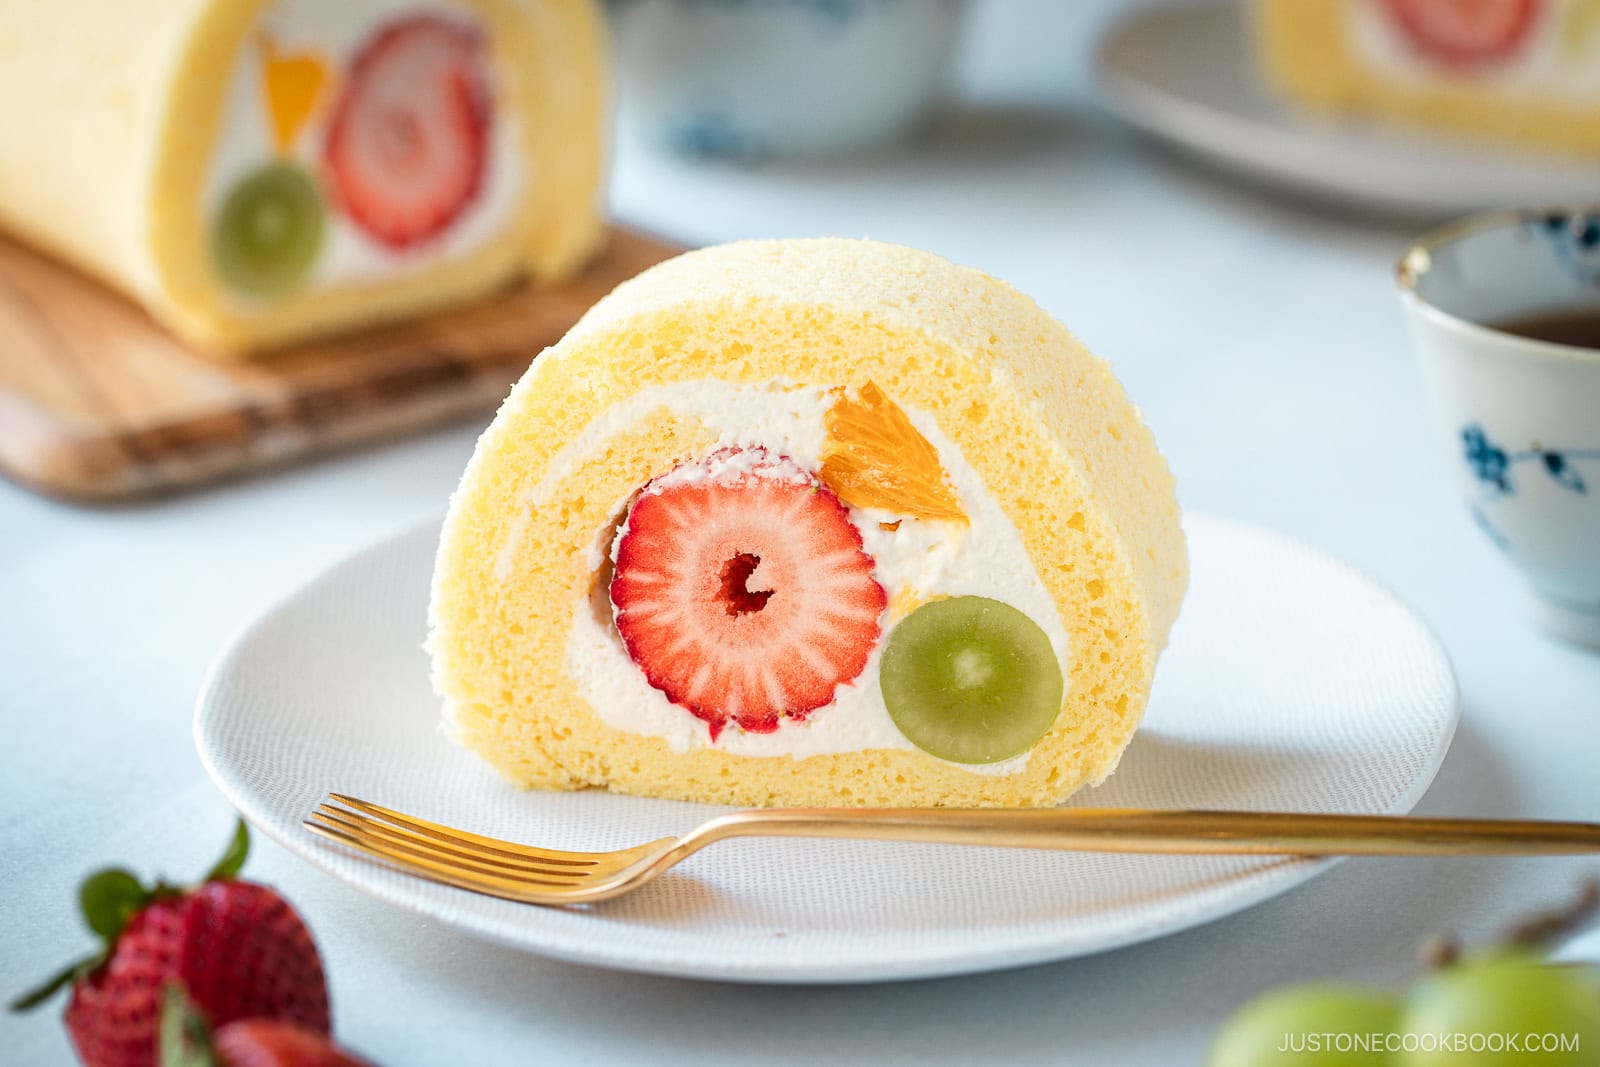
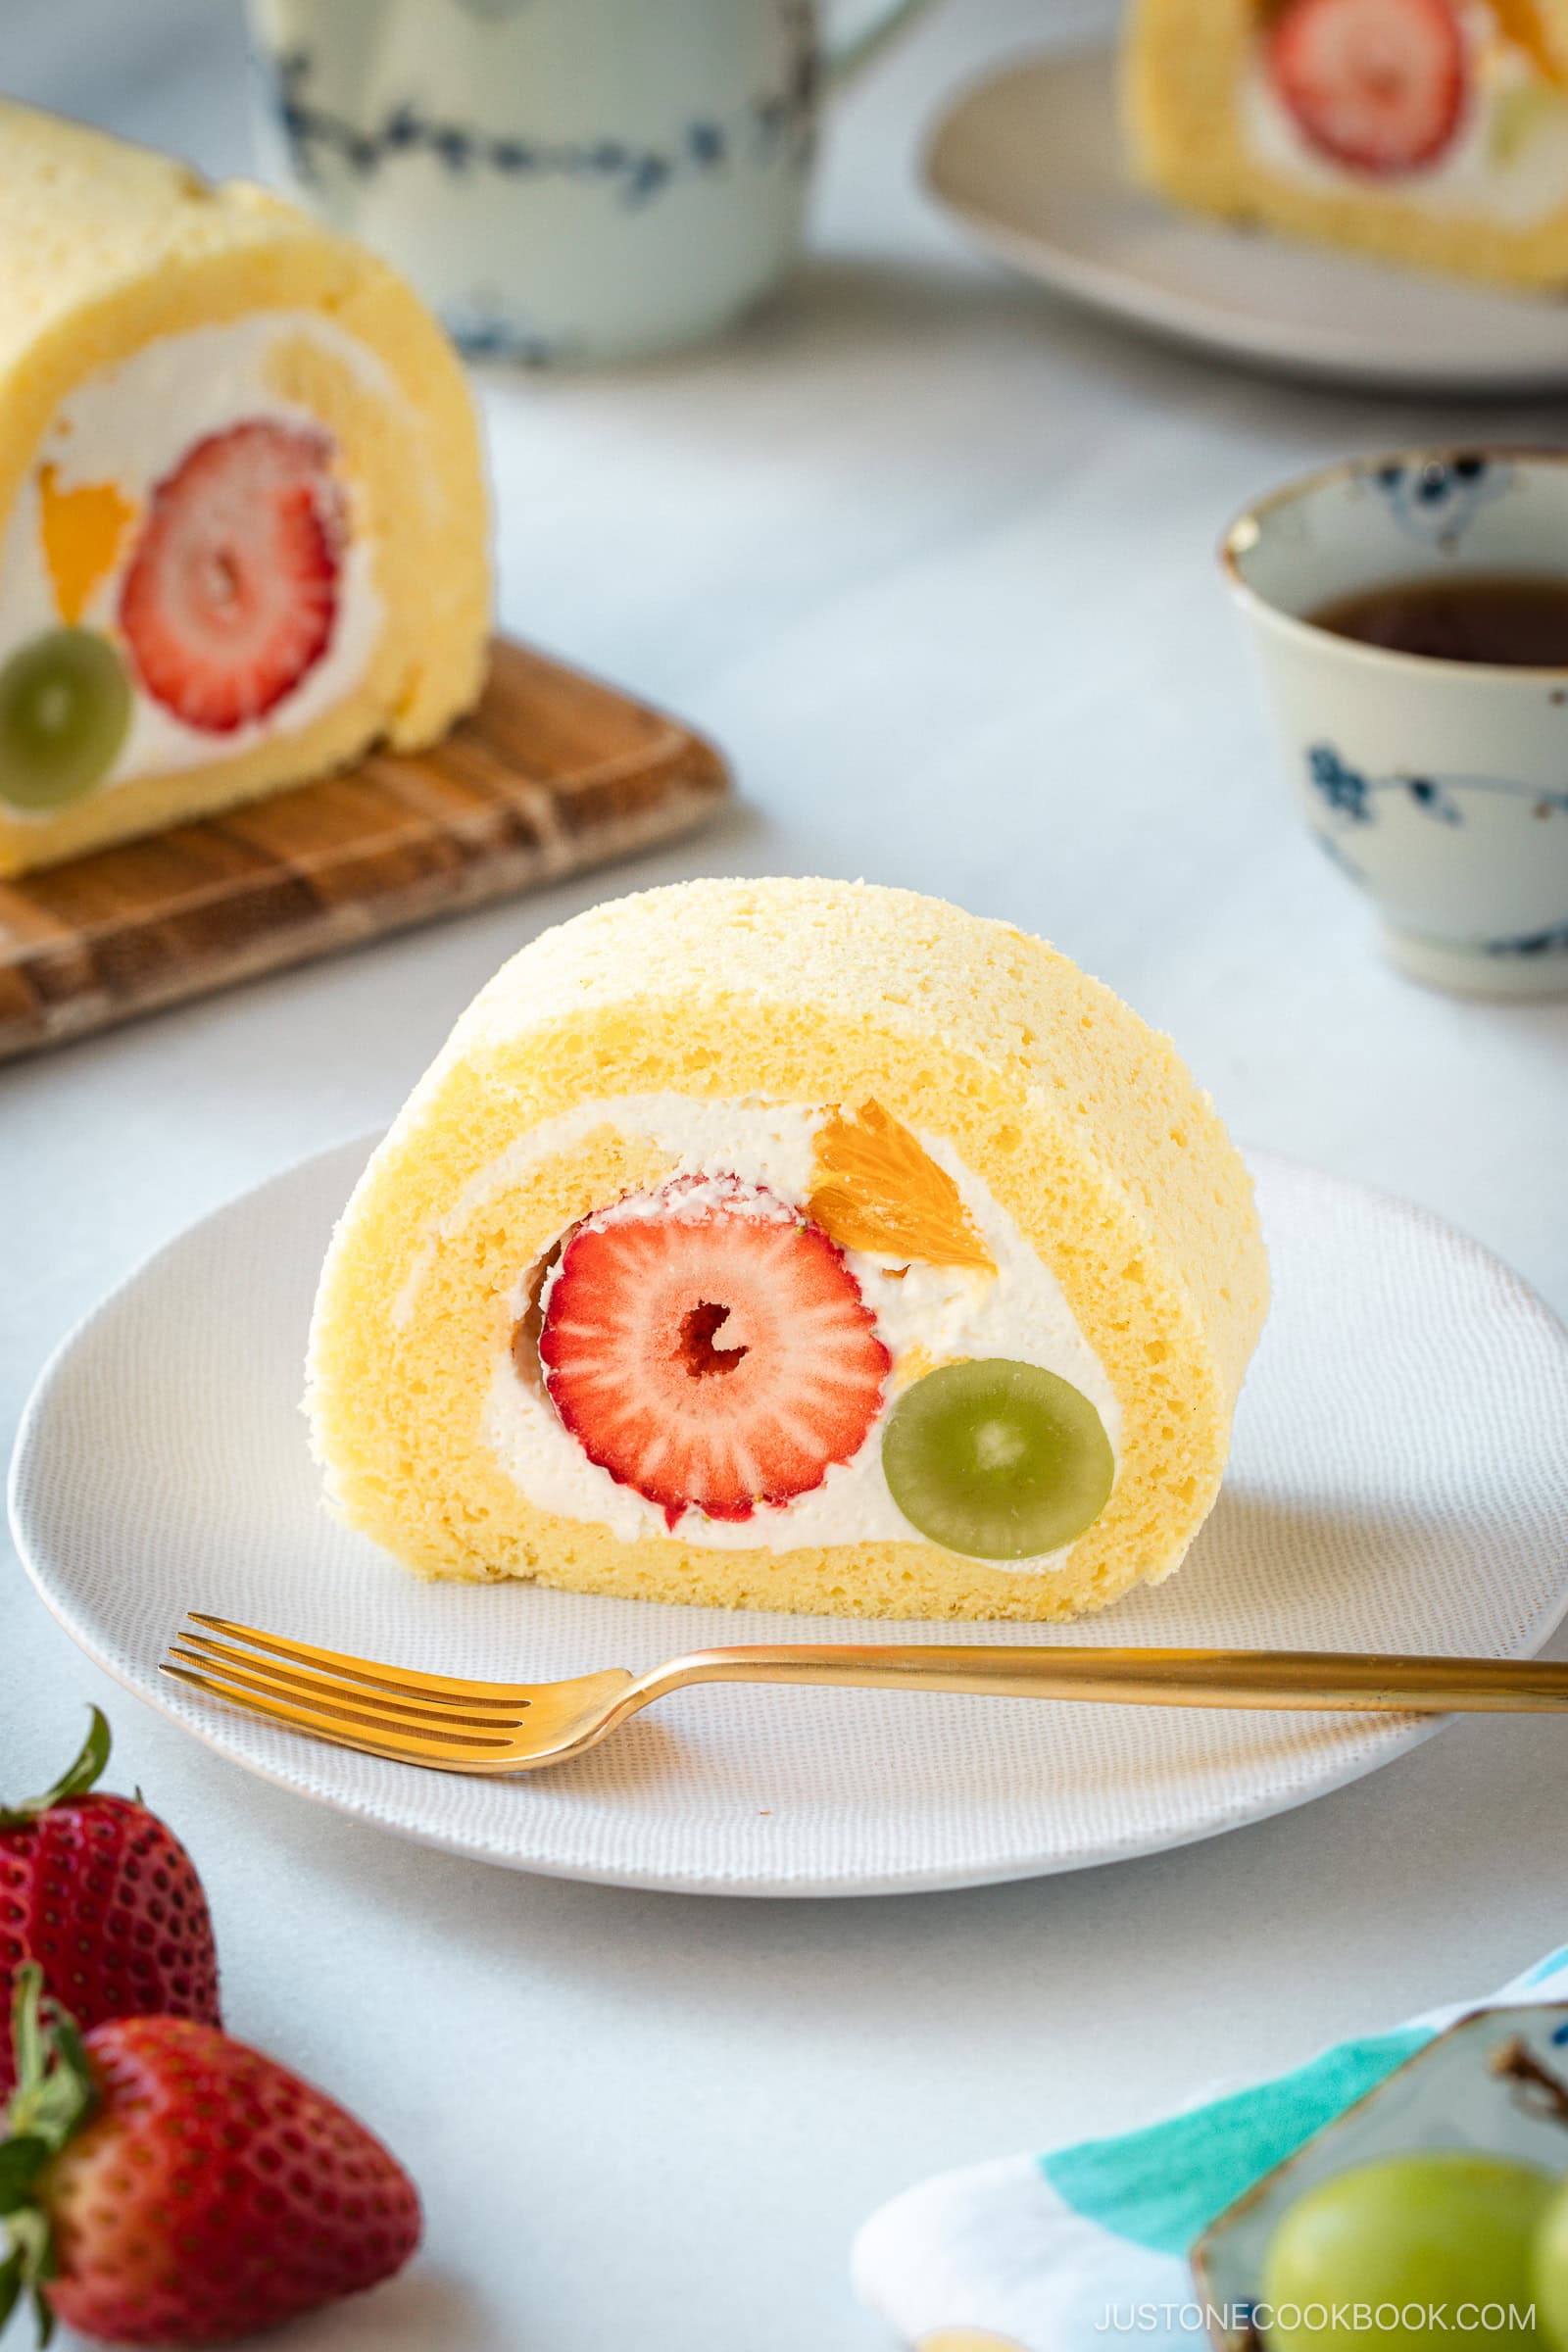
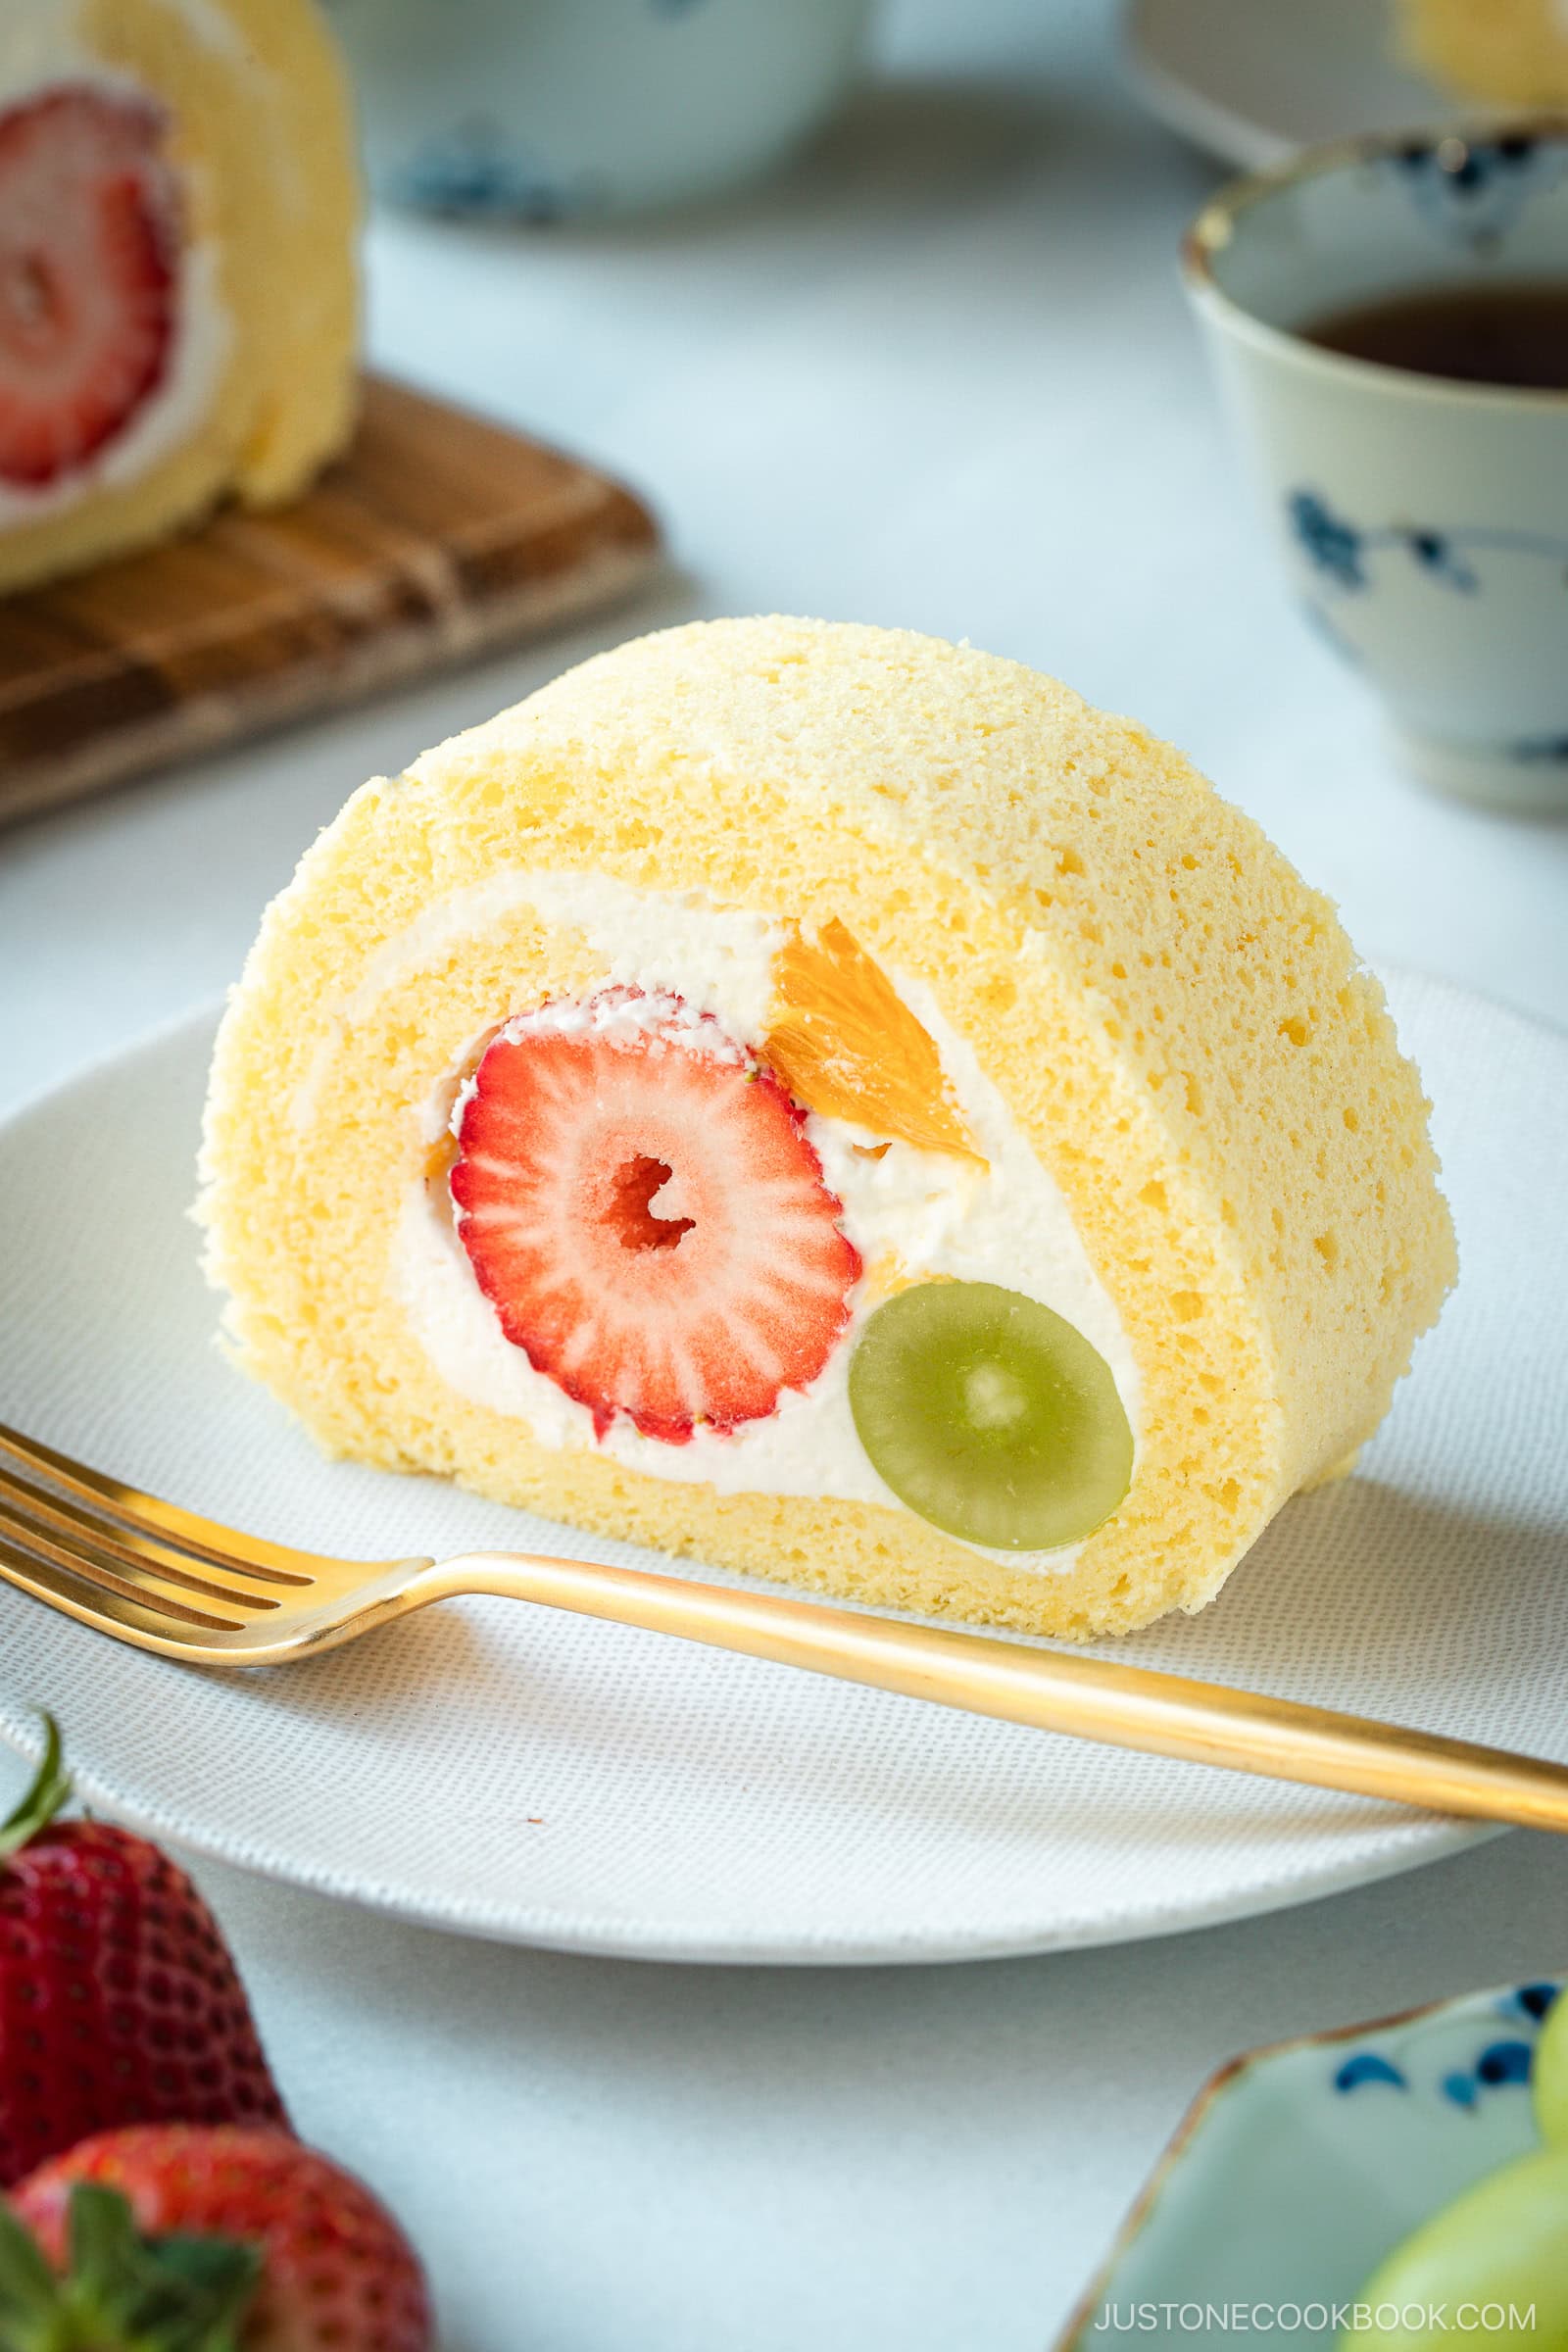
Smooth and moist sponge cake rolled with cream and recent fruit is one in all Japan’s most beloved sweets. Japanese Fruit Roll Cake has a fragile texture, gentle sweetness, and a gorgeous look—excellent for birthdays, holidays, or afternoon tea.
- Gentle, ethereal sponge with the right stability of sweetness.
- Stunning presentation that’s at all times a showstopper for company.
- Refreshing and stylish in each chew with home made whipped cream and recent fruit of your selection.
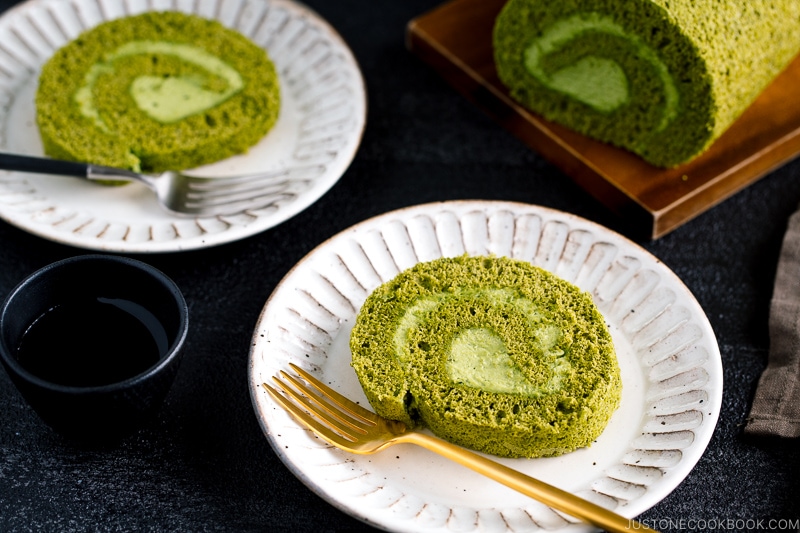
In the event you get pleasure from Japanese-style cake, strive my Japanese Strawberry Shortcake, Matcha Swiss Roll, and Castella Cake subsequent!
What’s Fruit Roll Cake?
Japanese fruit roll cake (フルーツロールケーキ) traces again to European Swiss rolls launched to Japan through the Meiji period. Japanese bakers later tailored the recipe to create a lighter, fluffier model. The sponge cake texture is sort of a cloud—moist but springy—and the home made whipped cream provides it a recent, clear style. It’s a staple in Japanese cafés, patisseries, and residential kitchens, particularly for birthdays and celebrations.
Components for Japanese Fruit Roll Cake
You’ll want a 15 x 10-inch (38 x 25 cm) jelly roll pan for this recipe.
- unsalted butter
- massive eggs
- sugar – divided, for the cake and whipped cream
- cake flour – retailer purchased or make cake flour at house with all-purpose flour and cornstarch
- recent fruit of your selection – I used strawberries, Shine Muscat grapes, and orange segments
- heavy cream and sugar – 36% or extra milkfat
Discover the printable recipe with measurements beneath.
How one can Make Japanese Fruit Roll Cake
- Collect and measure components. Weigh all components for accuracy. Preheat the oven and line the jelly roll pan with parchment paper.
- Soften the butter and separate the eggs. Heat the butter till tender and liquid. Separate the egg yolks and whites. Preserve the whites within the freezer for 15–20 minutes till barely icy.


- Combine the yolks and butter. Whisk egg yolks with half of the sugar over a double boiler till pale and creamy. Stir within the heat melted butter till easy. Take away from warmth.
- Whip the meringue. Beat the chilled egg whites in a stand mixer till foamy. Steadily add the remaining sugar in three additions. Proceed whisking at excessive pace till stiff peaks kind.
- Fold the batter. Gently combine one-quarter of the meringue into the yolk combination. Sift within the cake flour and fold it in till mixed. Fold in the remainder of the meringue with a spatula till no streaks stay.


- Bake the sponge. Unfold the batter evenly within the pan and bake at 350°F (180°C) for 11 minutes or till golden and agency to the contact. Faucet the recent cake pan on the counter a number of occasions to launch steam. Slide the cake onto a rack and flip it. Peel off the parchment paper from the underside of the cake and trim one edge.


- Fill and roll. Whip the cream and sugar till agency. Unfold on the sponge cake base and prepare the fruit in three rows. Roll tightly and wrap in parchment. Cowl with a kitchen towel and chill for no less than 1 hour.


- Slice and serve. Slice the chilled roll with a pointy knife and serve immediately.

Nami’s Recipe Suggestions
These easy suggestions will enable you make a light-weight and fluffy sponge cake full of a easy, ethereal cream each time.
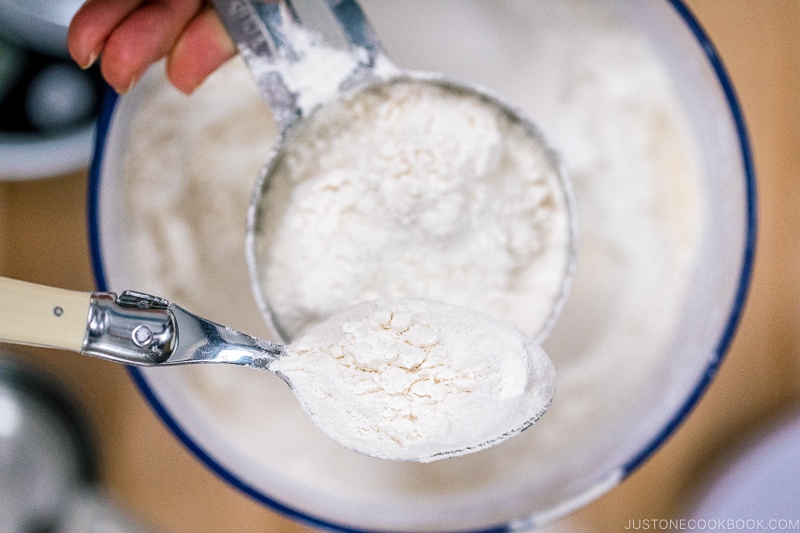
- Weigh your flour. Use a kitchen scale and convert the measurements to grams with the Metric button. In the event you don’t have a scale, see the way to measure flour so that you don’t scoop an excessive amount of.
- Separate the eggs. I take advantage of the separated egg technique for a moister and chewier sponge.
- Partially freeze egg whites. This small trick creates a finer, extra steady meringue. It helps the sponge rise excessive and keep gentle and bouncy.
- Deal with the batter gently. Overmixing deflates the air bubbles. Use a folding movement as a substitute of stirring.
- Trim one edge earlier than rolling. Lower one brief finish at a slight angle. This helps the roll shut neatly and reduces overlap.
- Create flat sides on fruits. Chopping flat surfaces on strawberries and grapes helps them align evenly contained in the roll for the right cross part.
- Chill earlier than slicing. Cooling the roll for no less than an hour permits the cream to set, making it simpler to chop clear, stunning slices.
Variations and Customizations
Seeking to change issues up? Strive these straightforward and engaging concepts!
- Use seasonal fruit: Strive strawberries, kiwi, and peaches in spring; Shine Muscat grapes, mango, or berries in summer time; kyoho grapes or pear in autumn; and canned mandarins or chestnut cream in winter.
- Make it matcha: Change 2–3 tsp (6–8 g) of cake flour with 1 Tbsp (6 g) of matcha powder. Sift the matcha with the flour twice for a easy batter. To stability the flavour, you may add ½–1 tsp further sugar. Use good “culinary-grade” matcha for brilliant shade and clear taste. For matcha whipped cream, sift ½–1 tsp matcha into the cream earlier than whipping.
- Chocolate lover’s model: Change 1 Tbsp (6–7 g) of cake flour with 1 Tbsp unsweetened cocoa powder. (Or maintain the flour the identical and add 1 tsp milk to forestall dryness.) Sift the cocoa with the flour for a easy batter.
- Taste the whipped cream: Add a splash of vanilla extract or a contact of yuzu zest for aroma.
What to Serve with Japanese Fruit Roll Cake


Storage Suggestions
To retailer: Wrap leftovers tightly in plastic wrap, retailer in an hermetic container, and maintain within the fridge for as much as 2–3 days. Slice chilled with a heat, clear knife for neat edges. Don’t freeze the fruit roll cake, because the whipped cream and fruit change texture after thawing. When frozen and thawed, the fruit releases moisture, which may make the entire cake watery.
FAQs
Completely. Kiwi, mango, blueberries, peaches, and bananas work fantastically. Keep away from fruits that launch an excessive amount of moisture, like watermelon, or are too agency to slice simply.
Overbaking can dry out the sponge cake. Additionally, roll the cake whereas it’s room temperature and versatile to forestall cracking. When the cake will get too chilly, it cracks extra simply.
You may make this recipe utilizing an electrical hand mixer, a big mixing bowl, and a medium mixing bowl.
Sure, you may scale back the sugar barely, however don’t go away it out fully.
Fruit roll cake doesn’t freeze nicely. When frozen and thawed, the fruit releases moisture, which may make the entire cake watery.
I’d love to listen to how yours turned out! 💛 Please go away a star score and remark beneath to share your expertise. Your suggestions not solely helps Simply One Cookbook but additionally helps different house cooks uncover recipes they will belief.
Stop your display screen from going darkish
-
Earlier than You Begin: I encourage you to weigh your components utilizing a kitchen scale. For weights, click on the Metric button above to transform the measurements to metric. If you do not have a scale, here is the way to measure flour with a measuring cup to keep away from scooping an excessive amount of: Fluff the flour with a spoon, sprinkle it into the cup, and degree it off. Collect all of the components. Nami’s Tip: If it takes you a very long time to chop fruit, contemplate slicing it forward of time, as we won’t let the cake cool for too lengthy.
-
Preheat the oven to 350°F (180°C). For a convection oven, scale back the cooking temperature by 25°F (15°C). Begin boiling a kettle of water.Line a 15 x 10-inch (38 x 25 cm) jelly roll pan with parchment paper so it matches snugly within the corners and on the underside. Go away some overhang on the sides so the paper is simple to peel off later.
To Combine the Yolks and Butter
-
Place 2½ Tbsp unsalted butter in a small microwave-safe bowl and heat it within the microwave till tender and liquid.
-
Don’t let it cool. To maintain it heat, add about 1 inch (2.5 cm) of scorching water (140°F/60°C) to a barely bigger bowl, then set the butter bowl on high to nest within the water.
-
Separate the yolks and whites of 4 massive eggs, if you have not already. Add 4 massive egg whites to a clear, dry stand mixer bowl, then place the bowl within the freezer till the whites are partially frozen (simply barely icy), about 15–20 minutes.
-
In a separate medium bowl, evenly beat 4 massive egg yolks with a whisk. Add 3 Tbsp sugar and blend nicely.Nami’s Tip: Don’t let the sugar sit on yolks—whisk it immediately. Sugar pulls water out of the yolks, forming grainy, yellow lumps that do not dissolve, leading to a denser cake with tiny specks within the sponge.
-
To create a double boiler, pour about 1 inch (2.5 cm) of scorching water (140°F/60°C) into a bigger bowl. Set the bowl with the yolk combination on high. Stir till the sugar dissolves, then whisk vigorously till the combination is pale, barely thick, and falls in ribbons from the whisk. Nami’s Tip: Warming the yolks helps dissolve the sugar, traps tiny air bubbles, and loosens the yolks so your sponge cake bakes up lighter, smoother, and extra versatile for rolling.
-
That is the ribbon stage. The yolk combination ought to attain about 100°F (40°C). Add the nice and cozy melted butter and whisk till totally mixed. Take away the bowl from the double boiler.
To Make the Meringue
-
Set the bowl with the partially frozen egg whites in a stand mixer fitted with a whisk attachment (or use a mixing bowl and handheld electrical mixer). Begin mixing on low pace (Velocity 2), then progressively improve to medium pace (Velocity 4) till egg whites change into foamy. Nami’s Tip: Partially freezing egg whites helps them whip quicker and create finer, extra steady bubbles, leading to a smoother, fluffier meringue.
-
Swap to medium-high pace (Velocity 6) and progressively add 3 Tbsp sugar in three additions, beating nicely after every till included.
-
Sprinkle within the final addition and proceed whipping till stiff peaks kind. To verify, carry the whisk—the meringue ought to maintain a peak that stands straight up or bends barely on the tip and appears shiny. Decrease the pace to “Stir” for a number of seconds to easy the feel.
To Fold the Batter
-
Add one-quarter of the meringue to the yolk combination and gently fold it in with a whisk till included.
-
Sift ⅓ cup cake flour by a fine-mesh sieve into the bowl of batter. Gently combine with the whisk till the flour is included and no dry spots stay.
-
Gently fold the remaining meringue into the batter with a silicone spatula, utilizing a cutting-and-folding movement till no streaks stay. Nami’s Tip: Rotate the bowl one-quarter flip counterclockwise whereas scooping and folding clockwise till simply included.
To Bake
-
Pour the batter into the ready pan and unfold it evenly with a pastry card or offset spatula.
-
Work it into the corners and easy out the highest. Watch out to not overwork the batter, as this could deflate the air bubbles.
-
Bake within the preheated oven at 350°F (180°C) for 10–12 minutes, till edges are evenly golden and high is agency to the contact, springing again when gently pressed.Nami’s Tip: Regulate the baking time as wanted to your oven. Since each oven heats in another way, begin checking across the 9-minute mark.
-
Take away the pan from the oven and faucet it a number of occasions on the counter to launch any steam.
To Unmold the Cake
-
Whereas the pan is scorching, pull the shorter aspect of the parchment overhang to slip the sponge cake onto a wire rack. Let it cool barely. When the floor feels dry to the contact and no heat air comes off the cake, place a brand new sheet of parchment paper on high.
-
Place one other rack over the cake and flip it over so the underside of the cake faces up. Fastidiously peel off the parchment paper. Keep away from pulling from one nook solely, because the cake could tear close to the top. As a substitute, gently loosen the paper from every nook towards the middle. Cowl loosely with parchment or a clear kitchen towel to maintain it from drying. Don’t overcool or refrigerate—the sponge cake cracks extra simply when chilly.
To Put together the Fruit
-
Whereas the cake is cooling, put together the fruit of your selection; here is the way to put together strawberries, grapes, and an orange. Lower off the tops and suggestions of 10 strawberries to create flat surfaces. Line them up finish to finish so the lower surfaces contact. You will want about 10 inches of strawberries.Nami’s Tip: Flat-cut surfaces assist the fruit line up straight with out gaps to create a gorgeous cross part once you slice the cake.
-
Likewise, lower off each ends of 12 Muscat grapes. Line them up finish to finish so the lower sides contact. You will want about 10 inches of grapes. Nami’s Tip: Place a paper towel beneath to soak up extra moisture.
-
Lower off and discard each ends of 1 orange. Then, take away the peel with a knife. Lower out the orange segments, leaving the membranes behind. Line them up finish to finish. You will want about 10 inches of orange segments (I used half an orange).
To Make the Whipped Cream
To Assemble the Fruit Roll Cake
-
When the filling is prepared, place a barely damp towel or nonstick silicone baking mat underneath the parchment paper with the cake on high. This can assist forestall the paper from slipping.Utilizing a pointy knife, diagonally trim about ½ inch (1.3 cm) off one brief finish of the cake to cut back overlap when rolling.
-
Utilizing an offset spatula, unfold a skinny layer of whipped cream to inside ½ inch (1.3 cm) of the cake’s edges. Unfold it thicker on the entrance (beginning brief edge) and thinner towards the perimeters and again (ending edge). This helps forestall the cream from shifting once you roll.
-
Prepare the fruit in three rows. Line up the strawberries about 1 inch away from the cake’s entrance edge. Subsequent, prepare a row of grapes ½ inch behind the berries and the orange segments about 1 inch behind the grapes. Press the fruit gently into the cream.Nami’s Tip: Place agency fruits, like strawberries or bananas, on the entrance of the roll to assist kind the core.
-
Beginning on the strawberry edge, use the parchment to carry and roll the cake over the filling.
-
Make a small, tight roll, ending seam aspect down. If there are any gaps or extra cream on the perimeters, easy them out with an offset spatula. Utilizing an extended ruler, tuck the highest sheet of parchment underneath the roll, then proceed rolling it tightly within the remaining parchment to safe the form and maintain the filling inside.
-
Fold each ends closed, then wrap the roll cake in a kitchen towel. Chill within the fridge with the cake’s seam aspect down for no less than 1 hour to agency up. Nami’s Tip: Mark the seam aspect so you already know which aspect ought to relaxation face down within the fridge.
To Serve
-
Unwrap the roll cake. For a fairly presentation, slice ½ inch (1.3 cm) from each ends to indicate the attractive swirls.
-
Use a heat knife to slice neat items, wiping it clear between cuts (dip in scorching water and dry). Switch to dessert plates and serve.
To Retailer
-
Wrap leftovers tightly in plastic wrap, retailer in an hermetic container, and maintain within the fridge for as much as 2–3 days. Fruit roll cake doesn’t freeze nicely. When frozen and thawed, the fruit releases moisture, which may make the entire cake watery.
Did you make this recipe?
Tag @justonecookbook on Instagram so we are able to see your scrumptious creation!