

 唐揚げ • Simply One Cookbook")
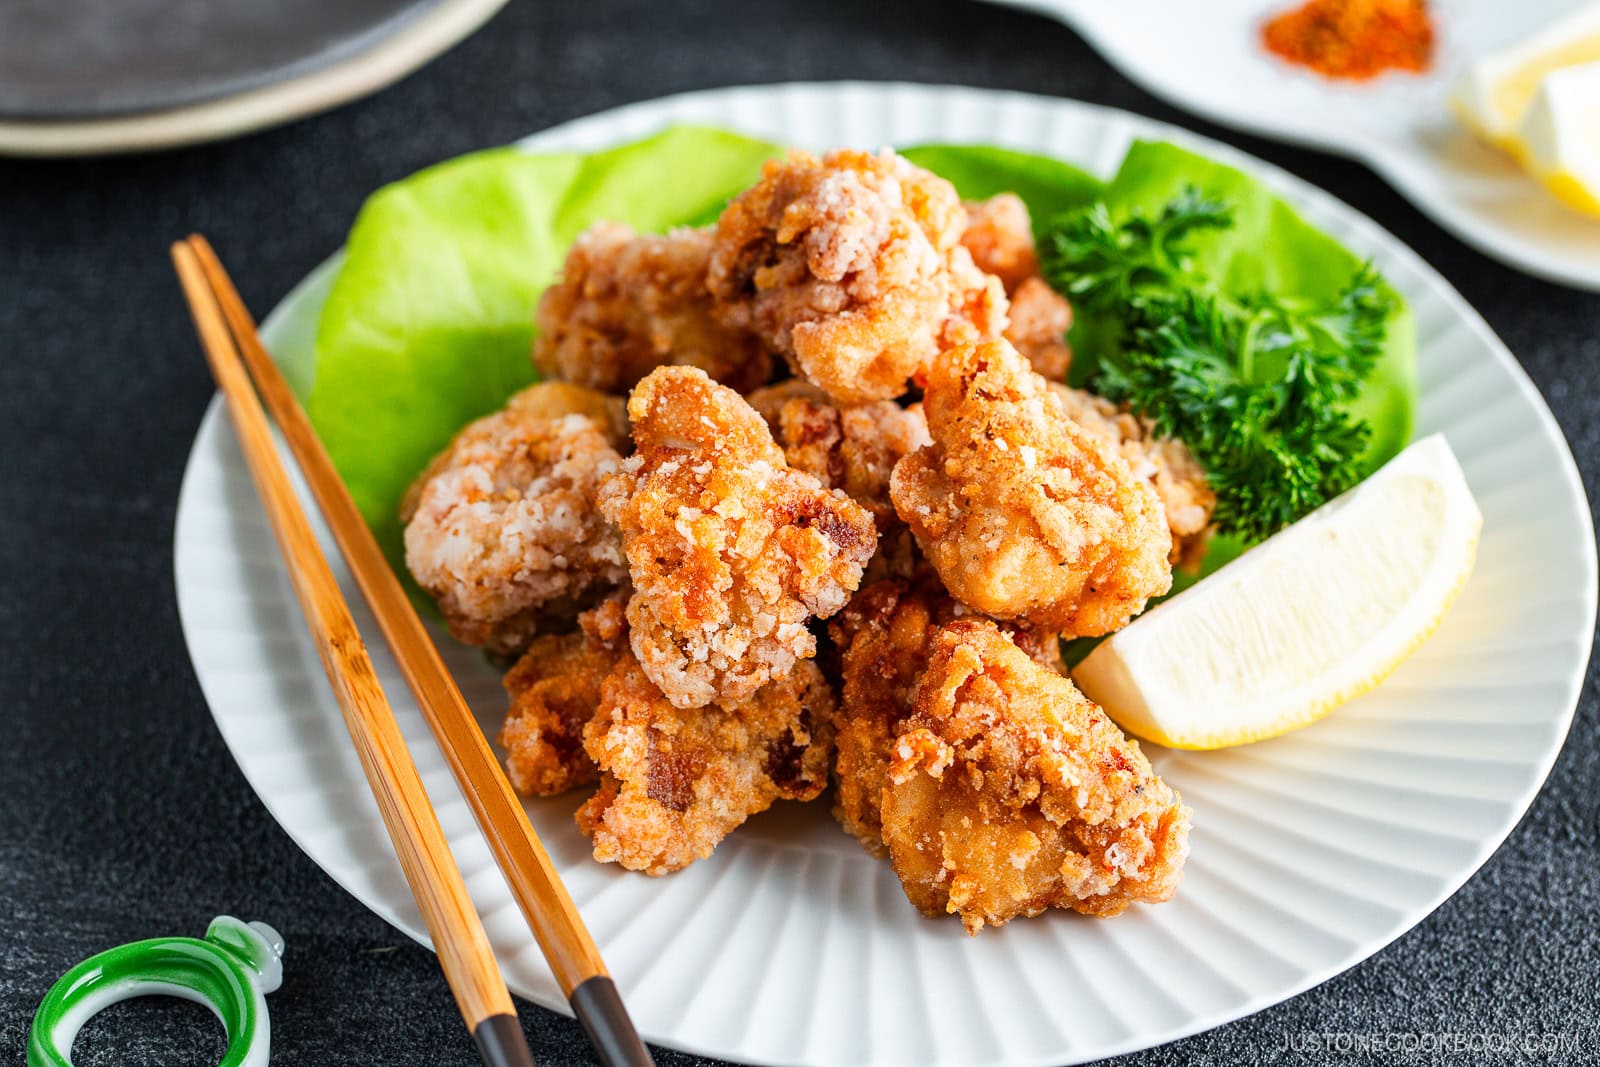
Discover ways to make the most effective Karaage (Japanese Fried Hen) with tender rooster thighs marinated in aromatics and twice-fried till golden brown. They’re juicy and ultra-crispy, and I’ll share my easy methods for wonderful outcomes.
I grew up consuming karaage, Japan’s beloved fried rooster. It’s a timeless dish discovered in all places—from dwelling kitchens and bento lunch bins to road stalls and household diners. My mother typically made it after we had company over, and I’ve been chasing that reminiscence ever since—making an attempt to recreate her model with completely crisp pores and skin and tender, juicy meat. It’s the sort of dish you’ll need to take pleasure in wholeheartedly and with out hesitation.
If you happen to’re craving extra fried rooster, strive my Fried Hen Wings, Nagoya Type Fried Hen, or Hen Nanban subsequent!
What’s Karaage?
Karaage (唐揚げ) is a Japanese cooking technique the place we coat meat or veggies in flour earlier than deep-frying. Whereas technically something may be ready on this model, the time period is primarily related to Japanese fried rooster. Karaage is a staple appetizer in Japanese gastropubs (izakaya) and ramen retailers and a fundamental dish in bento field lunches and Japanese home-cooked meals.
Why I Love This Recipe
- Golden crust and succulent middle – The method I share ensures a crispy crust and extremely moist and tender meat.
- Deceptively straightforward – If you happen to ever thought frying rooster was daunting, this dish will persuade you in any other case.
- Excellent for internet hosting – We sometimes serve karaage as a fundamental dish and different dishes for events.
Substances for Karaage
- Hen thighs – boneless and skin-on
- Kosher salt and black pepper
- Ginger
- Garlic
- Soy sauce
- Sake
- Toasted sesame oil
- Impartial oil – learn my put up on the Finest Impartial Oil for Cooking
- Potato starch – or cornstarch
- All-purpose flour
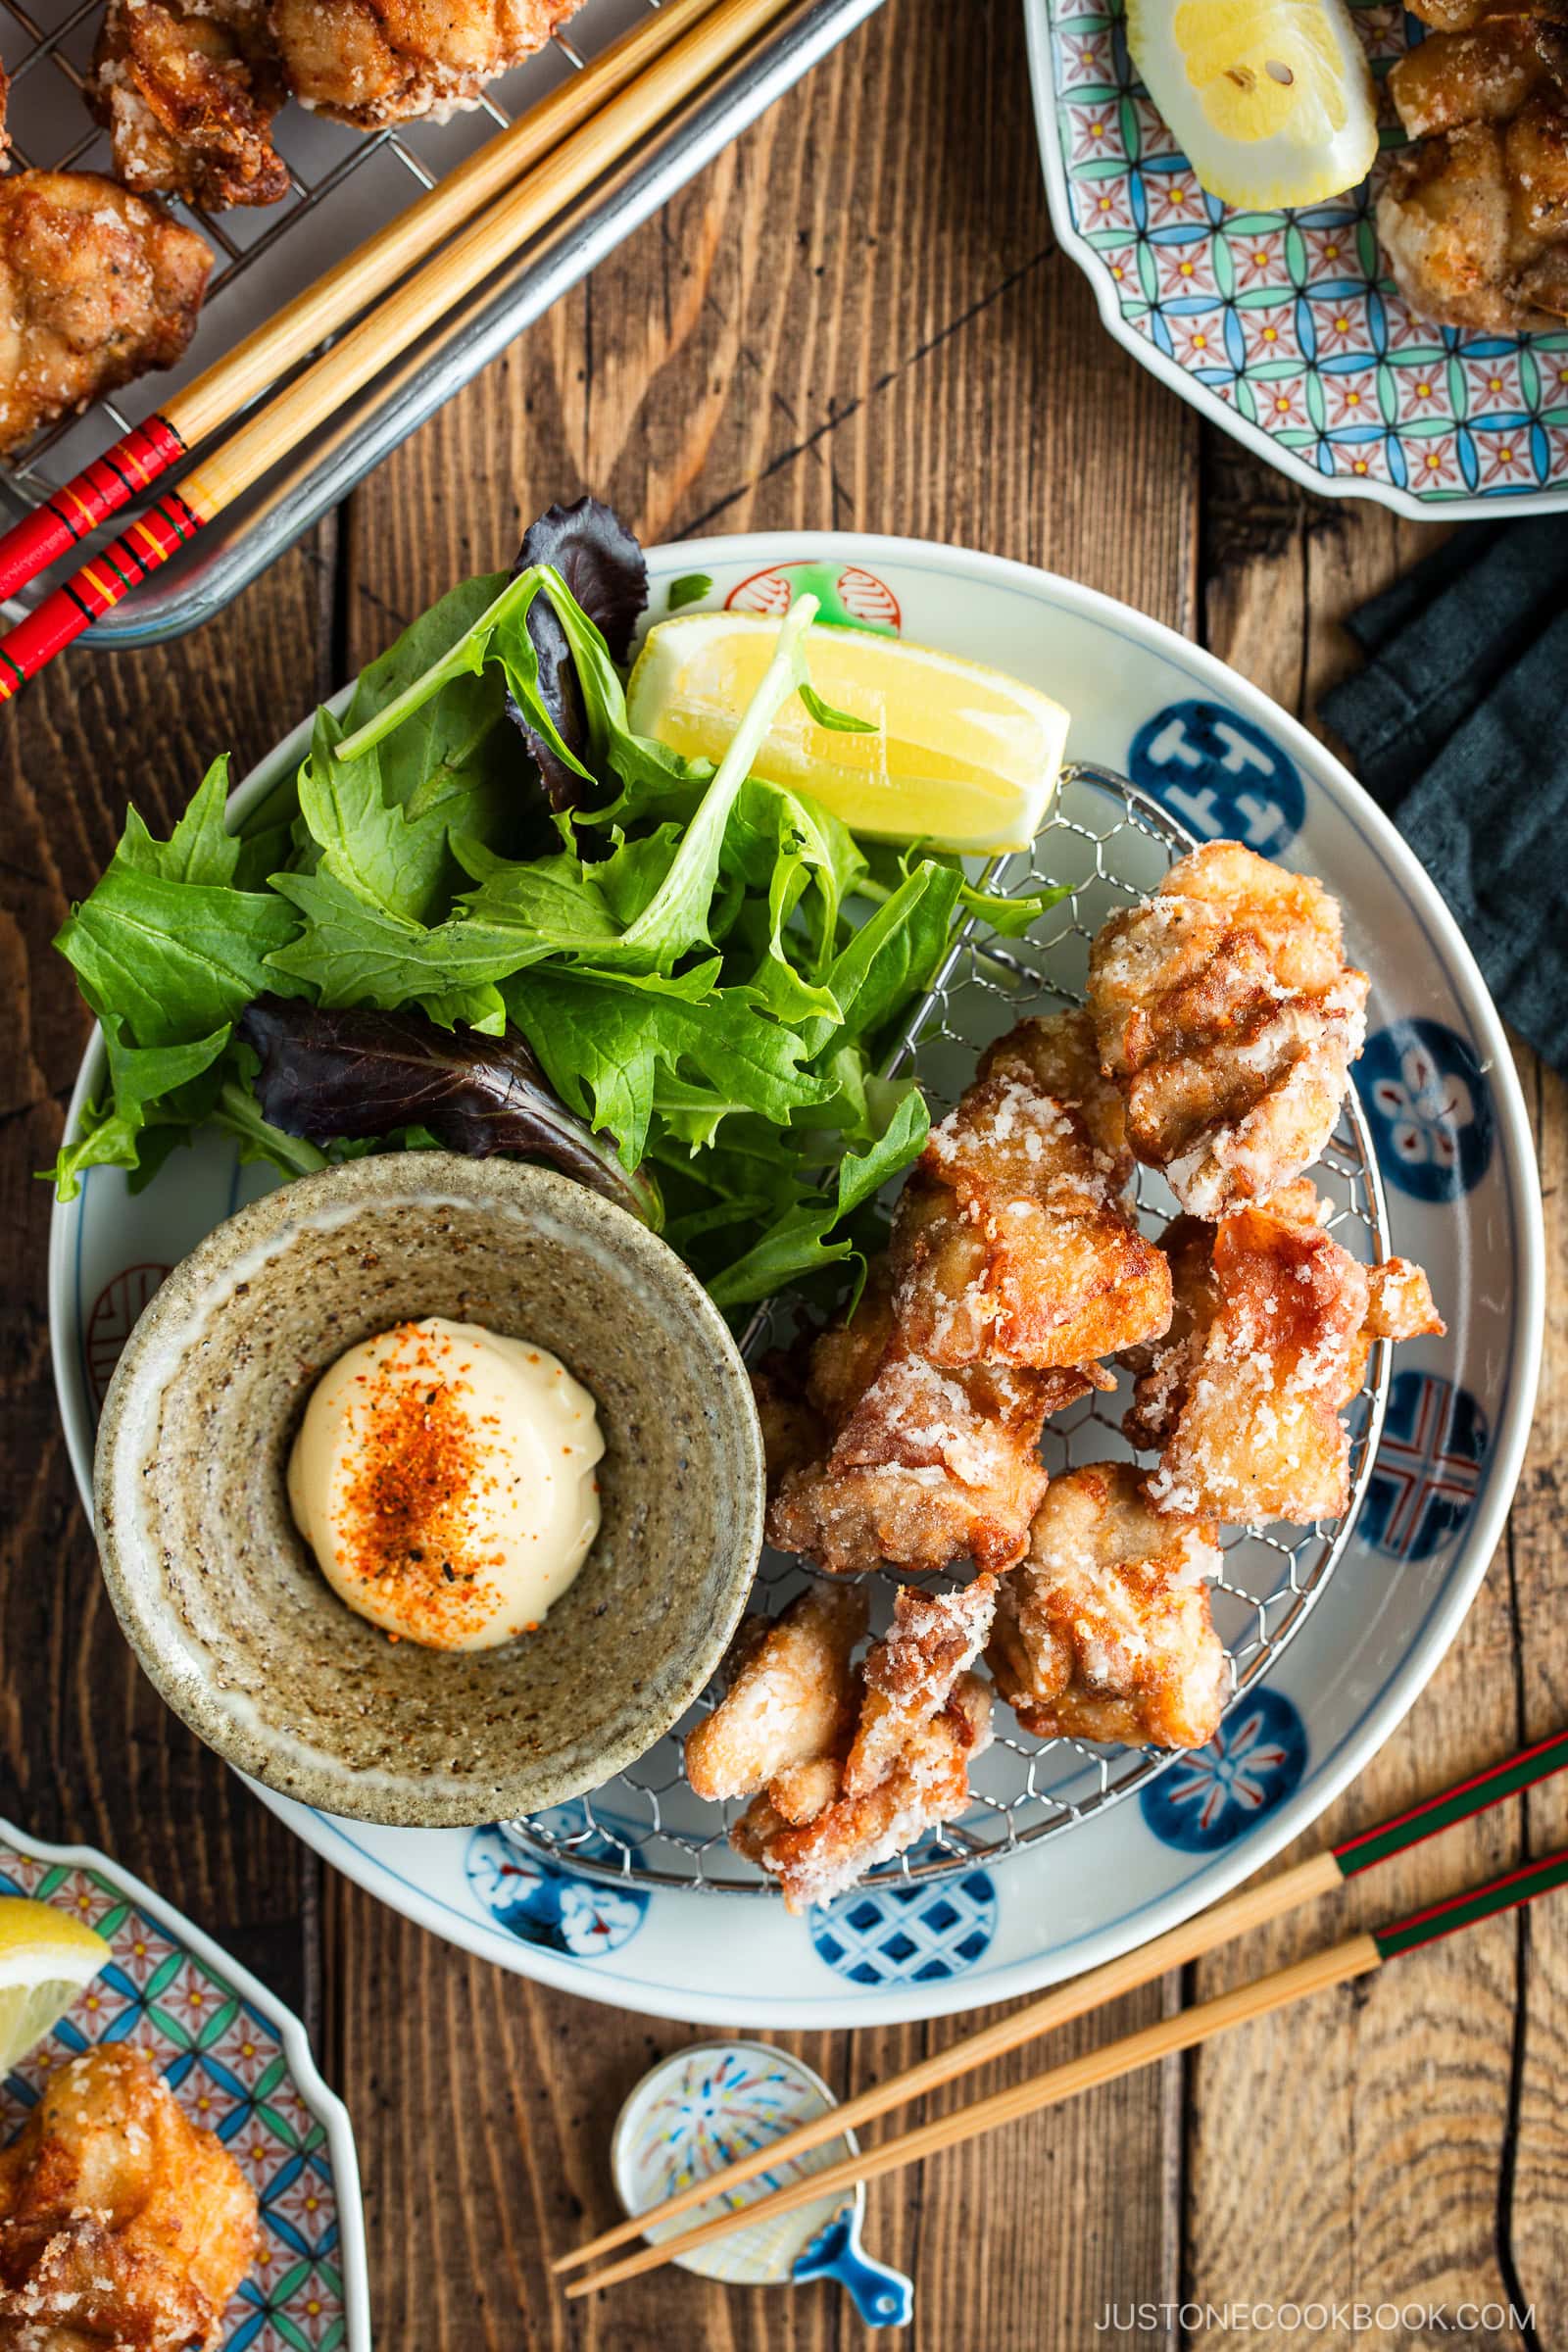
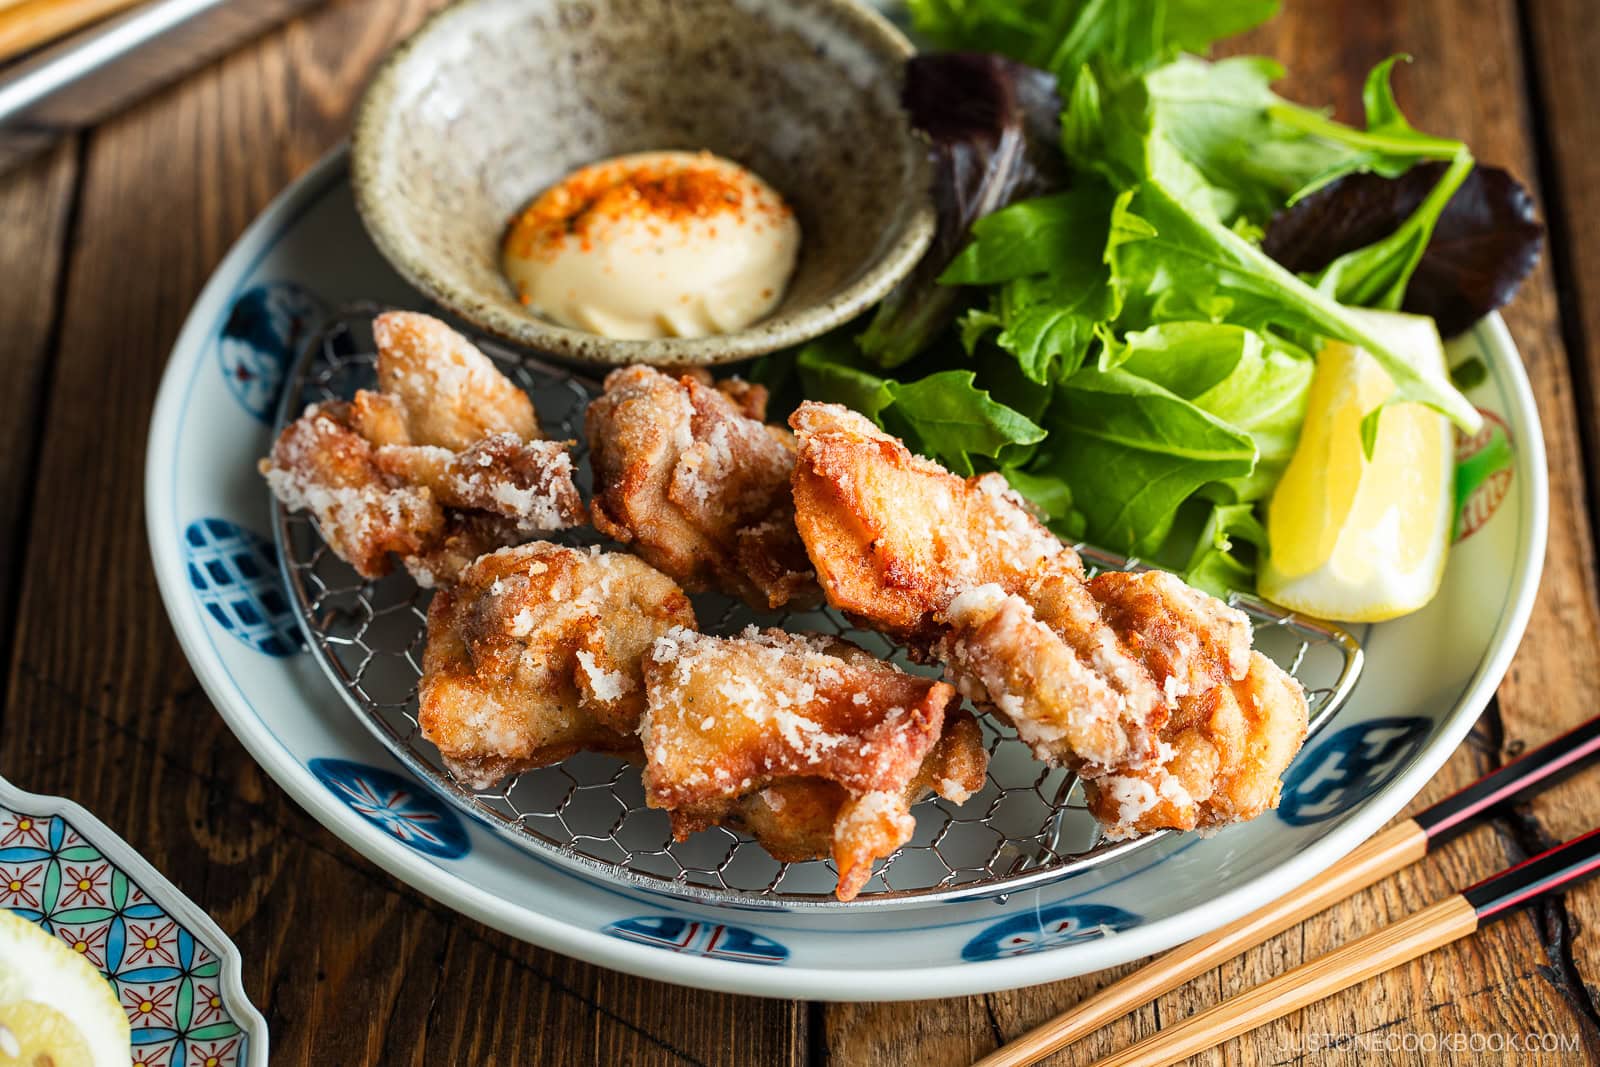
- Lemon wedges, Japanese Kewpie mayonnaise, and shichimi togarashi (Japanese seven spice) – optionally available toppings and garnishes
Discover the printable recipe with measurements under.
Substitutions
- Hen thighs: I’ve discovered that boneless, skin-on rooster thighs ship the most effective outcomes—the pores and skin turns fantastically crispy whereas retaining the meat tender and juicy. That stated, skinless thighs work too, in the event you desire. In case your rooster thighs come bone-in, you’ll be able to ask your butcher to take away the bones or do it your self at dwelling with a pointy knife.
- Sake: If you happen to can’t discover this, I like to recommend utilizing dry sherry or Chinese language rice wine as an alternative, or skip it.
- Potato starch: You may additionally use rice flour or corn starch as an alternative. I’ve not examined this dish with tapioca starch, however please let me know the way it seems in the event you strive it.
- All-purpose flour: For gluten-free, substitute with one of many starches as an alternative.
How one can Make Karaage
Preparation
Step 1 – Put together the rooster. Slice the rooster thighs into 2-inch items and season with salt and pepper. Place it in a big bowl.


Step 2 – Marinate. Add the grated ginger, garlic, soy sauce, sake, and sesame oil to the bowl. Toss to coat, cowl the bowl, and marinate within the fridge for half-hour.


Step 3 – Warmth the oil. Add oil to a deep pot over medium warmth and preheat to 325ºF (160ºC).


Step 4 – Dredge the rooster. Place the flour and starch in separate piles on the shallow plate. Dredge the rooster within the flour, then the starch. Repeat with the remaining items.


Cooking
Step 5 – Fry in batches. Submerge a number of rooster items within the sizzling oil and fry for 90 seconds. Switch the rooster to a wire rack to empty the surplus oil. Repeat with all of the rooster.


Step 6 – Fry a second time. Elevate the oil temperature to 350ºF (180ºC) and fry the rooster once more for 45 seconds, then return to the wire rack, and repeat with the entire items.


Assemble
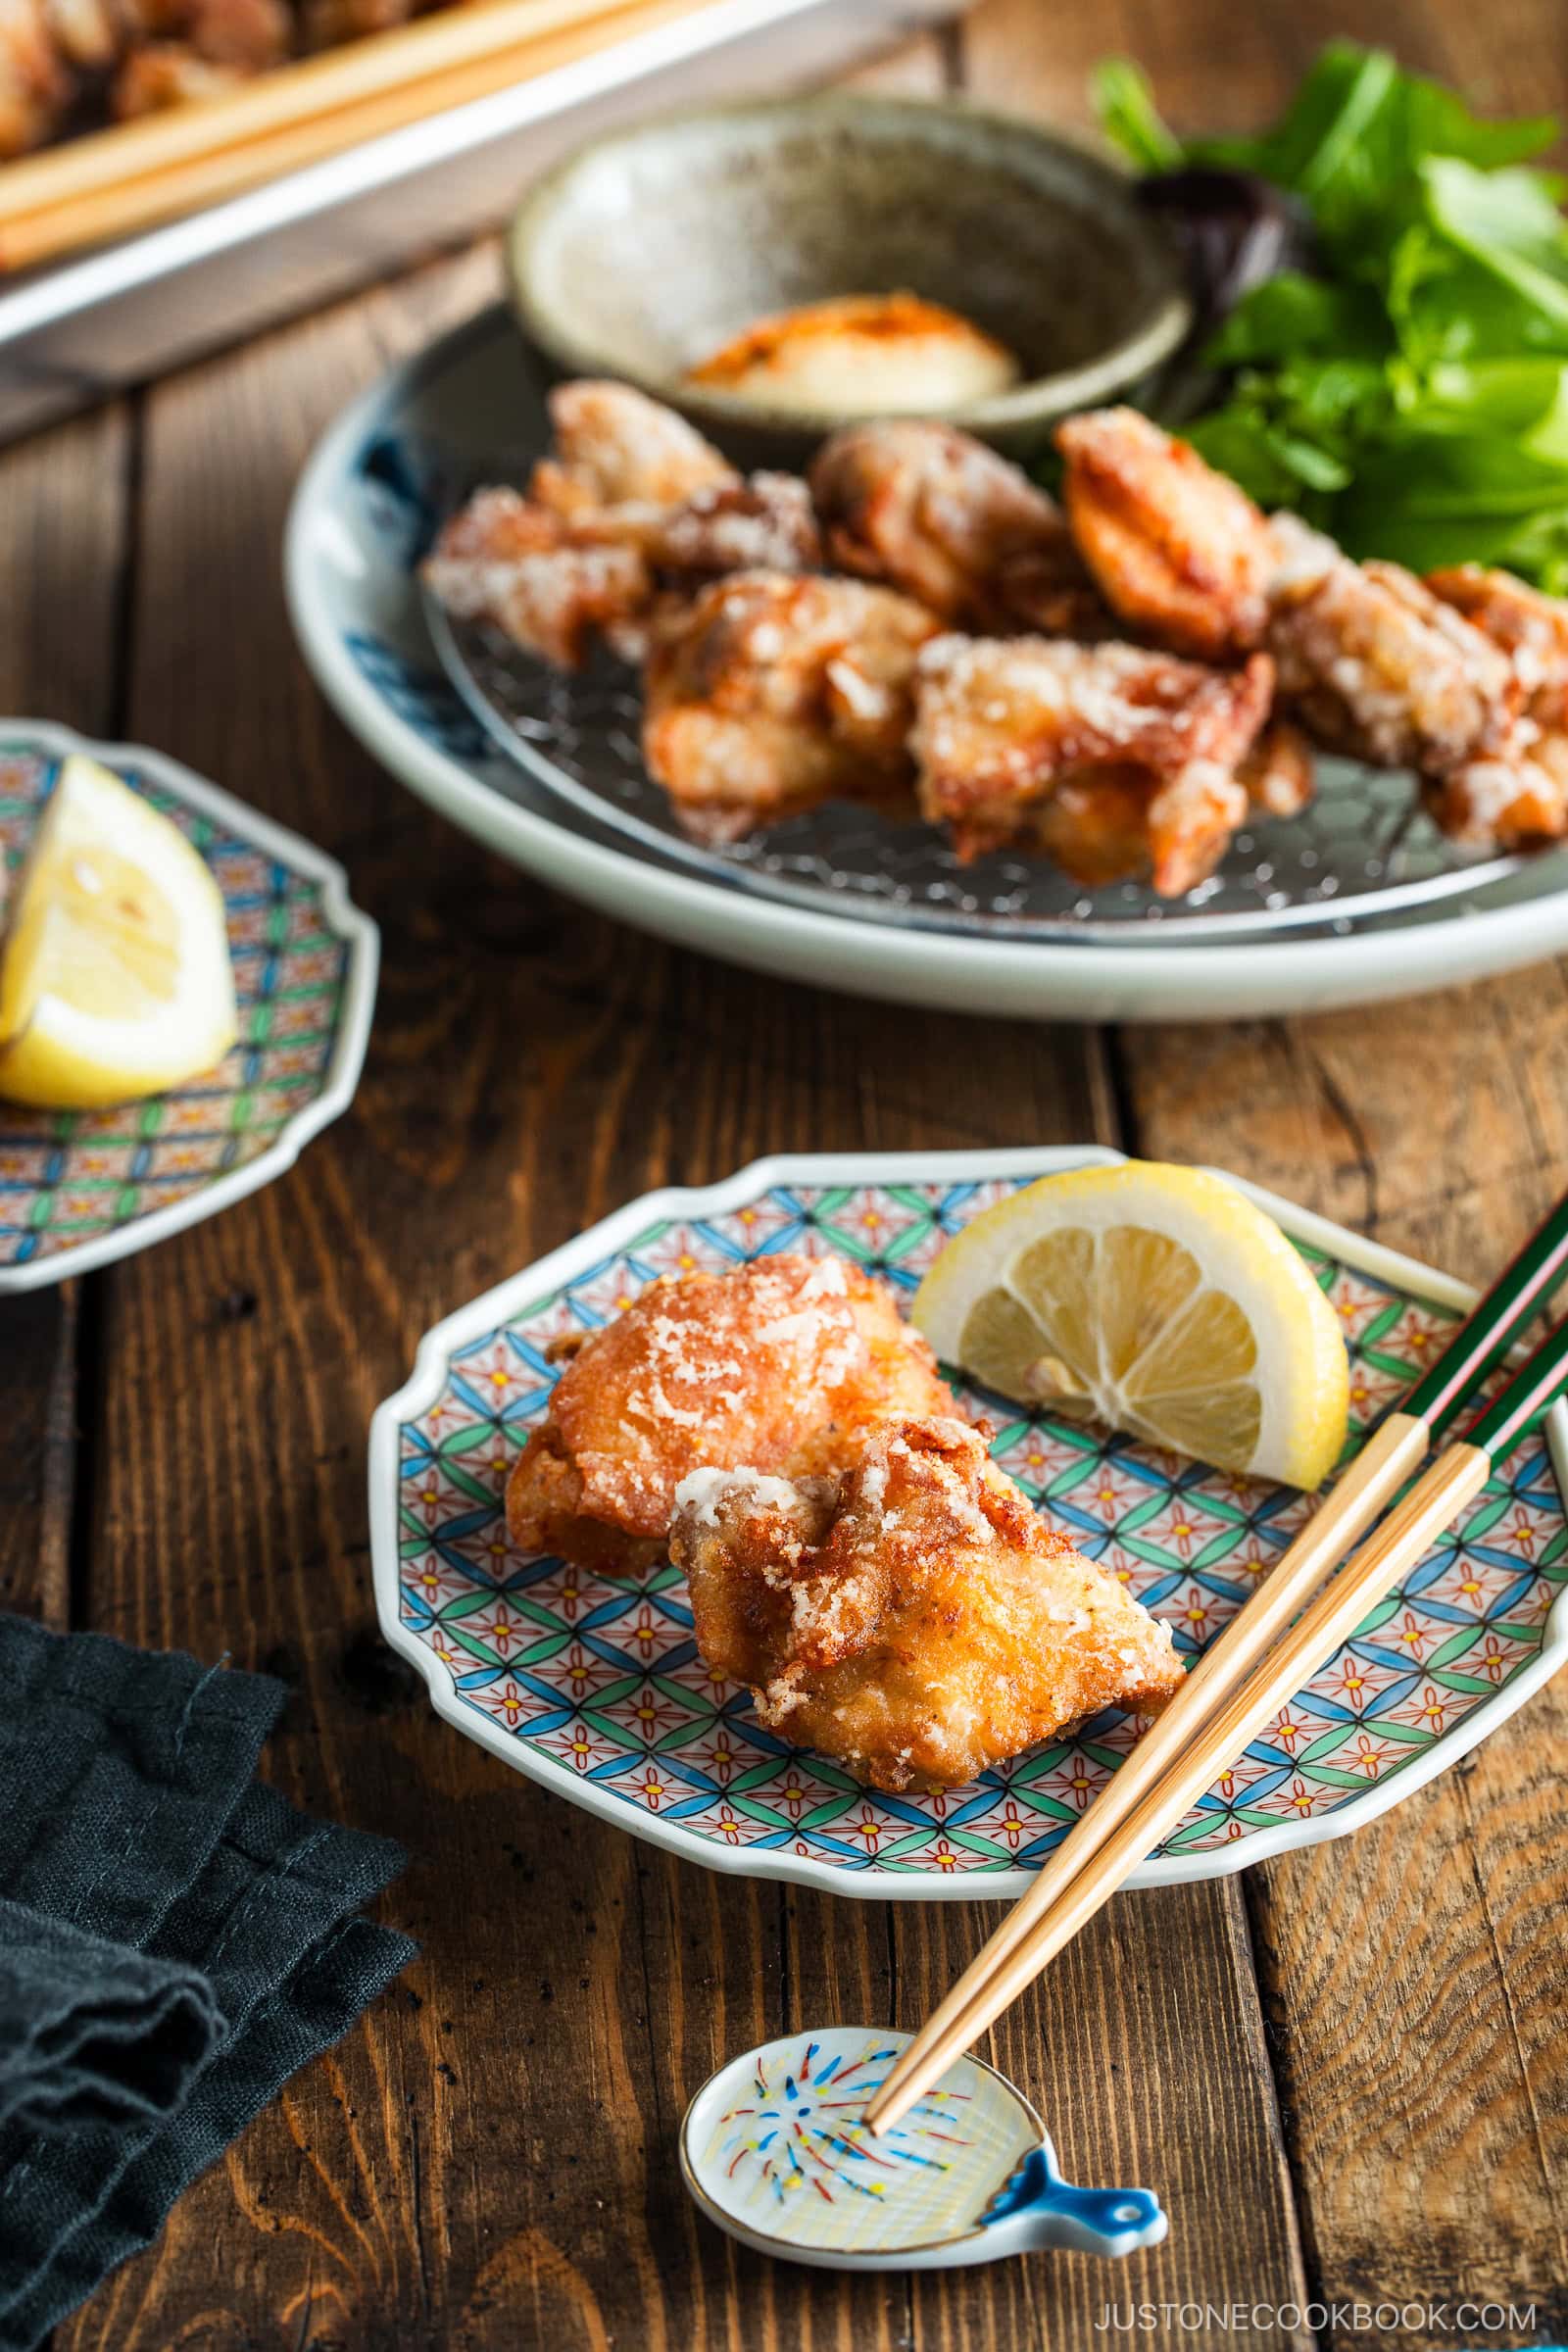
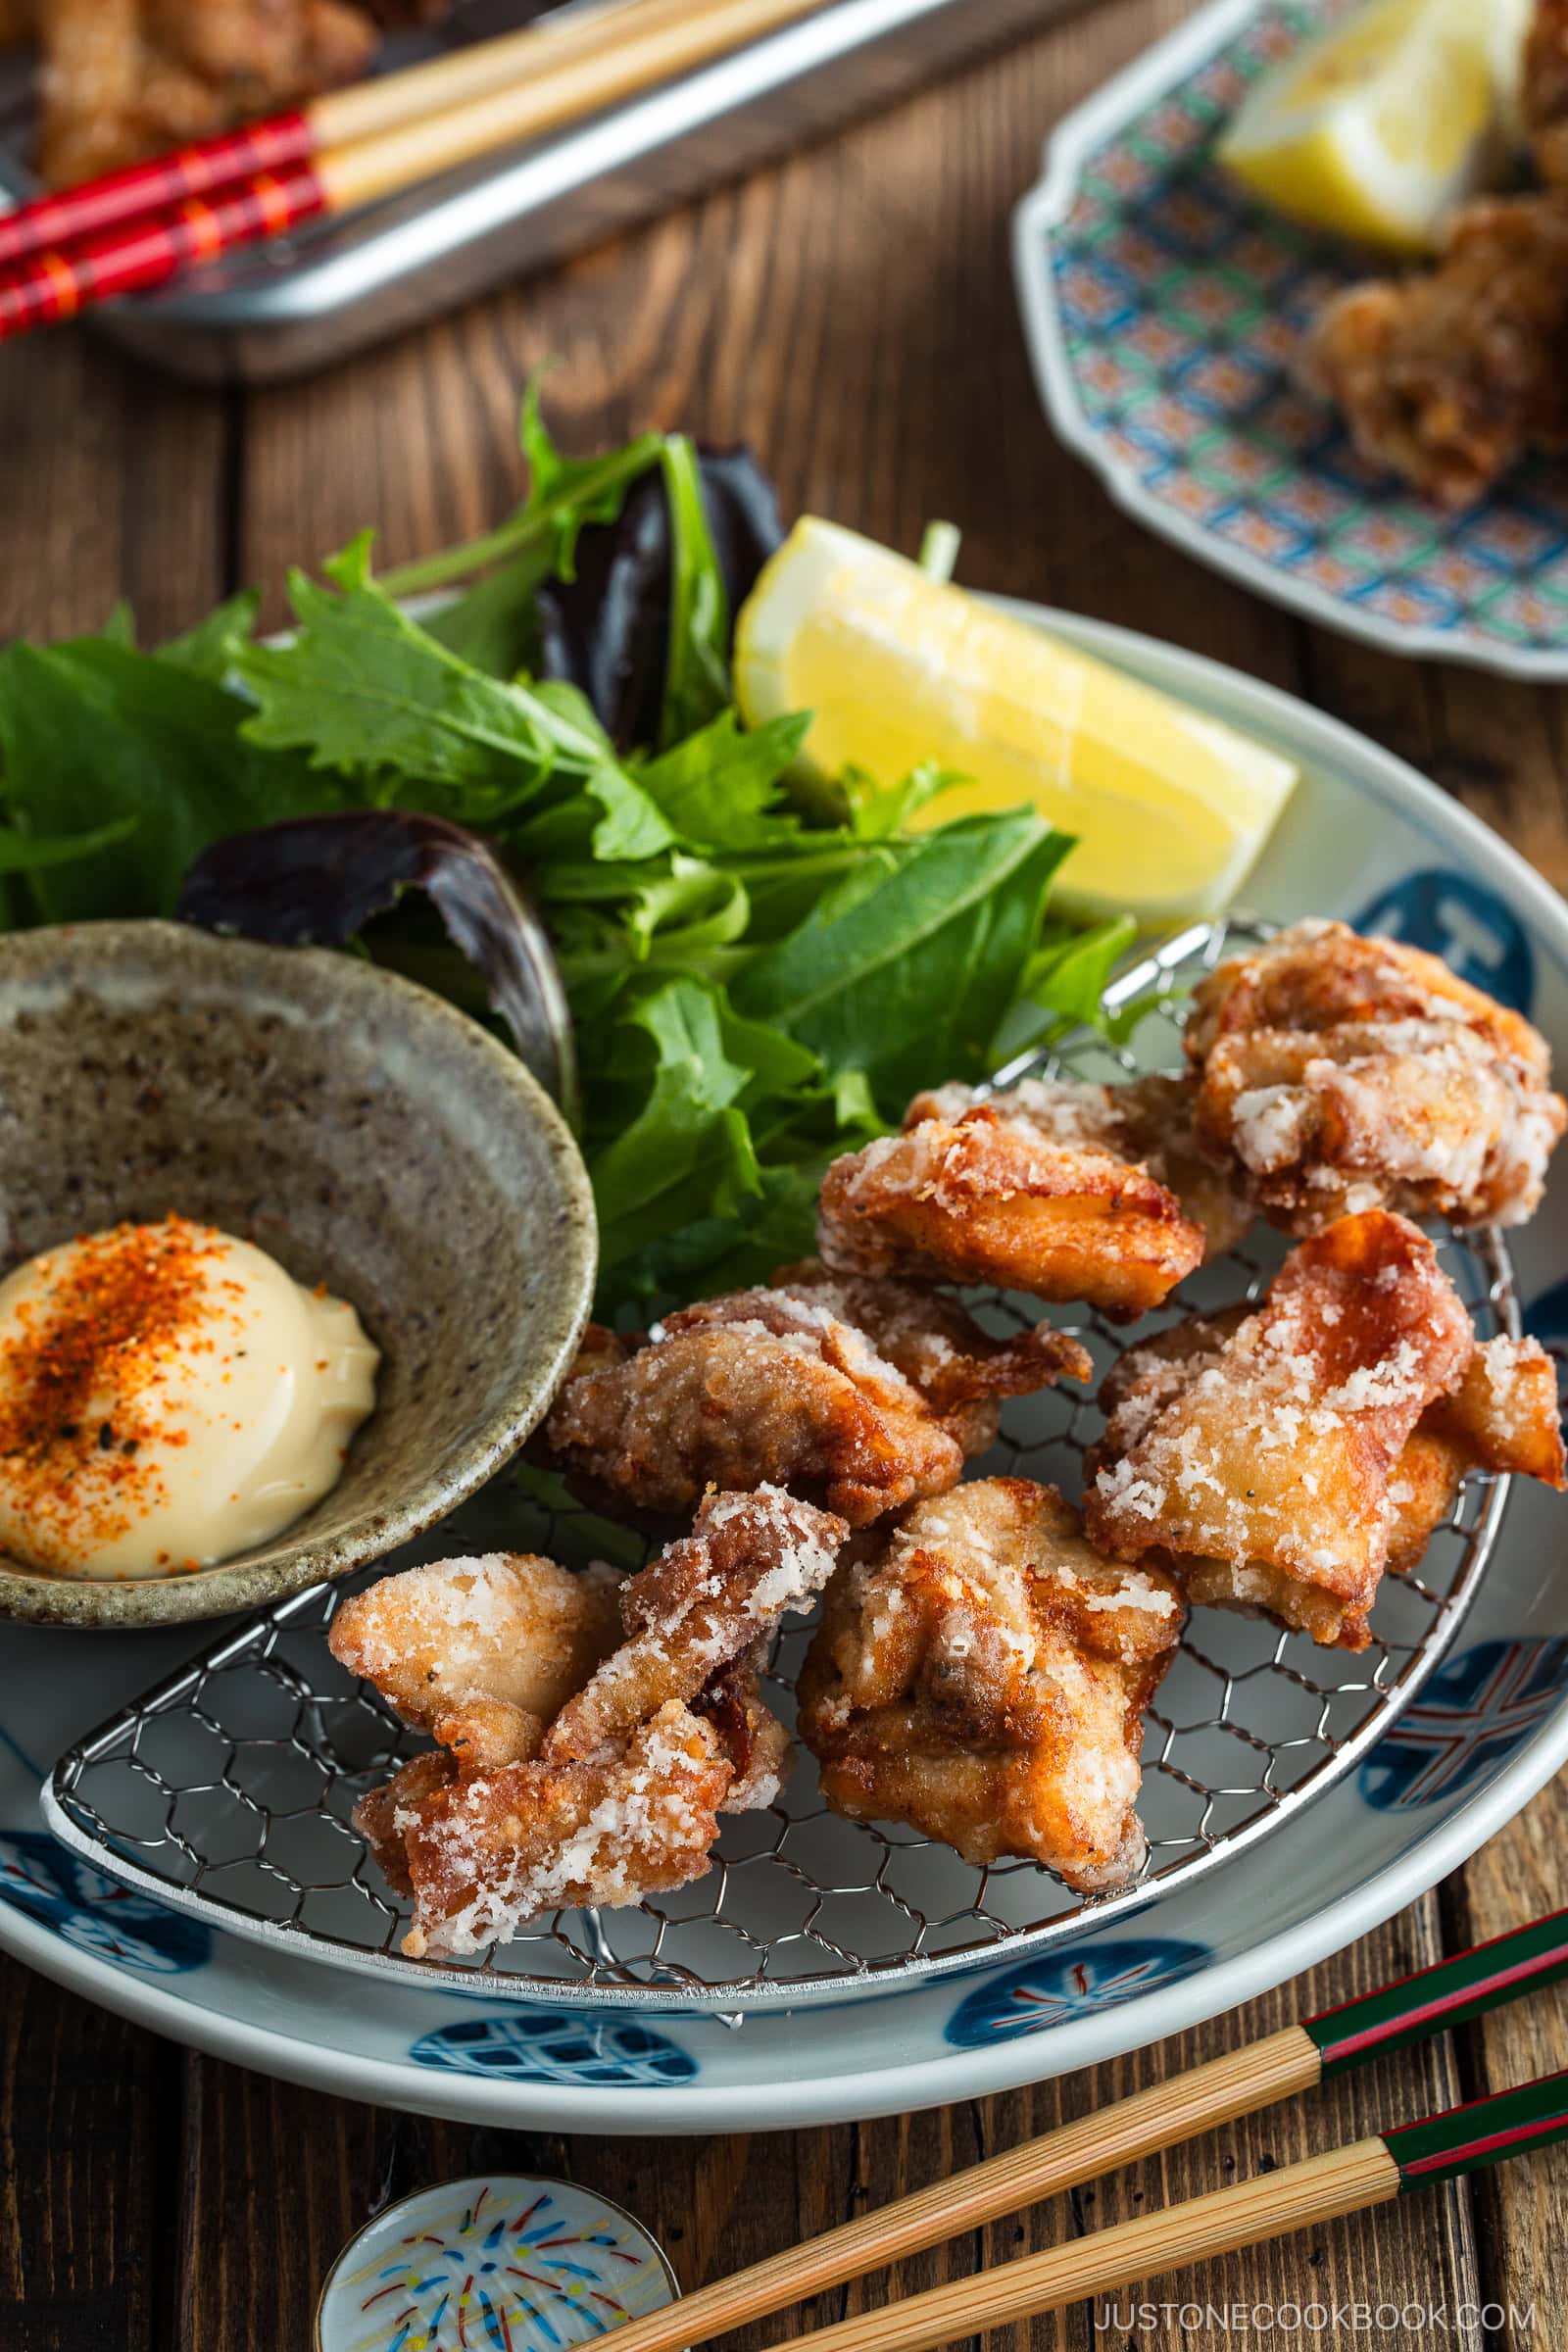
Step 7 – Serve. Serve the fried rooster heat with optionally available lemon wedges, Japanese Kewpie mayo, and a sprinkle of shichimi togarashi.


Nami’s Recipe Ideas
- Reduce the rooster into evenly sized items – This helps make sure that all of the items prepare dinner on the similar price. When the rooster is uniform in dimension, you keep away from undercooking some items whereas overcooking others.
- Don’t marinate too lengthy – I’ve discovered that half-hour is right for the rooster to soak within the flavors.
- Evenly coat in flour – Earlier than frying, I counsel calmly shaking the rooster to take away the surplus flour, which might make the oil cloudy and compromise the rooster’s texture.
- Don’t crowd the pot – There ought to solely be 3–5 items of rooster within the pot at one time. Any extra and the oil temperature will drop, inflicting the rooster to soak up an excessive amount of oil. For extra useful suggestions, see my put up How one can Deep-Fry Meals at House.
Variations and Customizations
Like many variations of fried rooster, my recipe has numerous room to change and alter to your preferences. Listed below are a few of my recommendations.
- Use different cuts of rooster. Though they’re much less flavorful and juicy, rooster breasts would work on this recipe. Keep in mind that rooster breasts prepare dinner extra shortly than thighs, so cut back the frying time by 15–20 seconds.
- Make it gluten-free. Attempt my Gluten-Free Karaage recipe, which is simply as scrumptious.
What to Serve with Karaage

Storage and Reheating Ideas
To retailer: Enable the rooster to chill utterly, then refrigerate it in an hermetic container for 3–4 days or freeze it for as much as 3–4 months.
To reheat: Reheat leftovers within the oven at 350°F (180ºC) for 7–8 minutes or till heat and crispy all through.
Regularly Requested Questions
Katsu refers to deep-fried cutlets and generally makes use of panko-breaded rooster breast, whereas karaage makes use of bite-size rooster thighs which might be coated in starch. We serve katsu with a sweet-savory brown sauce known as tonkatsu sauce. For karaage, we normally serve it with Japanese mayonnaise and a squeeze of lemon juice.
Whereas each karaage and tatsuta-age are beloved Japanese fried rooster dishes, they differ barely in preparation and presentation. Karaage is often marinated in a combination of soy sauce, sake, garlic, and ginger, then coated in both flour, potato starch, or a mixture of each earlier than frying. This offers it a golden, rustic look with daring, savory flavors. In distinction, tatsuta-age makes use of an easier marinade—normally simply soy sauce and mirin—which ends up in a barely sweeter style. It’s coated solely in potato starch, giving it a lighter, crispier texture and a pale, nearly powdery end as soon as fried.
Forestall your display from going darkish
-
Earlier than You Begin…Please observe that this recipe requires half-hour of marinating time. Collect all of the elements.
To Marinate the Hen
-
Put together 1½ lb boneless, skin-on rooster thighs by reducing every into 2-inch (5-cm) items. Season with ½ tsp Diamond Crystal kosher salt and ⅛ tsp freshly floor black pepper.
-
Now, grate the ginger (I take advantage of a ceramic grater) and measure ½ tsp ginger (grated, with juice). Add it to a big bowl. Mince or press 1 clove garlic (I take advantage of a garlic press) and add it to the bowl.
-
Add ½–1 Tbsp soy sauce, ½ Tbsp sake, and ½ tsp toasted sesame oil to the ginger and garlic. Whisk to mix.
-
Add the rooster to the marinade and blend it along with your fingers. Cowl and marinate within the fridge for half-hour.
To Preheat the Oil
-
Whereas the rooster is marinating, put together the oil for deep-frying. Pour about 3–4 cups impartial oil right into a heavy-bottomed pot (I like utilizing the 2.75-QT Staub), till you could have at the least 1 to 1½ inches (2.5 to three.8 cm) of oil. Warmth it to 325ºF (160ºC) over medium-low warmth so you could have sufficient time to prep the rooster.
To Coat the Hen
-
In the meantime, dredge the rooster items. Put together separate piles of 2 Tbsp all-purpose flour (plain flour) and 2 Tbsp potato starch or cornstarch in a tray. Evenly coat a chunk of marinated rooster within the flour and dirt off the surplus.
-
Subsequent, dredge it within the potato starch and shake off the surplus. Place it in a separate tray. Proceed with the remaining rooster items.
To Prepare dinner: The First Fry
-
Verify that the oil temperature has reached 325ºF (160ºC). Tip: If you happen to don‘t have an instantaneous learn thermometer, insert a picket chopstick into the oil; you‘ll understand it‘s sizzling sufficient if small bubbles begin to seem across the tip. For extra useful suggestions, see my put up How one can Deep-Fry Meals.When it is prepared, gently add 3 to five rooster items at a time to the recent oil. Don’t overcrowd the pot. Tip: If you happen to add too many items directly, the oil temperature will drop shortly, and the rooster will take in an excessive amount of oil.
-
Deep-fry for 90 seconds, or till the rooster is a light-weight golden colour. Switch to a wire rack to empty the surplus oil. Tip: If the rooster browns too shortly, then the oil temperature is just too excessive. Both put a number of extra items of rooster within the oil or decrease the warmth setting. Controlling the oil temperature always is essential for deep-frying.
-
The residual warmth will proceed to prepare dinner the rooster because it rests. Proceed to fry the remaining rooster items. Between batches, scoop up and discard the crumbs within the oil with a fine-mesh sieve. This retains the oil clear and prevents it from changing into darker.
The Second Fry
-
Now, increase the oil temperature to 350ºF (180ºC). Place the primary 3 to five items of rested rooster again into the oil and deep-fry for 45 seconds, or till the pores and skin is golden brown and crispy. Switch them to the wire rack to empty the surplus oil. Proceed frying the remaining rooster items.
-
The left picture exhibits the rooster items after the primary fry and the suitable picture exhibits them after the second fry. The rooster items on the suitable are barely darker in colour.
Energy: 531 kcal · Carbohydrates: 8 g · Protein: 29 g · Fats: 42 g · Saturated Fats: 19 g · Trans Fats: 1 g · Ldl cholesterol: 167 mg · Sodium: 254 mg · Potassium: 411 mg · Fiber: 1 g · Sugar: 1 g · Vitamin A: 133 IU · Vitamin C: 1 mg · Calcium: 19 mg · Iron: 1 mg
Editor’s Observe: This put up was initially printed on October 10, 2012, and up to date with new pictures and a video on October 3, 2019. It was republished on April 25, 2025, with extra suggestions and useful data.