

by Chris Arnold

So you obtain an iRoast2, and your roasts are popping out too darkish or too mild, otherwise you really feel the flavour may very well be higher. Perhaps you might be usually completely satisfied, however suppose you would get extra from the iRoast 2. Or perhaps you simply wish to see how others use theirs. Hopefully, we may give you some suggestions that will help you get extra from the ever-popular Hearthware i-Roast2. Please be aware that though this text is written particularly for the i-Roast 2, lots of the rules apply equally nicely to the unique iRoast 1 fashions.
First, we should always say that these Hearthware models are literally fairly low-cost within the grand scheme of issues, and as such, have pretty huge variances between models. Principally, which means that in case your buddy buys an iRoast2, and you purchase an iRoast2, a given profile in your machine will doubtless not produce the identical roast as a given profile on his machine.
Not solely that, however the voltage popping out of the wall at your own home can have a average impact on how your roast seems. And for the reason that voltage in most properties fluctuates on an nearly minute-by-minute foundation, your roast success can rely in some half on conserving that in test and attempting to compensate if attainable. Extra on that later.
A Phrase About Profiles
A profile is just a listing of directions (referred to as phases) programmed into the iRoast2 unit. It tells the unit what temperature you need it to run at, and for what size of time. The unique iRoast permits for five profiles with 3 phases every, whereas the iRoast2 permits for 10 profiles with 5 phases every. One other small be aware: The iRoast 1 will lose any programming you enter when unplugged. This was mounted within the iRoast 2, which alone is cause sufficient to improve to the i-Roast2.
Right here is an instance of a typical 5 stage profile simply to offer you an concept of what a profile would possibly appear to be. This profile additionally contains good notes from earlier roast experiments. (HINT: Take good notes!) You don’t want to make use of all the phases out there, though you would possibly as nicely if they’re there, as it is going to make for a smoother profile.
Pattern Profile 1
Brazil Poco Fundo 115 VAC 5.3 Ounces (150 Grams)
Stopped at Stage 5 with simply 30 seconds left About 15 seconds into 2nd crack
Stage 1 370F 5 Minutes 15 min left
Stage 2 390F 4 Minutes 10 min left
Stage 3 405F 3 Minutes 6 min left
Stage 4 420F 2 Minutes 3 min left
Stage 5 440F 1 Minute 1 min left
COOLING NA 4 Minutes 0 min left
Notice that the temperatures listed above don’t point out the precise temperature of the bean. Don’t fear. We gives you some pattern profiles to get you began.
A Phrase About Voltage
WARNING – YOU CAN DIE IF YOU DO NOT KNOW WHAT YOU ARE DOING. IF IN DOUBT, CALL A LICENSED ELECTRICIAN.
You should use a easy AC Volt Meter to test the AC Voltage. Please see producer directions for protected use. Higher but, you can too use a tool that tells you slightly extra information, and simply plugs proper in.
One such gadget is branded as Kill-a-Watt. Though initially designed to point out you the way a lot vitality and cash you might be utilizing on a given electrical gadget, the Kill a Watt works nice for this utility. The principle benefit is that it simply plugs into the wall outlet and your roaster plugs into the Killawatt. Now you possibly can monitor the voltage in real-time, and see the precise voltage as your roaster is working.

Voltage earlier than Roasting
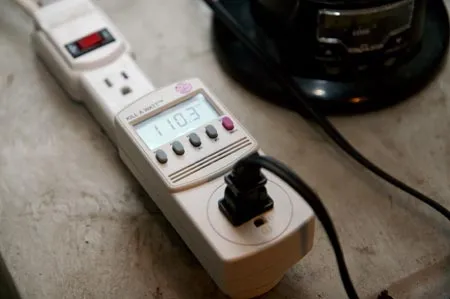
Voltage whereas Roasting
Now you already know the voltage, what are you able to do about it? Properly for one factor you possibly can know {that a} given profile at a given voltage works for a given bean. Subsequent time you go to roast that very same bean with that very same profile, however with a distinct voltage, it is going to doubtless end in a not quite perfect roast. The next voltage often means a sooner/darker roast, and a decrease voltage a slower/lighter roast. There are two options to this downside.
The primary answer entails the usage of one thing referred to as a Variac. We won’t go into element on this article, however a Variac could make the voltage output run at a gentle output, whatever the enter voltage (inside a spread, in fact). Please keep tuned for an upcoming article on Variacs and low roasters.
The second answer entails merely having three or extra profiles to account for voltage fluctuations. Since my voltage fluctuates between 110 and 120 volts, I picked 115 as my baseline and developed a profile for that voltage. I then made one which was slower and ended with a decrease last temperature for the times when the voltage was excessive and one which was sooner and ended with a better last temperature for the times when the voltage was low. In fact, this eats two extra slots in my 10 profile capability iRoast2, however I discovered it was price it. You may additionally discover that totally different retailers have totally different voltages. Typically, it’s only a matter of discovering an outlet that offers you the voltage you might be looking for.
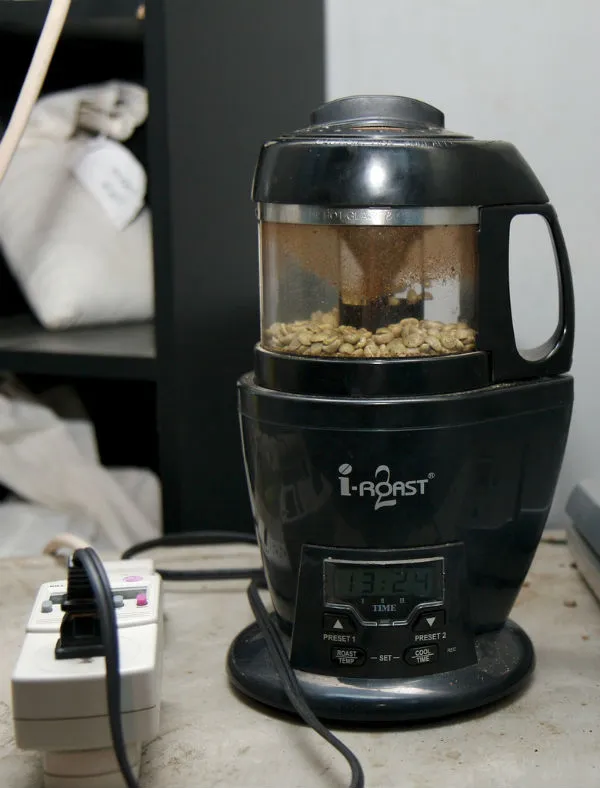
Begin of Roast
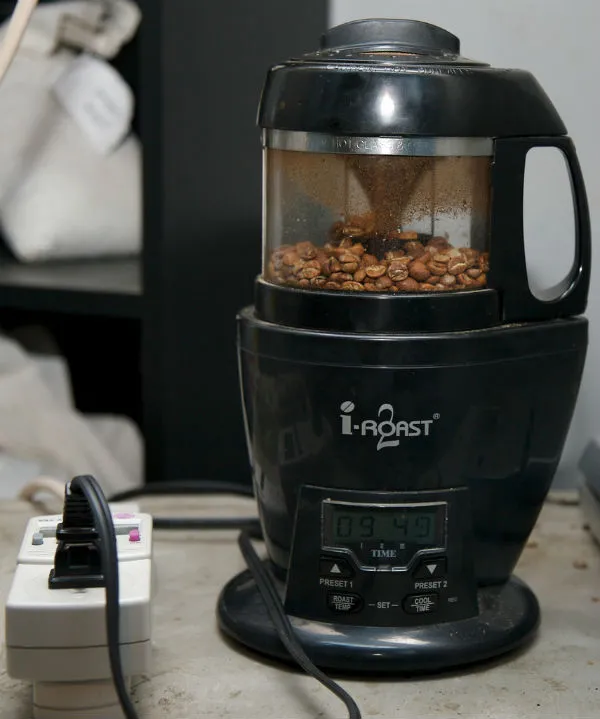
Roast underway
1st Crack
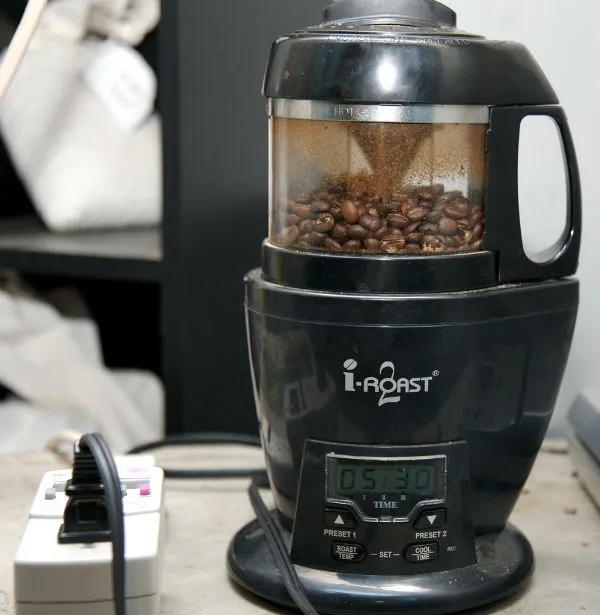
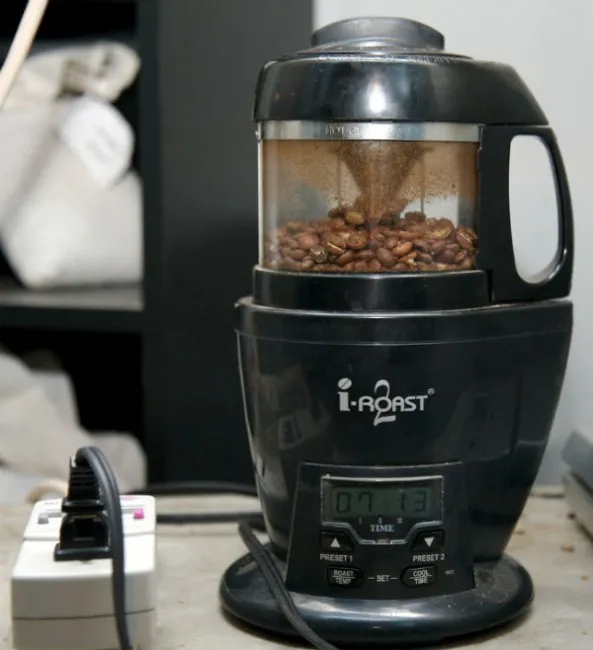
2nd Crack – Roast prepared to finish. Are you able to see what went fallacious right here?
Discover within the final image how there’s 5:30 left and but I’m already within the second crack? Which means now we have a roast that’s lower than 10 minutes. Ideally, you need about 12-Quarter-hour of whole roast time. Why did I’ve an issue? As a result of I had not used this specific bean with this specific profile. So I’ve some work to do! See, it’s OK to fail. You’re going to have much more failures than successes, not less than to start with.
High Ten Suggestions To Profitable Roasting With the IROAST
- Monitor the roast from begin to end as fires can escape.
- Be able to hit the cool button if the roast is getting too darkish or is producing an excessive amount of smoke.
- After each roast, empty the chaff collector very nicely and ensure the display screen is totally freed from particles (use a mushy brush if crucial).
- A darkish roast just isn’t often a flavorful roast, as lots of the nuances are killed if taken too far into the second crack.
- Attempting to stretch the primary crack and the second crack may end up in a sweeter roast, which can be supreme for espresso.
- Attempting a shorter/sooner roast will end in a brighter roast, which can be supreme for drip and even French Press (Press Pot).
- Each second and first crack may be exhausting to listen to with the “I-Roar”. You might must get shut and transfer your head as a way to hear the cracks.
- At all times use the identical quantity of inexperienced espresso (5.3 ounces or 150 grams is recommended). Get a digital scale if crucial.
- Stick to one inexperienced espresso varietal till you get it proper. Purchase 5 kilos or extra to make sure you don’t run out earlier than dialing in a given bean.
- Hold voltage monitored and in test, adjusting your roast profiles or utilizing a Variac to compensate.
Keep in mind to experiment, and preserve good notes on all elements of the method. And don’t overlook to have enjoyable!
Some Profiles To Get You Began
SAMPLE PROFILE 1A (For Low Voltage Days ~110 VAC)
Stage 1 380F 5 Minutes 15 min left
Stage 2 400F 4 Minutes 10 min left
Stage 3 420F 3 Minutes 6 min left
Stage 4 440F 2 Minutes 3 min left
Stage 5 460F 1 Minute 1 min left
COOLING NA 4 Minutes 0 min left
SAMPLE PROFILE 1B (For Common Voltage Days ~115 VAC)
Stage 1 370F 5 Minutes 15 min left
Stage 2 385F 4 Minutes 10 min left
Stage 3 400F 3 Minutes 6 min left
Stage 4 415F 2 Minutes 3 min left
Stage 5 430F 1 Minute 1 min left
COOLING NA 4 Minutes 0 min left
SAMPLE PROFILE 1C (For Excessive Voltage Days ~120 VAC)
Stage 1 360F 5 Minutes 15 min left
Stage 2 370F 4 Minutes 10 min left
Stage 3 380F 3 Minutes 6 min left
Stage 4 390F 2 Minutes 3 min left
Stage 5 400F 1 Minute 1 min left
COOLING NA 4 Minutes 0 min left
Sources
iRoast 2 (not out there)
Printed on