

 – Omnivore’s Cookbook")
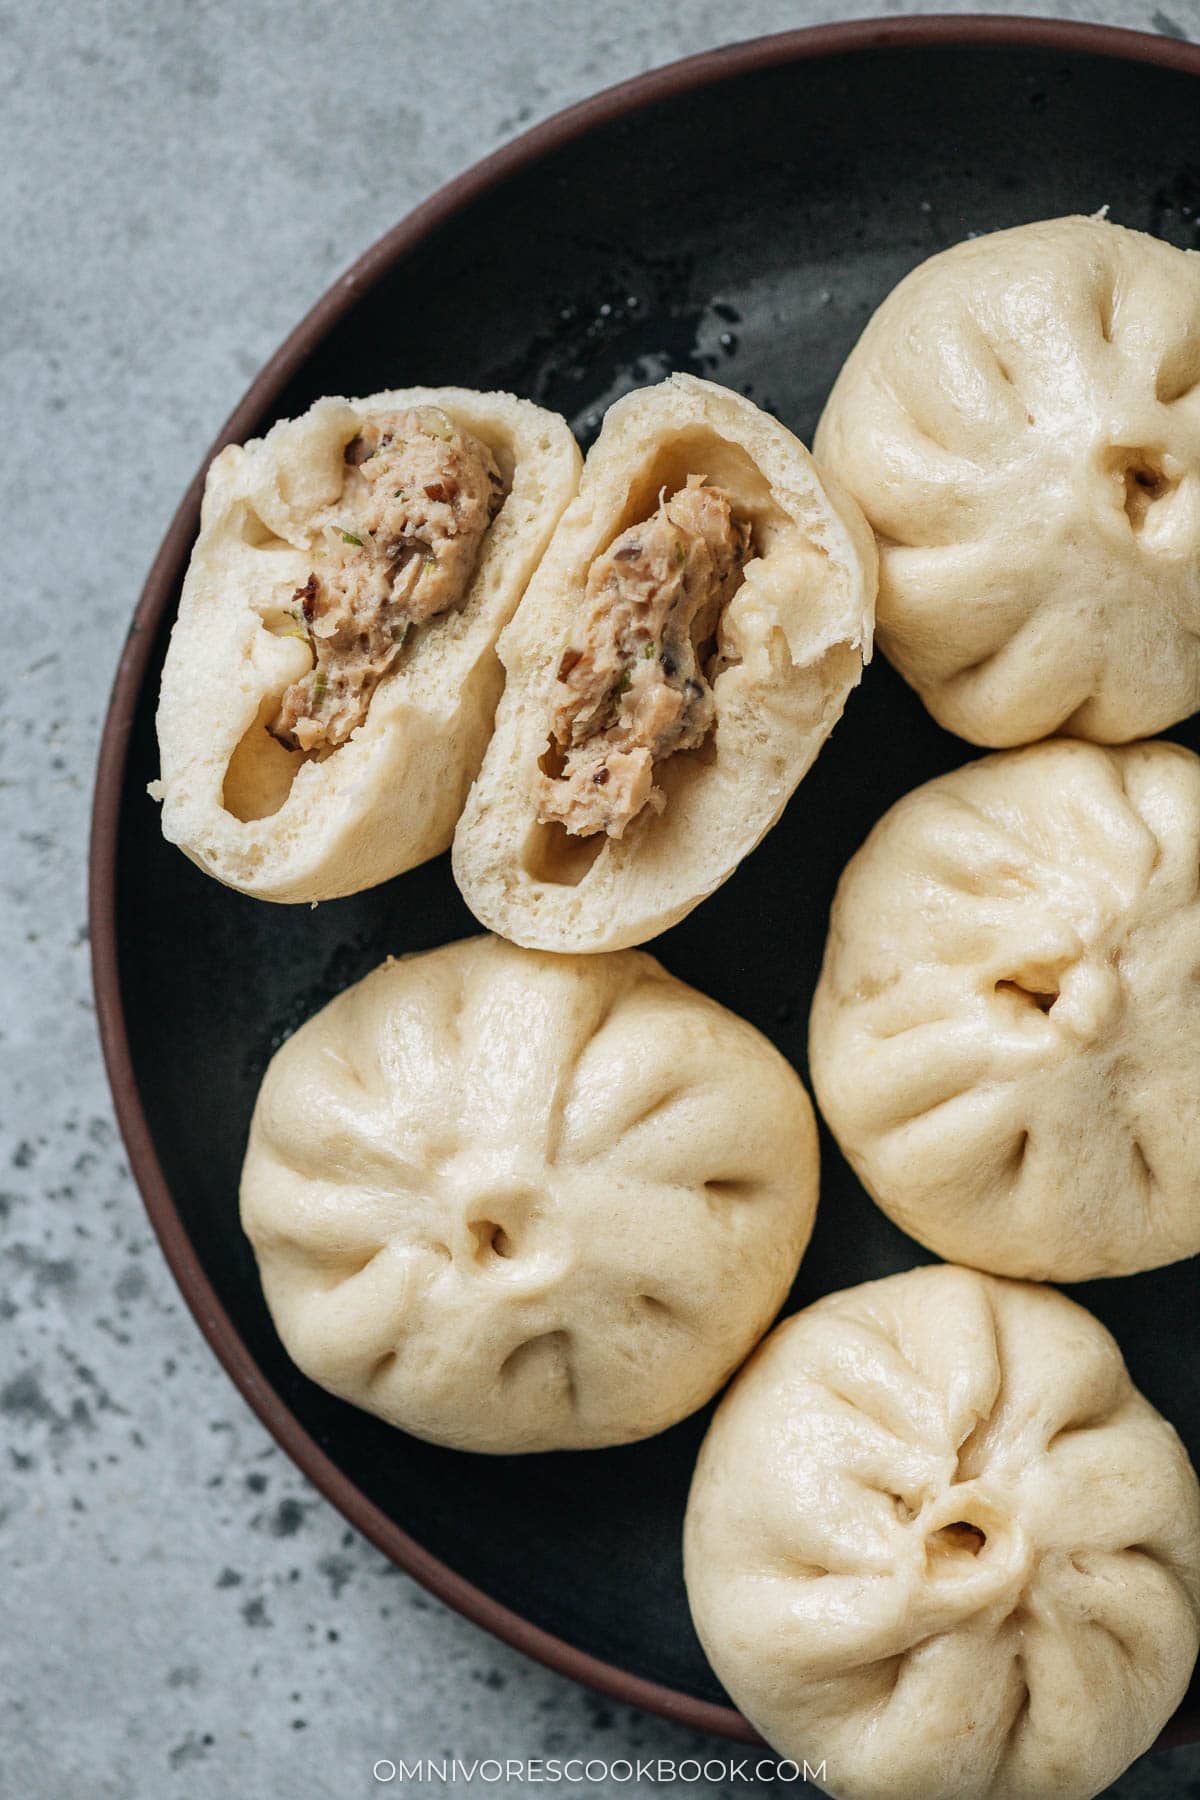
Hen buns look very completely different throughout the areas of China. In Cantonese cooking the time period often means steamed char siu buns made with chopped cooked hen and char siu sauce, or a hen and mushroom bun the place the diced hen is marinated and cooked first earlier than wrapping. The recipe I developed on this submit is the Northern model, an in depth cousin of my steamed pork buns with chive, the place the uncooked floor meat goes straight into the wrapper and cooks because the bun steams.
My grandma made these at residence on a regular basis once I was rising up in Beijing, and he or she served them with a bowl of plain congee or millet congee for breakfast, a facet of easy stir fried greens at lunch, or a cucumber salad at supper. Now dwelling within the US, I want to make an enormous batch and freeze them, so I can simply reheat and serve them. My son likes to snack on the buns after a fast reheat within the microwave. My husband and I are likely to eat them slower with a small bowl of vinegar on the facet, the best way my grandma did.
I deal with these as a weekend undertaking that splits throughout 3 brief phases, the dough that wants an hour of rise time, the filling that comes collectively in a single bowl, and the wrap-pleat-steam stretch that converts the dough into 12 buns. I like the Northern model as a result of the uncooked floor hen filling is quicker to combine than the Cantonese model, the meat holds collectively contained in the wrapper with out falling aside, and the consequence tastes so savory from the shiitake.
I like to recommend you to all the time double the recipe and freeze the extras, the recipe under holds up for a month so you may pull them out for a fast weekday breakfast. So good!
 – Omnivore’s Cookbook")
Elements
I work the components in two parallel tracks, the dough on the counter and the filling in a mixing bowl, so the meat is resting within the fridge by the point the dough is prepared for me to roll. Here’s what I exploit:
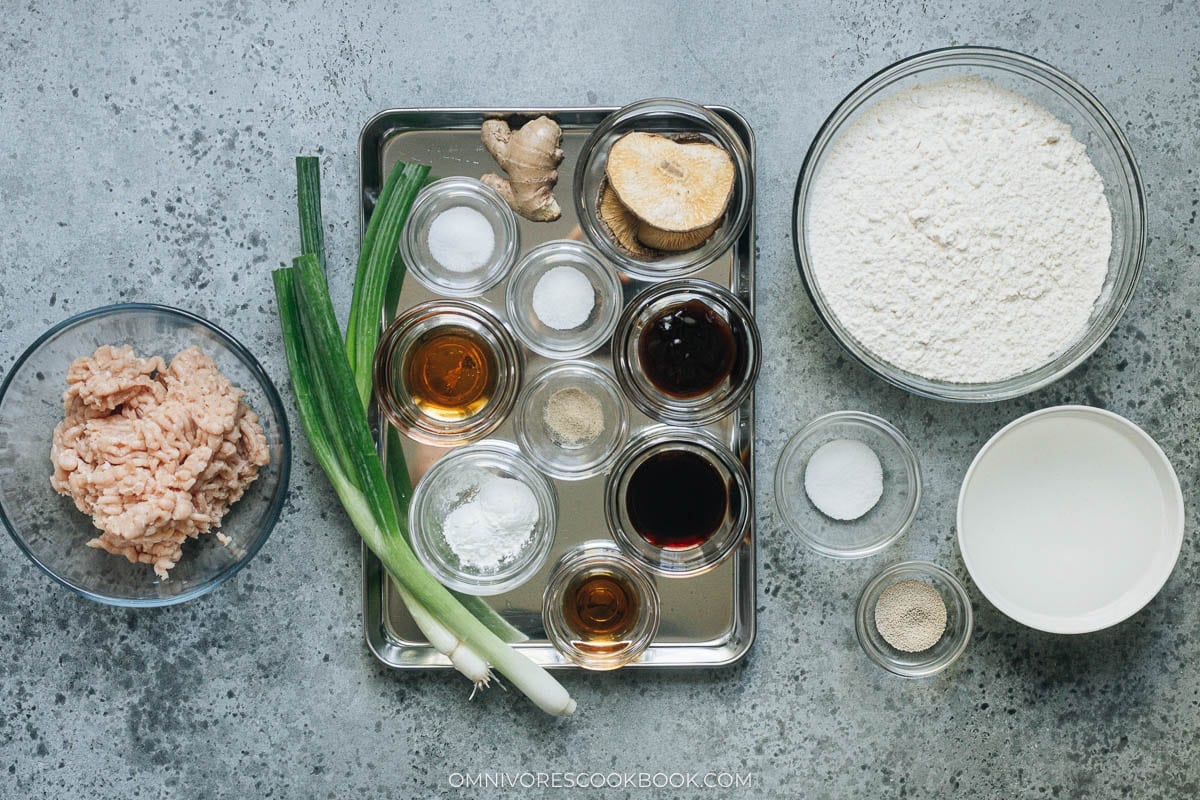
Dough: I exploit heat water, a small quantity of sugar to feed the yeast, energetic dry yeast, and all-purpose flour for the wrapper. My dough is barely agency to the contact when I’ve kneaded it proper, and it stretches right into a easy elastic ball beneath my palms.
Hen and aromatics: I combine floor hen with minced rehydrated dried shiitake mushrooms, grated ginger, and thinly sliced scallions. The dried shiitake does the identical job for me right here that it does in my Northern dumpling fillings, including a roasted forest taste that I can not get from contemporary mushrooms.
Filling sauces: I season the meat with oyster sauce, gentle soy sauce, and Shaoxing wine. I add cornstarch to tighten the filling so it holds collectively contained in the bun, and floor white pepper for a heat that doesn’t flip the filling spicy.
Filling finishers: I spherical out the seasoning with salt, sugar, and toasted sesame oil.
Dipping sauce: Chinkiang vinegar is the one factor I really want on the desk. I add a splash of soy sauce once I need the dip saltier, and a spoon of chili oil when my husband is on the desk and desires some warmth.
How To Make
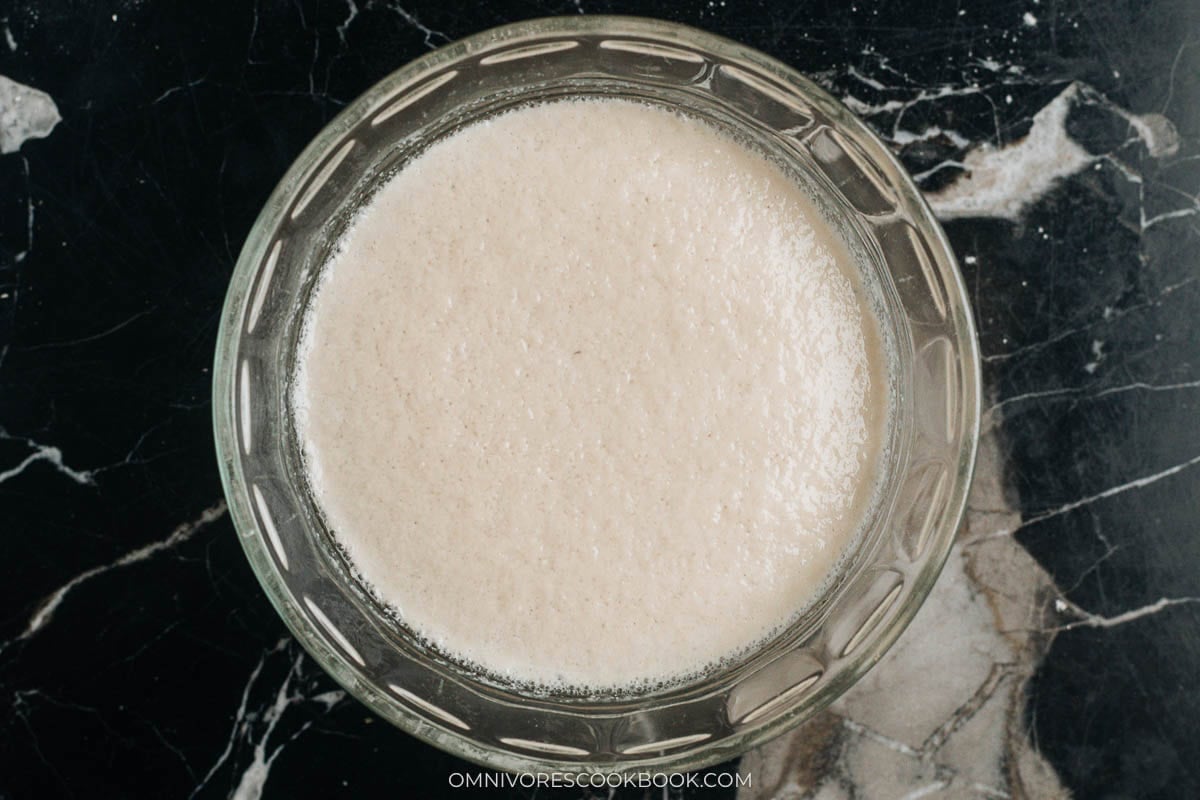
1. Activate the yeast: Warmth the water within the microwave or on the stovetop till heat to the contact, about 110°F. Stir in 1 teaspoon of sugar to dissolve, sprinkle within the yeast, and let sit for five minutes till the floor bubbles up.
2. Knead the dough with a stand mixer: Add the flour to the blending bowl, pour the yeast water into the middle, and blend on low with the dough hook till a shaggy dough types. Add 1 teaspoon of water at a time if any dry flour stays on the backside, then flip the velocity to medium-high and knead for quarter-hour till the dough is easy and elastic. The dough needs to be barely agency to the contact and form right into a spherical ball with out sticking to your palms.
3. Or knead by hand: Pour the yeast water into a big mixing bowl with the flour, drizzling slowly whereas stirring with chopsticks in a round movement. As soon as a shaggy dough types with no dry flour left, switch the whole lot to a clear working floor and knead for 15 to 18 minutes till easy and elastic, including 1 teaspoon of water at a time if the dough stays too dry.
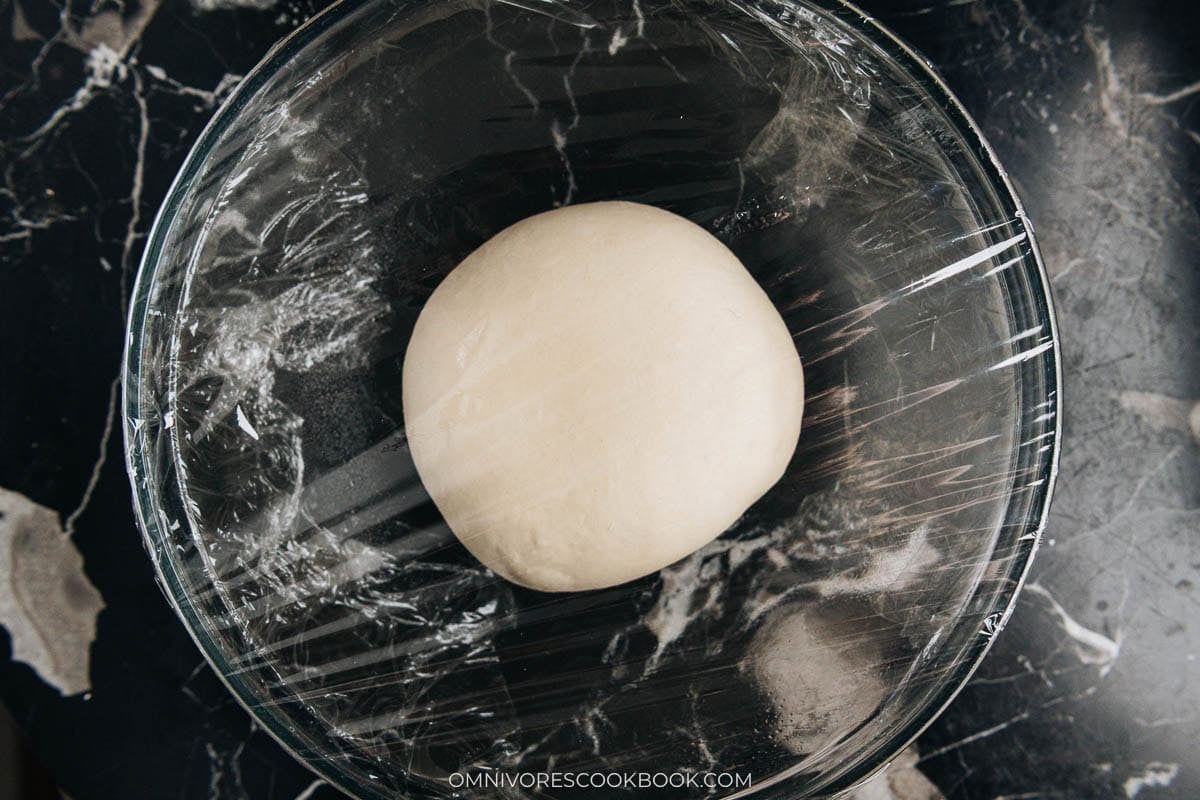
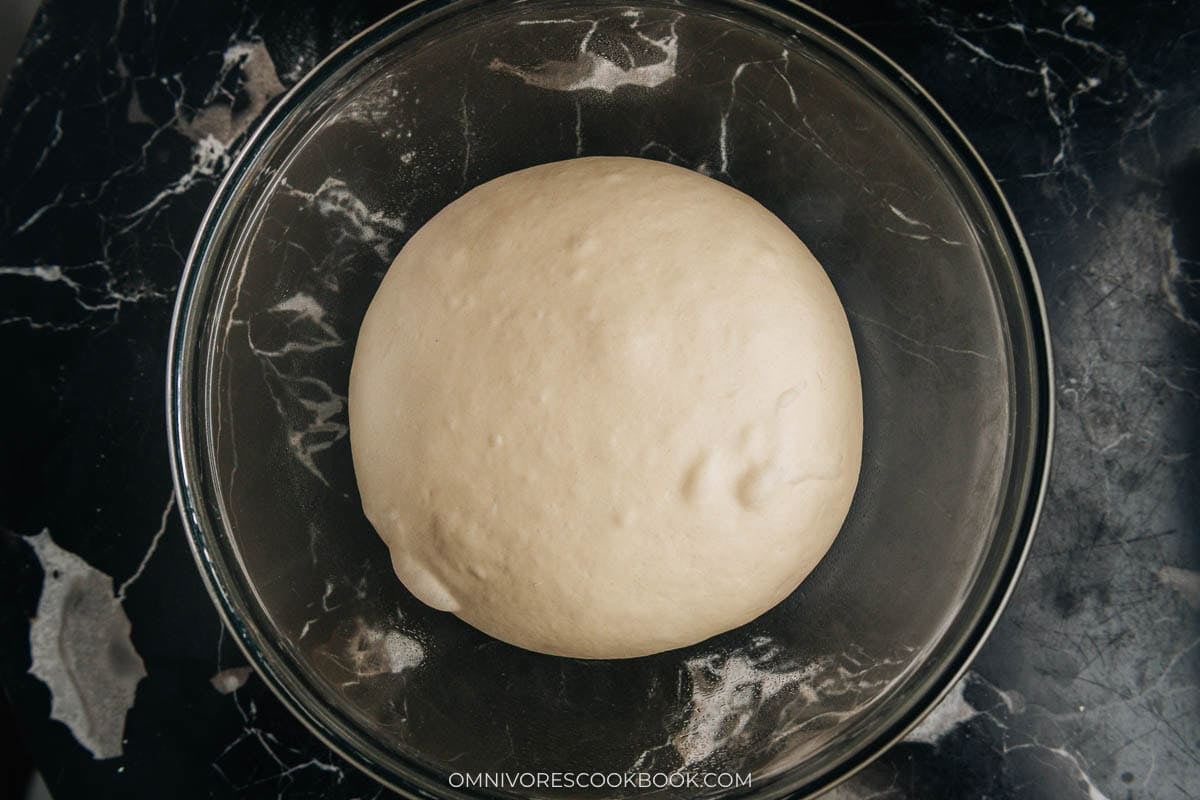
4. First rise: Cowl the bowl with plastic wrap and relaxation the dough till it doubles in measurement, about 1 hour, or 45 to 90 minutes relying on warmth and humidity.
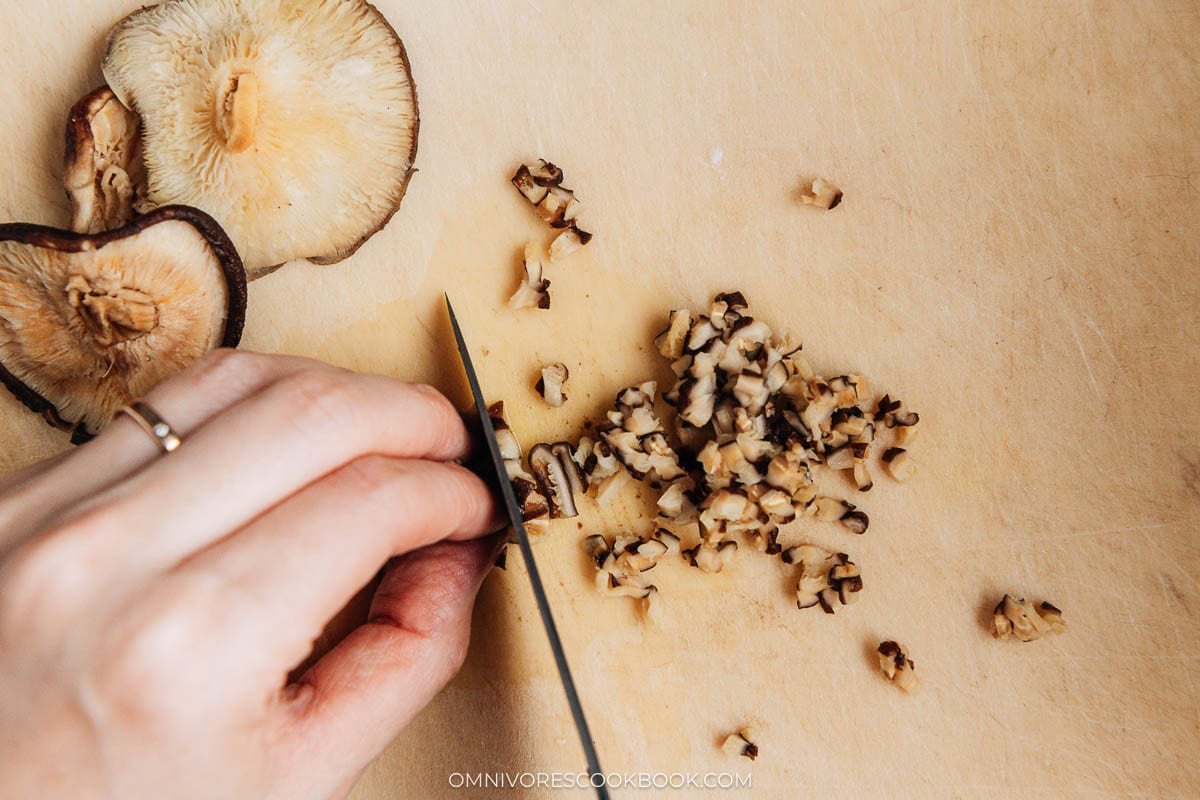
5. Rehydrate the shiitake: Soak the dried shiitake mushrooms in heat water for 15 to twenty minutes till delicate. Squeeze out the water, trim and discard the powerful stems, and mince the caps finely.
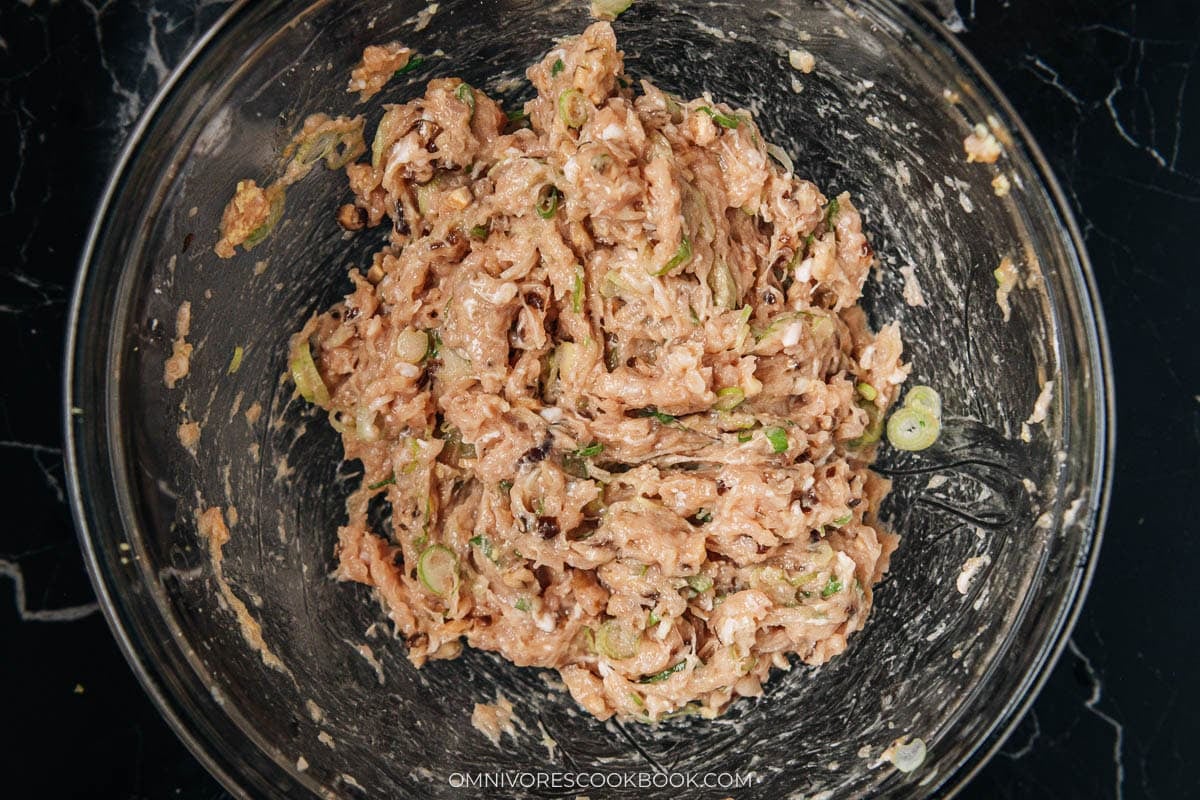
6. Combine the filling: Mix the bottom hen, minced shiitake, oyster sauce, gentle soy sauce, Shaoxing wine, cornstarch, grated ginger, sliced scallions, salt, sugar, and white pepper in a big bowl. Stir in a single round route by hand or with a picket spatula till all of the liquid is absorbed and the hen turns streaky. Drizzle within the toasted sesame oil and stir to mix. Cowl the bowl with plastic wrap and refrigerate till the dough is prepared.
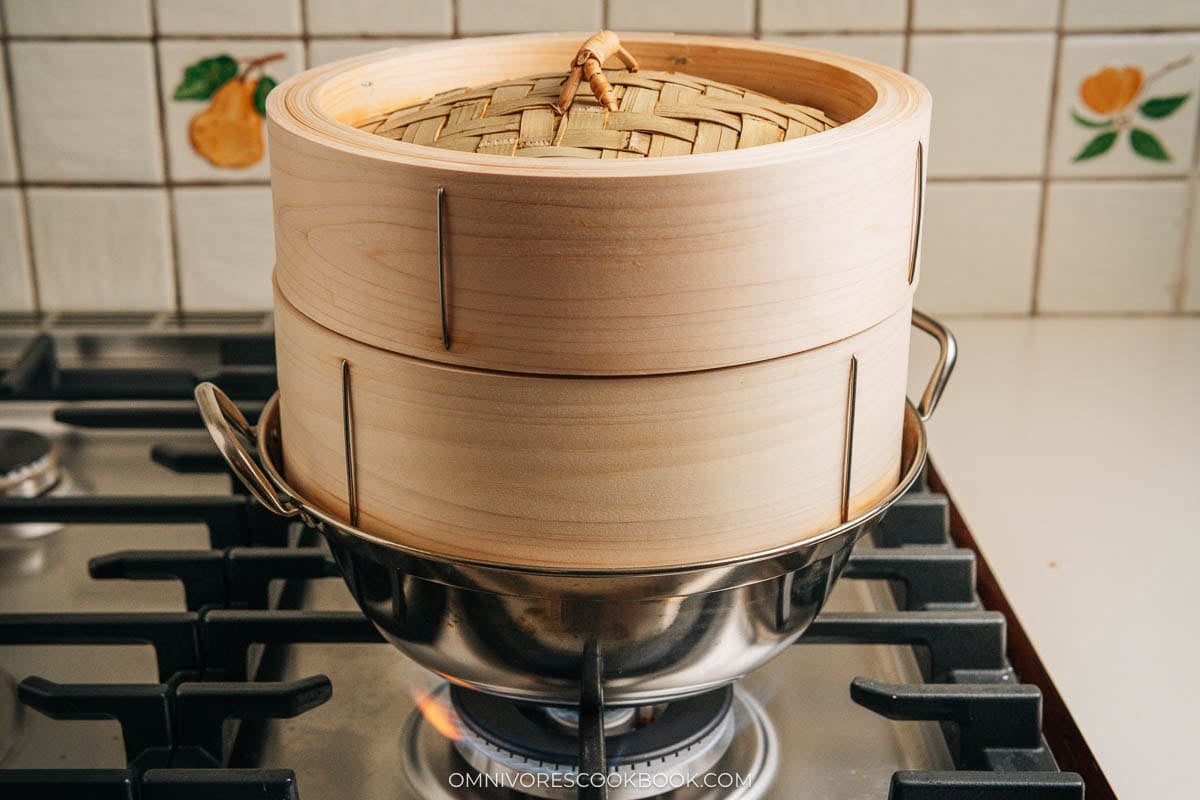
7. Prep the steamer: Line the steamer with steamer paper, or with parchment paper lower right into a circle with a couple of holes poked in it. Rinse a bamboo steamer with chilly water earlier than utilizing to forestall scorching, or wrap the lid of a chrome steel steamer with a clear kitchen towel so condensation doesn’t drip onto the buns.
8. Punch and divide: As soon as the dough has doubled, punch it down along with your fist and knead for five minutes till it returns to its unique measurement. Divide the dough into 2 even items and hold one coated within the bowl with plastic wrap so it doesn’t dry out.
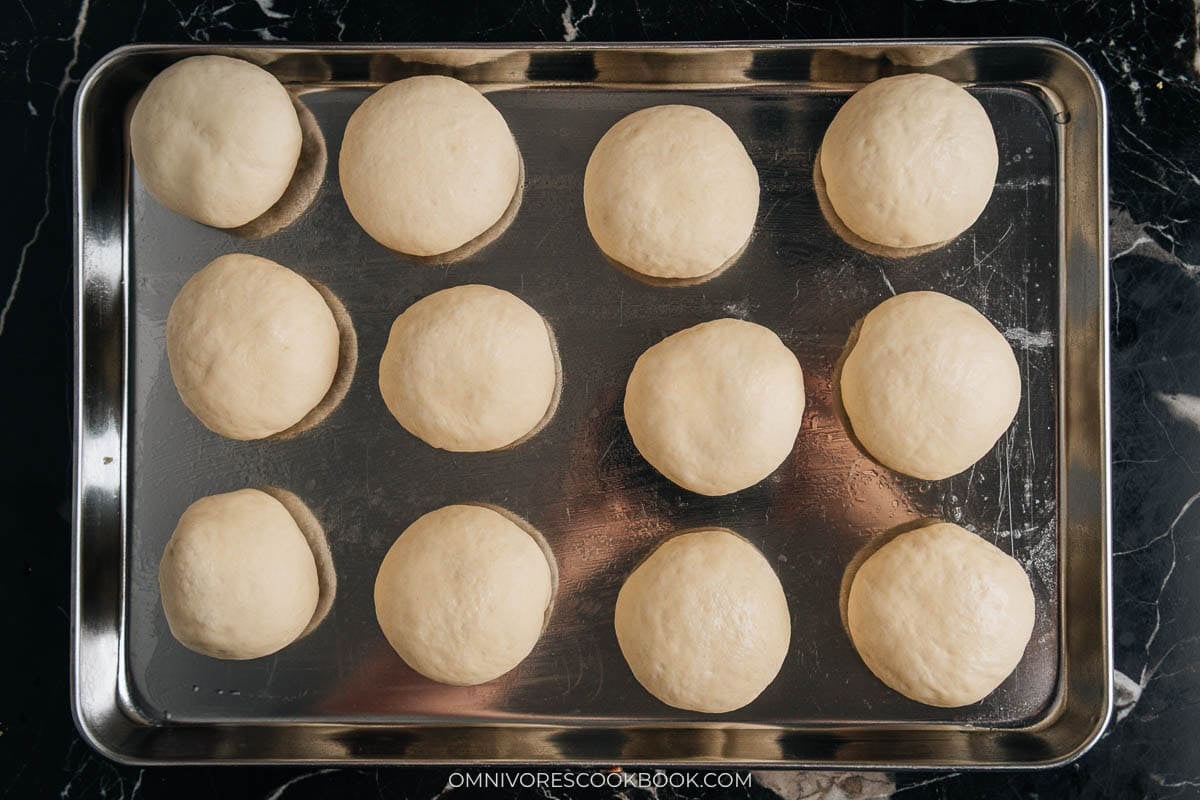
9. Reduce the dough: Roll the working piece into a protracted log and lower into 6 even items, about 38 grams every on a scale. Tuck each bit along with your hand, knead a couple of extra occasions to easy out air bubbles, form right into a ball, and canopy. Let the balls relaxation for 10 to fifteen minutes so the dough relaxes earlier than rolling.
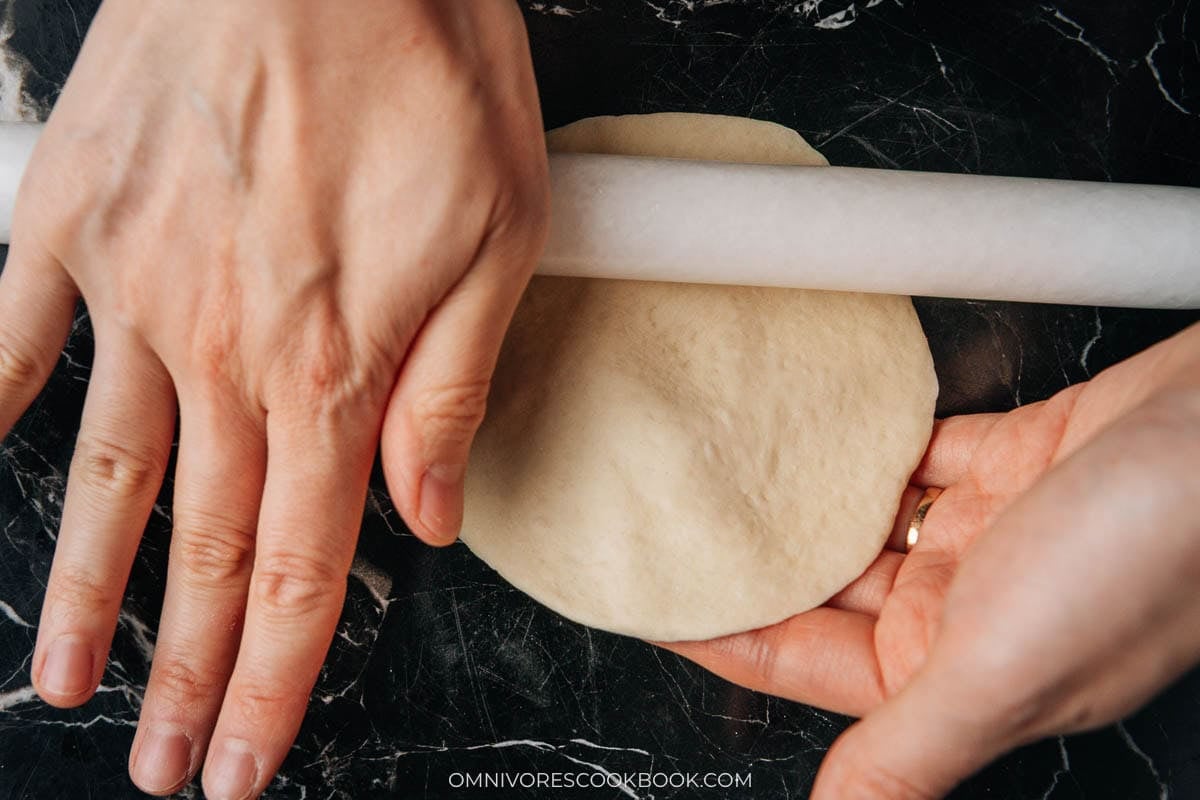
10. Roll the wrappers: Press a dough ball right into a spherical disk along with your palm and roll it out with a rolling pin, rotating as you go to maintain the form even. Focus the rolling on the perimeters so the middle stays barely thicker than the rim, and the completed wrapper needs to be about 4.5 inches throughout.
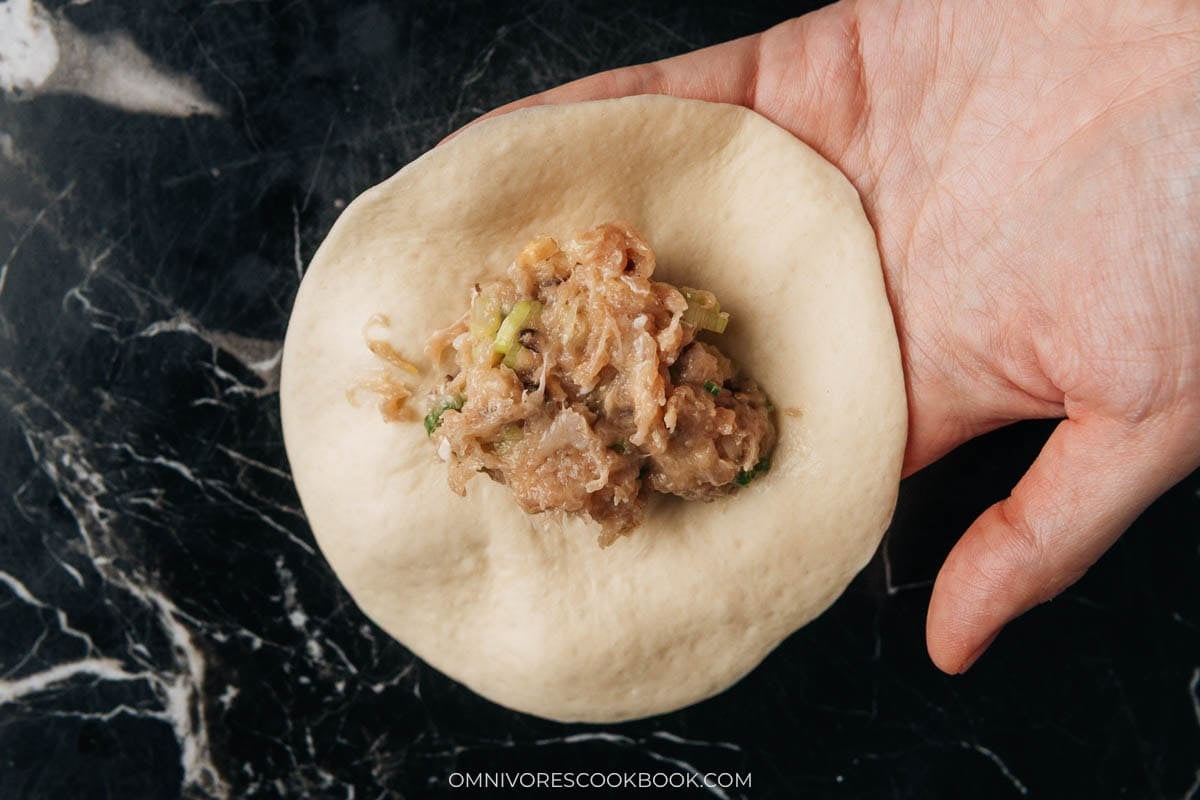
11. Wrap the buns: Place about 2 tablespoons of filling within the heart of the wrapper, or as a lot as you may pleat.
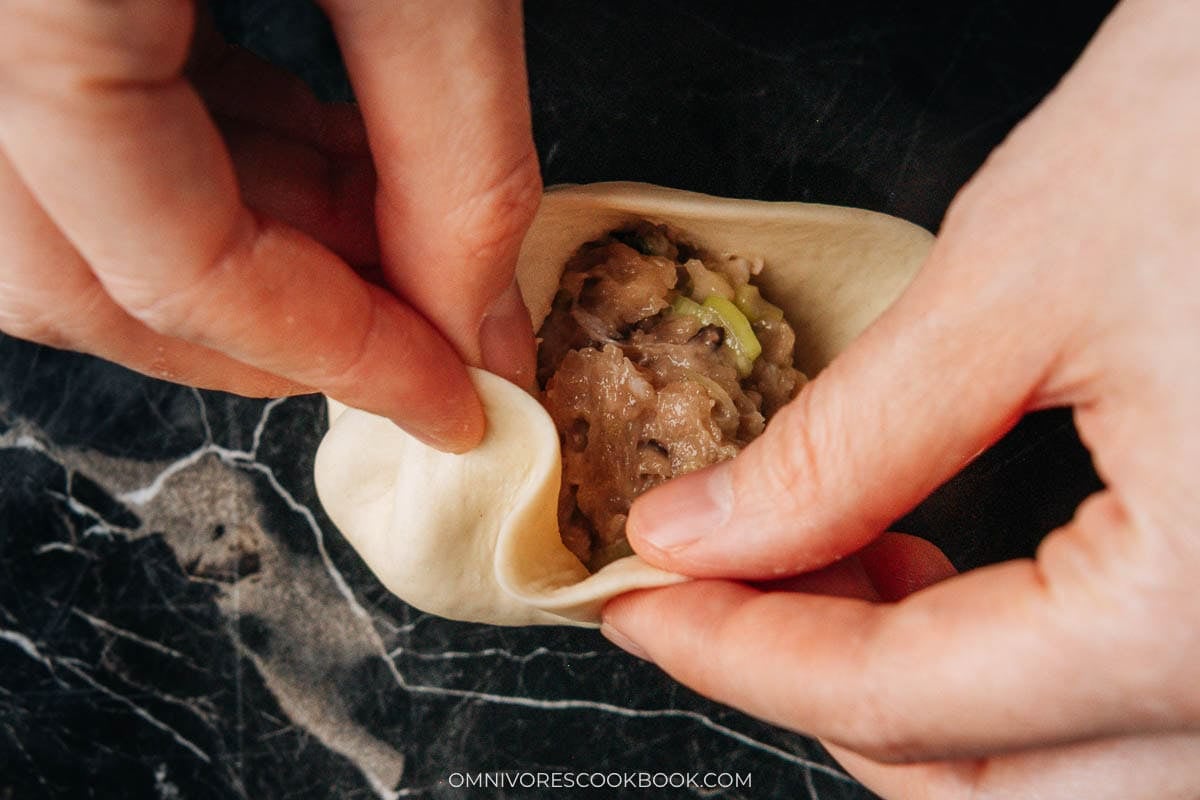
Pinch a bit of the sting to itself, fold the adjoining edge over your finger holding the pinch, and press the folded edges collectively.
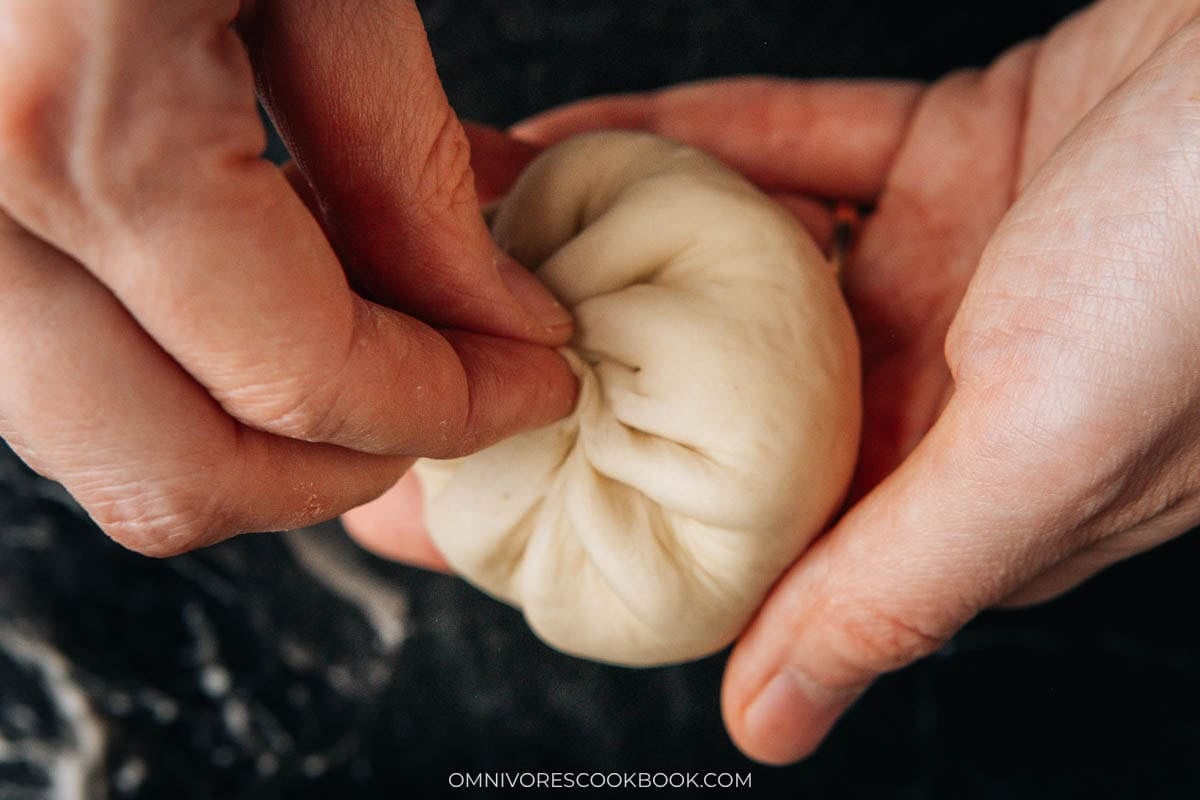
Rotate and repeat across the wrapper till all the perimeters are pleated, then spin and pinch the middle to seal the highest.
Discover it tough to form the buns?
Shaping steamed buns positively requires some follow to good. For me, I all the time assume it’s tougher than wrapping dumplings. That’s why I create a YouTube video, so you may see the method. One small tip – it’s simpler to position the bun on the working floor whereas pleating, as a substitute of holding the bun with one hand.
Scroll down and you will notice my video under.
12. Second rise: Place the wrapped buns into the lined steamer, leaving at the very least 1 inch between them. Cowl with plastic wrap or a moist towel and let rise for quarter-hour till barely bigger.

13. Steam the buns: Deliver the water within the steamer pot to a boil over medium-high warmth and steam the buns for quarter-hour.
14. Relaxation earlier than lifting the lid: Flip off the warmth and let the buns sit coated for two minutes earlier than eradicating the lid. This step lets the steamer scale back strain regularly so the buns don’t collapse.

15. Serve: Plate the buns sizzling with a small bowl of Chinkiang vinegar for dipping. Add a splash of soy sauce for extra saltiness or a spoon of chili oil for warmth.
Cooking Notes
Weigh the dough items: In the event you want superbly trying buns which are even in measurement, I extremely advocate weighing the dough items as a substitute of eye-balling them. I weigh each bit to about 38 grams on a scale so all 12 buns end on the identical time and the identical texture.
Use white pepper, not black pepper, within the filling: Black pepper has a sharper edge that pokes by means of the delicate steamed dough and tastes extra European than Northern Chinese language.
Check the primary rise with the finger poke: Doubling in measurement is the straightforward visible cue, however the surer check is to press a finger about half an inch into the dough and watch what occurs. If the indent springs again slowly and leaves a delicate dimple, the dough is able to punch down, and if it springs again quick and disappears, I give it one other 10 to fifteen minutes.
All the time hold the unused dough items coated: The dough dry out quick and can grow to be powerful and onerous to work with, for those who expose it to the air for too lengthy. I all the time cowl up the dough items with plastic wrap. If the dough begins to really feel dry, I cowl them with damp paper towels to retain the feel.
Serving Solutions
Sizzling out of the steamer is when these buns are at their greatest, with the wrapper pillowy and the filling juicy beneath the wheat. I plate 3 or 4 buns per particular person with a small dish of Chinkiang vinegar on the facet and a few chilly Northern breakfast staples on the desk, often a couple of Chinese language soy sauce eggs lower in halves and a small dish of pickled daikon with carrot to chop the savory filling.
When I’m constructing a bigger weekend meal across the buns, I deal with them because the carb facet of a multi-dish desk and pull collectively a bowl of Chinese language fish congee as a lightweight protein soup, plus a plate of child bok choy stir fry for the inexperienced.
Regularly Ask Questions
Why did my buns prove dense and gummy as a substitute of pillowy?
The most certainly trigger is the primary rise stopping brief, the second rise getting skipped, or the steamer strain dropping too quick on the finish. I verify that the dough has doubled in quantity earlier than I punch it down, give the formed buns the total 15 minute second rise in order that they puff barely earlier than steaming, and depart the lid on for two minutes after the warmth is off so the buns don’t collapse.
What’s the easiest way to pleat a bun if I’ve by no means accomplished it earlier than?
I all the time inform rookies to give attention to utilizing a smaller quantity of filling and transferring their palms slowly earlier than worrying about what number of pleats they’ll make. A bun with eight uneven pleats and a safe seal tastes simply nearly as good as one with eighteen completely shaped pleats. To start with, sealing the bun correctly is much extra vital than presentation.
The hot button is to verify the filling is absolutely enclosed and that the wrapper is distributed as evenly as potential, so that you don’t find yourself with thick, doughy spots. If pleating feels intimidating, don’t fear about it. You’ll be able to merely collect the wrapper across the filling and pinch the highest closed to type a easy, spherical bun. Actually, some Cantonese buns, similar to hen buns, are historically formed this fashion and don’t have any pleats in any respect.
With somewhat follow, your pleats will naturally grow to be neater over time, however a well-sealed bun will all the time matter greater than good seems to be.
How lengthy do leftover buns hold within the fridge and freezer?
Cooked buns hold in an hermetic container within the fridge for 3 days and within the freezer for 1 month. I reheat the refrigerated ones within the microwave coated with damp towels to maintain the buns from drying out, or reheat within the steamer till heated by means of. For frozen buns, you may both thaw them in a single day within the fridge then reheat, or reheat the frozen buns within the steamer till heated by means of.
Wish to Save This Recipe?
Enter your e mail under & we’ll ship it to your inbox. Plus get nice new recipes from us each week!
These steamed hen buns are a Northern Chinese language baozi I grew up consuming in Beijing, with a delicate pillowy wheat dough wrapped round a juicy filling of floor hen, dried shiitake mushrooms, ginger, and scallions. I serve them sizzling from the steamer with a small bowl of Chinkiang vinegar on the facet for breakfast, lunch, or supper.
Forestall your display screen from going darkish
Combine the dough & 1st rise
-
Warmth the water within the microwave or over the stovetop till heat to the contact, about 110°F (43°C). Add the 1 teaspoon sugar to the water and stir to dissolve. Add the yeast. Let sit for five minutes or till the yeast is effervescent up.
-
Possibility 1 – use a stand mixer: Add the flour into the blending bowl and pour the water into the middle. Combine on low with the dough hook till a shaggy dough types. If there’s dry flour within the bowl after kneading for some time, add 1 teaspoon of water at a time, till there’s no dry flour left. Flip the velocity to 4 and hold kneading, till the dough is easy and elastic, quarter-hour or so. After 8 minutes, if the dough doesn’t come collectively, use your palms to assist collect the flour on the underside. The dough needs to be barely powerful to the contact and shouldn’t follow your palms. Form the dough a couple of extra occasions along with your palms so it types a spherical ball.
-
Possibility 2 – knead by hand: Add the water into an enormous mixing bowl. Slowly drizzle the water with yeast into the flour whereas stirring with chopsticks in a round movement. After all of the water is added, combine till a shaggy dough types. The dough flakes needs to be a bit agency to the contact and there needs to be no dry flour within the bowl. If there’s nonetheless dry flour, add 1 teaspoon of water at a time and hold mixing. Press the dough collectively utilizing your palms, then switch the dough and any flour left onto a clear working floor. Knead till a easy and elastic ball is shaped, about 15 to 18 minutes. The dough needs to be barely powerful to the contact and shouldn’t follow your palms.
-
Cowl the blending bowl with plastic wrap. Relaxation till the dimensions doubles, about 1 hour (45 to 90 minutes relying on warmth and humidity).
Put together the filling
-
Soak the dried shiitake mushrooms in heat water till turning delicate, 15 to twenty minutes. Gently squeeze out the water, take away and discard the powerful stems, and mince the caps.
-
In an enormous bowl, add the hen, minced shiitake mushrooms and the remainder of the filling components apart from the sesame oil.
-
Combine the whole lot collectively in a single round route by hand or with a picket spatula, till all of the liquid is absorbed and the hen is streaky.
-
Add the sesame oil and blend nicely. Cowl with plastic wrap and switch into the fridge till the dough is prepared.
Put together the steamer
-
Use a bit of steamer paper to line the steamer. In the event you don’t have steamer paper, you may lower a bit of parchment paper right into a circle, then lower a couple of holes in it.
-
In the event you plan to make use of a bamboo steamer, rinse it completely with chilly water earlier than utilizing to forestall scorching.
-
In case you are utilizing a chrome steel steamer, put together a clear kitchen towel and use it between the lid and the steamer. This may stop the condensation from dripping onto the buns and affecting their rise.
-
Type the buns & 2nd rise
-
As soon as the dough has doubled in measurement, punch it down along with your fist. Knead along with your palms till it returns to its unique measurement, about 5 minutes.
-
Divide the dough into 2 even items. Switch one piece again to the bowl and canopy it with plastic wrap to forestall it from drying out.
-
Work on the opposite piece by rolling the dough into a protracted log. Reduce the log into 6 even items, or 38 g per piece utilizing a scale.
-
All the time cowl the dough items with plastic wrap once you’re not engaged on them. For every dough piece, tuck it along with your hand, knead a couple of extra occasions to easy out any air bubbles, then form it right into a ball. Place the ball on a tray and canopy. Repeat with all of the dough items. As soon as accomplished, let the dough relaxation for 10 to fifteen minutes to loosen up, so will probably be simpler to roll out.
-
Press the dough right into a spherical disk utilizing your palm. Begin to roll it out with a rolling pin. In the event you’re not aware of the method, roll the dough a couple of occasions, rotate it and roll the brief ends once more. After a couple of occasions, begin to give attention to rolling out the perimeters so the middle is thicker and the perimeters are skinny. In the event you’re skillful, use one hand to rotate the dough with the opposite hand rolling out one finish till forming a spherical wrapper. As soon as accomplished, the wrapper needs to be about 4.5” (11 cm) in diameter, with a barely thick heart and skinny edges.
-
Place about 1.5 yo 2 tablespoons of filling (or as a lot you may wrap) within the heart of the wrapper. Make pleats by pinching a bit of the sting to itself, then folding the adjoining edge over your finger holding the pinch, then press the folded edges collectively. Rotate and repeat the method till all the perimeters are pleated. Then spin and pinch the middle collectively to seal the bun.
-
As soon as accomplished, place the buns into the lined steamer, then cowl them with plastic wrap or a moist towel.
-
Repeat the method till you fill the steamer, ensuring you allow at the very least 1” (2.5 cm) between the buns. Let rise for quarter-hour, or till the dimensions turns into a bit bigger. (*Footnote 1)
Cook dinner the buns
-
Deliver the water to a boil and steam the buns over medium-high warmth for quarter-hour.
-
As soon as accomplished, flip off the warmth and let sit for two minutes earlier than eradicating the lid. (*Footnote 2)
Serve
-
Serve sizzling with vinegar as a dipping sauce. If you wish to make the dipping sauce saltier, you may add a splash of soy sauce. It’s also possible to add some chili oil to the dipping sauce if you would like some spice.
-
Retailer the leftover buns in an hermetic container within the fridge for 3 days or within the freezer for 1 month.
-
You’ll be able to reheat the refrigerated buns within the microwave. For greatest outcomes with frozen buns, warmth them up within the steamer till warmed all through.
Ingredient Substitution Information
- If utilizing a daily steamer, you’ll most likely must cook dinner in 2 batches as a result of it gained’t match all of the buns. It is best to cook dinner the primary batch instantly after resting, when you work on the second batch.
- Let the buns sit, let the steamer scale back strain regularly, so the buns gained’t collapse once you open the lid. This step is extra vital for stainless-steel steamers, because the lid is tighter than with a bamboo steamer.
Serving: 1serving, Energy: 123kcal, Carbohydrates: 18g, Protein: 7g, Fats: 2g, Saturated Fats: 1g, Polyunsaturated Fats: 0.5g, Monounsaturated Fats: 1g, Trans Fats: 0.02g, Ldl cholesterol: 22mg, Sodium: 340mg, Potassium: 178mg, Fiber: 1g, Sugar: 1g, Vitamin A: 20IU, Vitamin C: 0.4mg, Calcium: 7mg, Iron: 1mg

Did you make this recipe?
I’d love to listen to the way it turned out for you! Please take a second to depart a 5-star ranking ⭐️ and share your ideas within the feedback additional down the web page. It actually helps others uncover the recipe too.